Our Wise Agent Lead Forms Through WordPress Include:
Capture Form Integration: Add capture forms to any page and effortlessly direct leads to your Wise Agent account.
Lead Funneling: Funnel leads into your Wise Agent account, ensuring centralized lead management.
Lead Rule Automation: Automate lead management by setting up rules within Wise Agent to trigger personalized marketing content to new leads instantly, based on predefined criteria.
Elementor Integration: Seamlessly integrate Wise Agent with Elementor to add capture forms to your Elementor pages.
Installing The Plugin
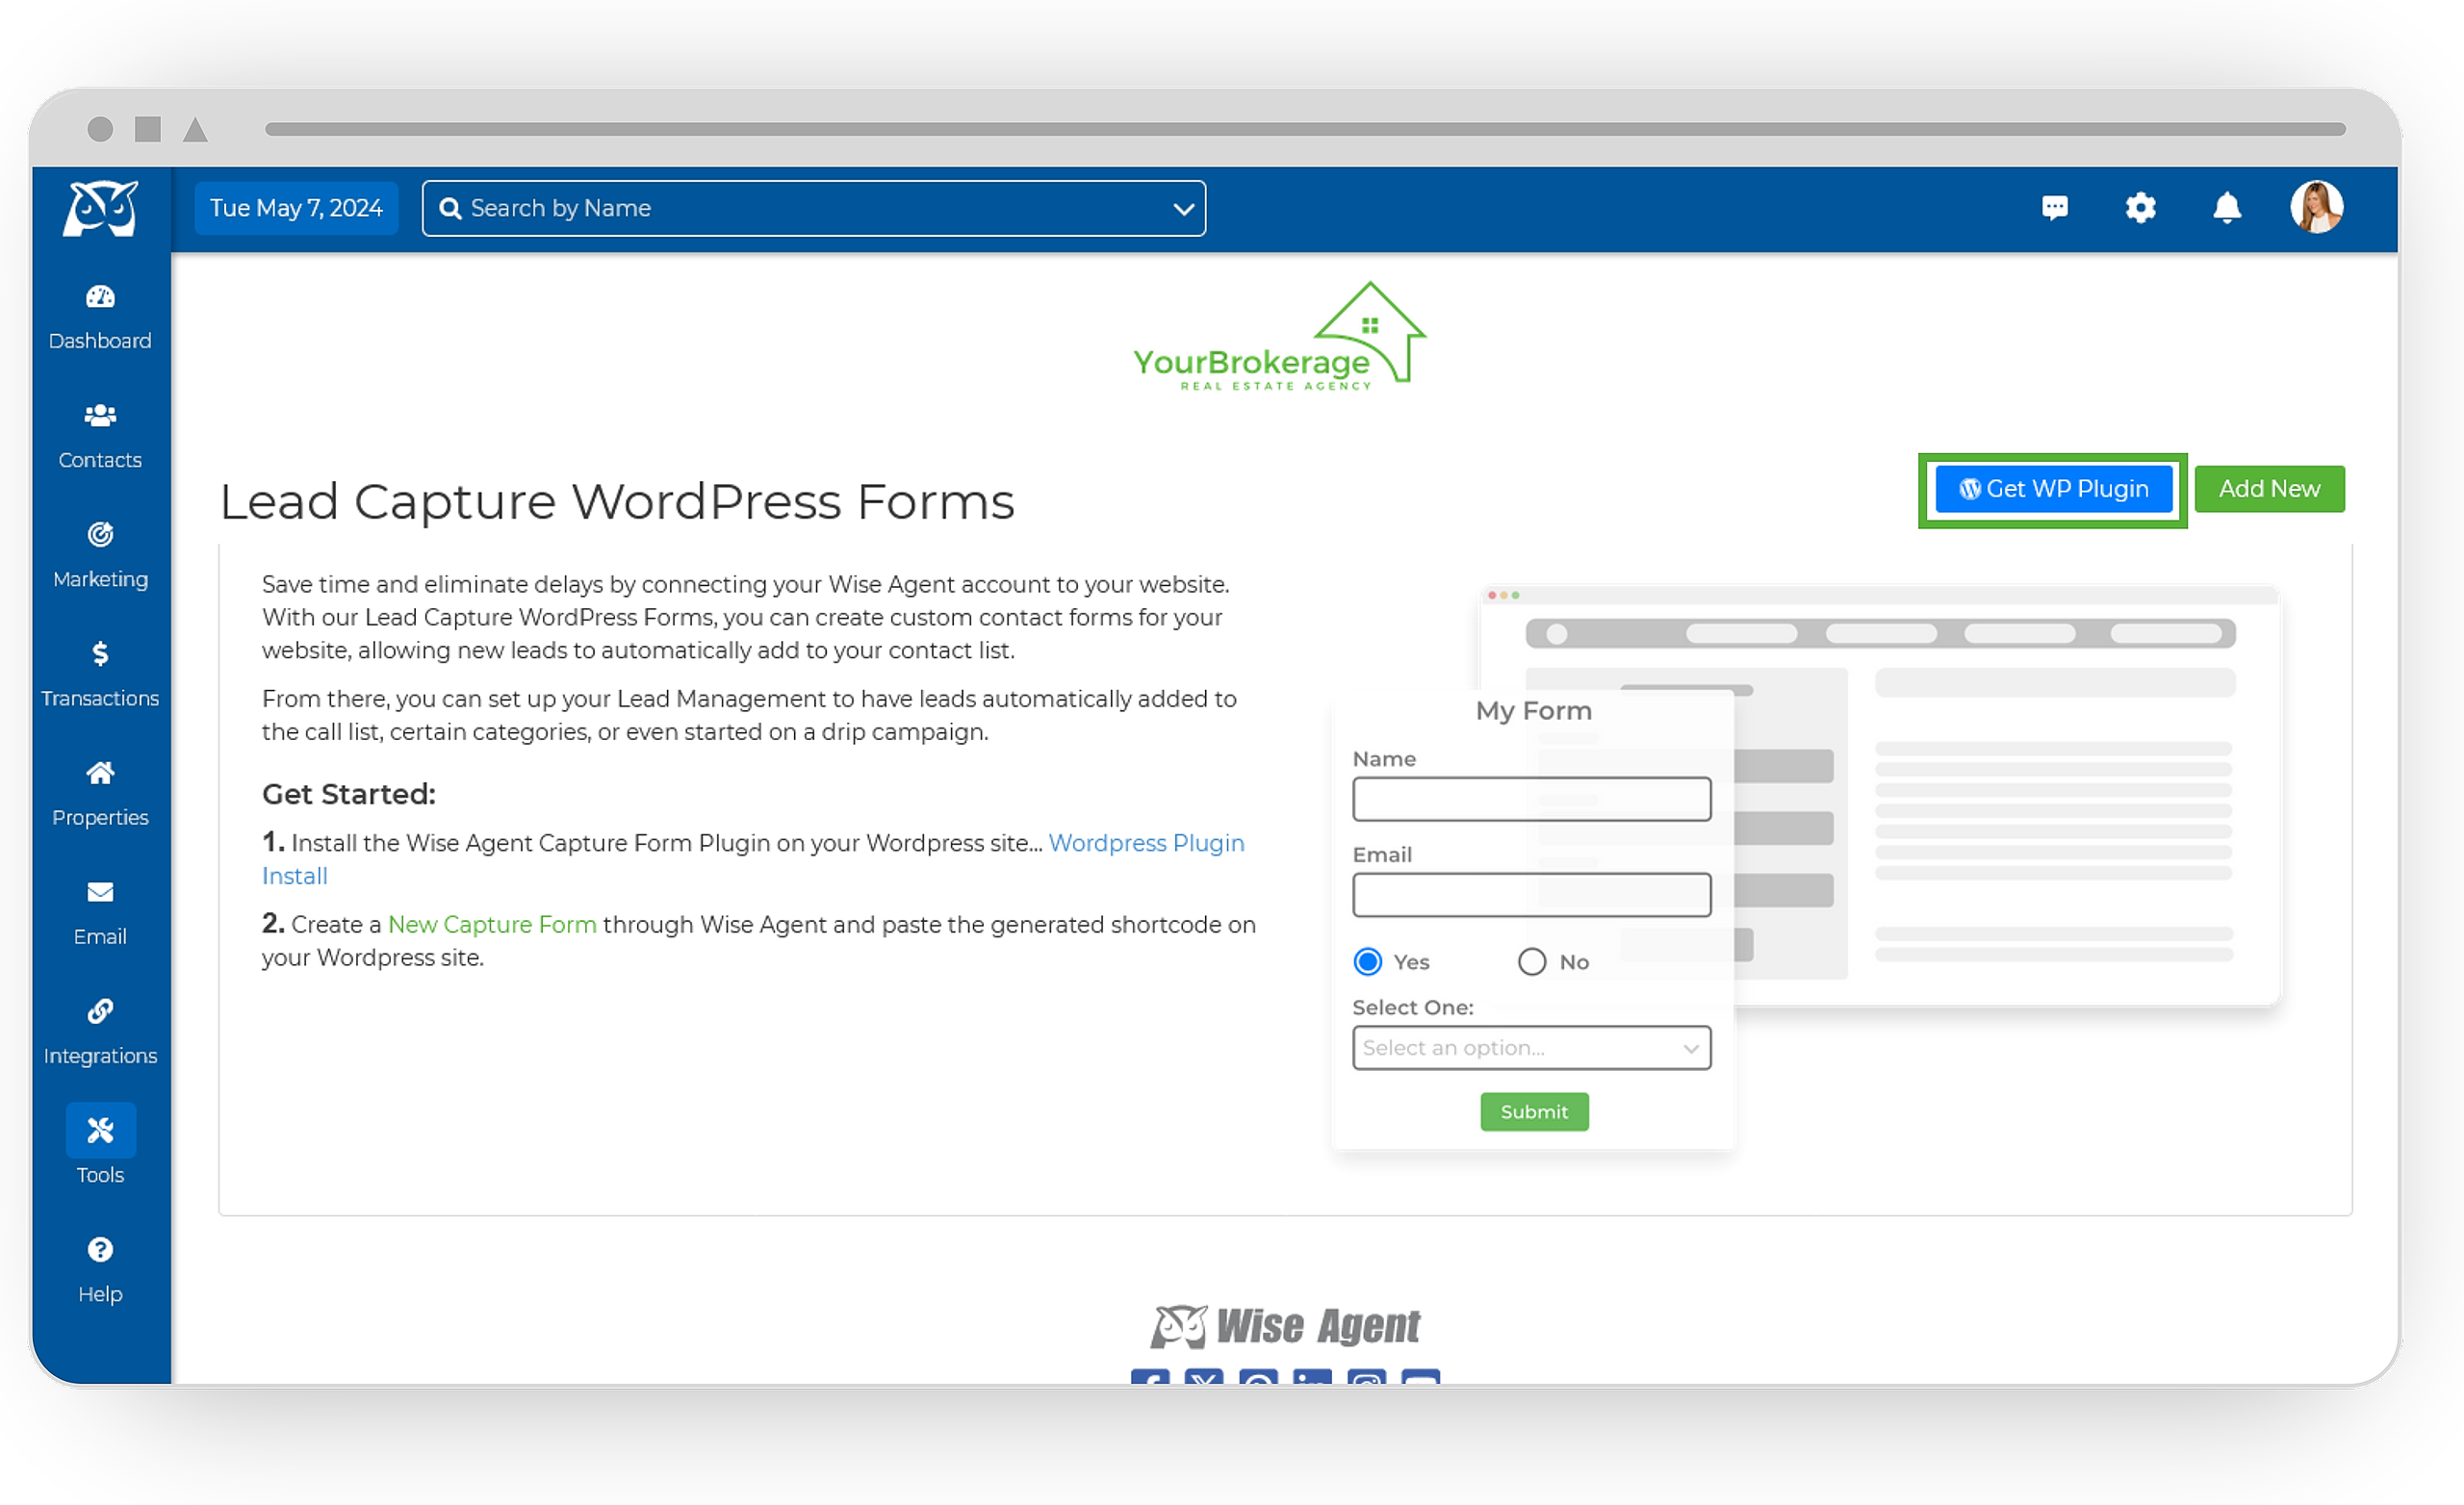
Login to your Wise Agent account.
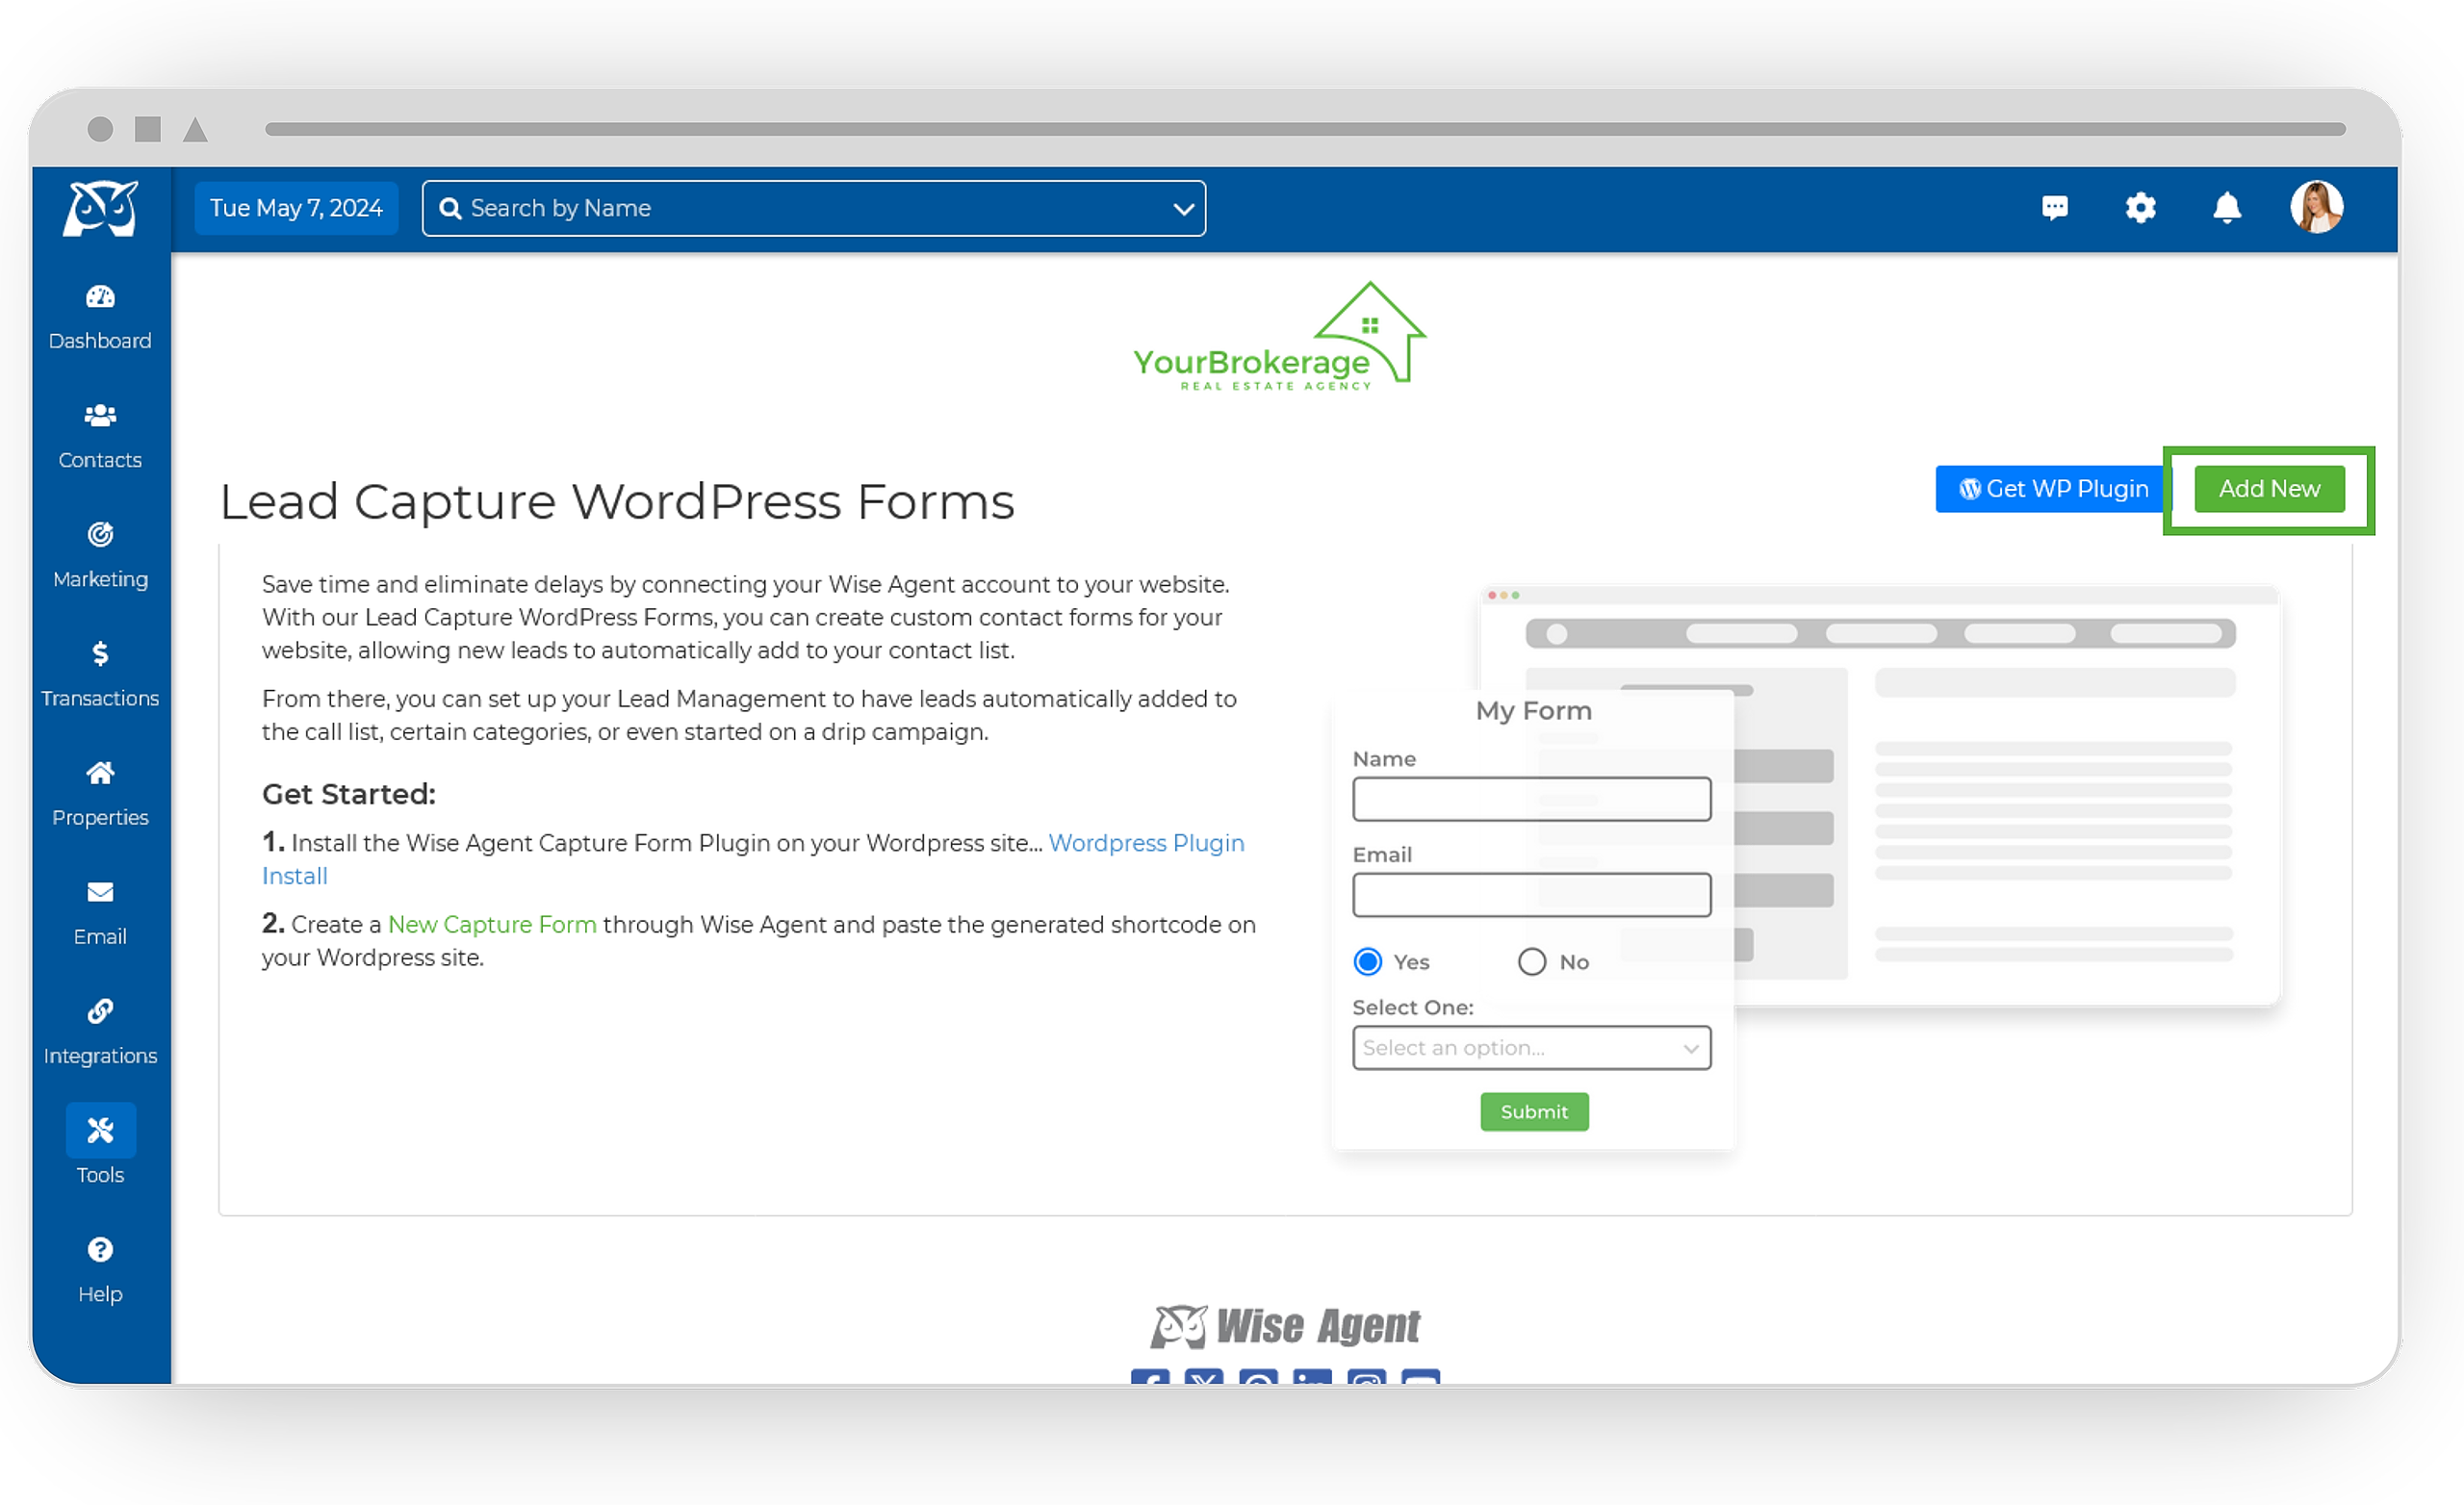
From the sidebar, select Tools, then Capture Forms.
On the Capture Forms page, locate the Get WP Plugin button on the right side and click it to be redirected to the download page.
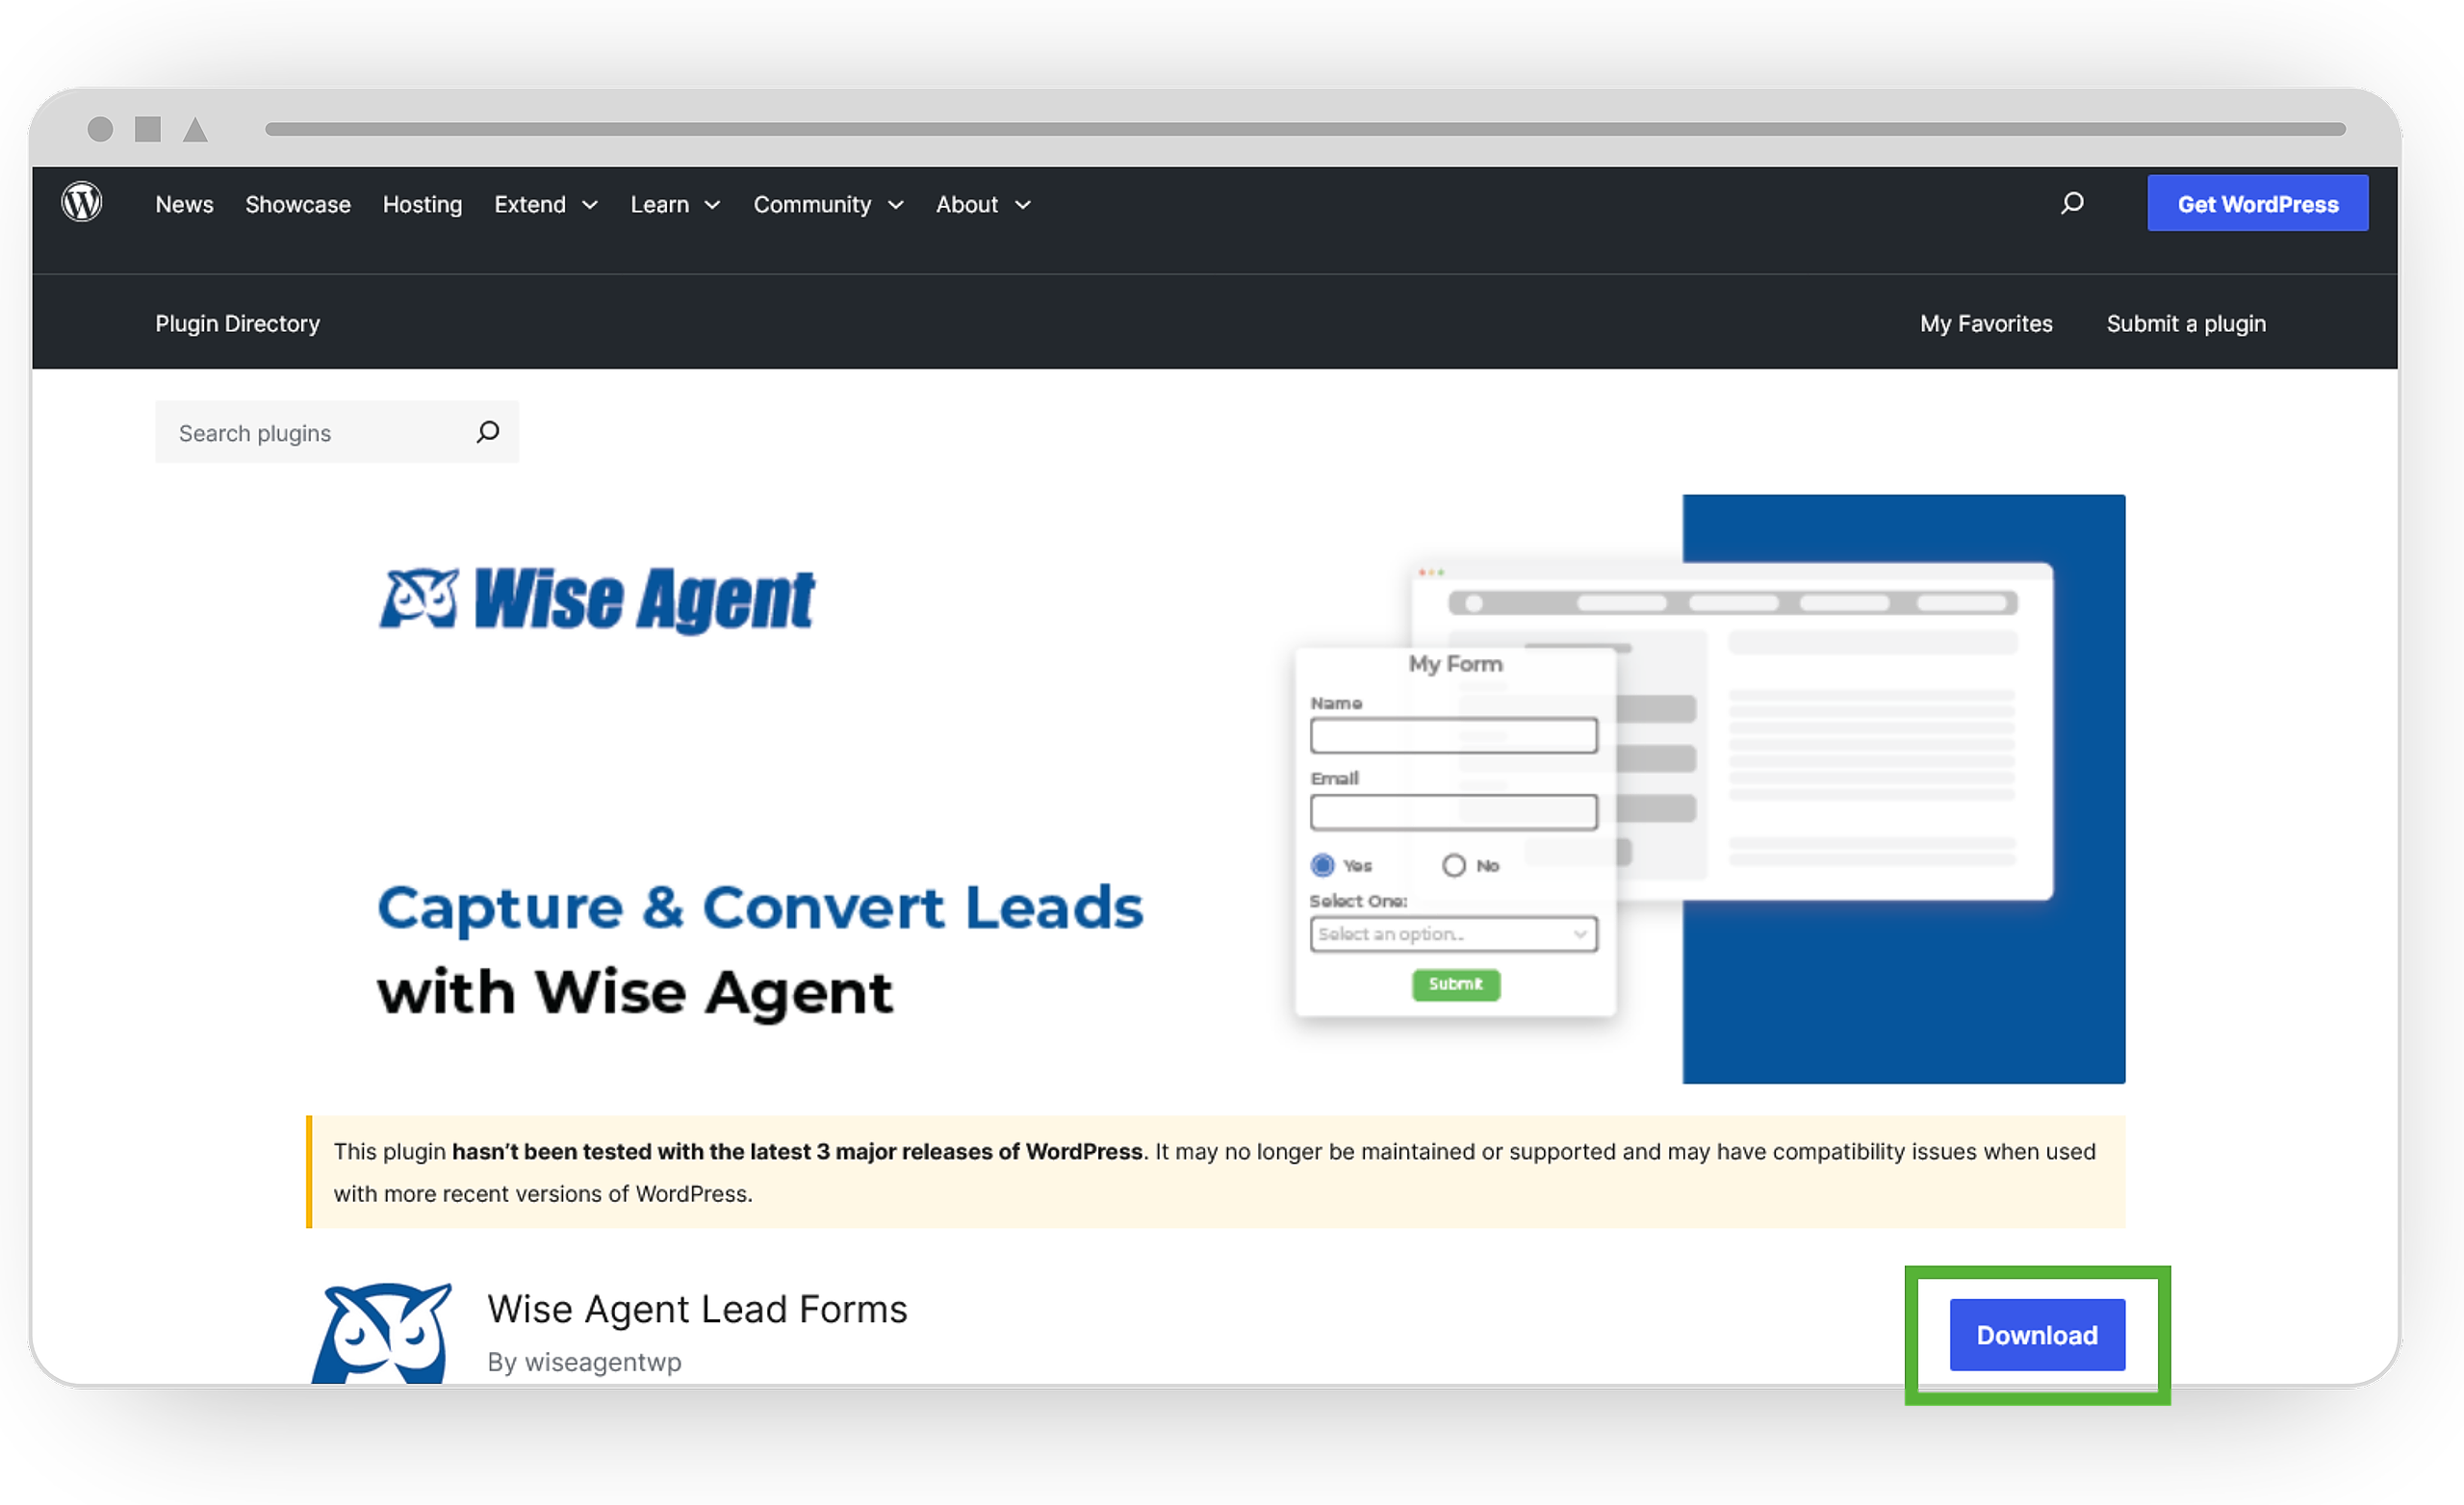
Click the Download button to obtain the Wise Agent plugin.
Adding The Plugin To WordPress
Log in to your WordPress account and navigate to the Plugin menu.
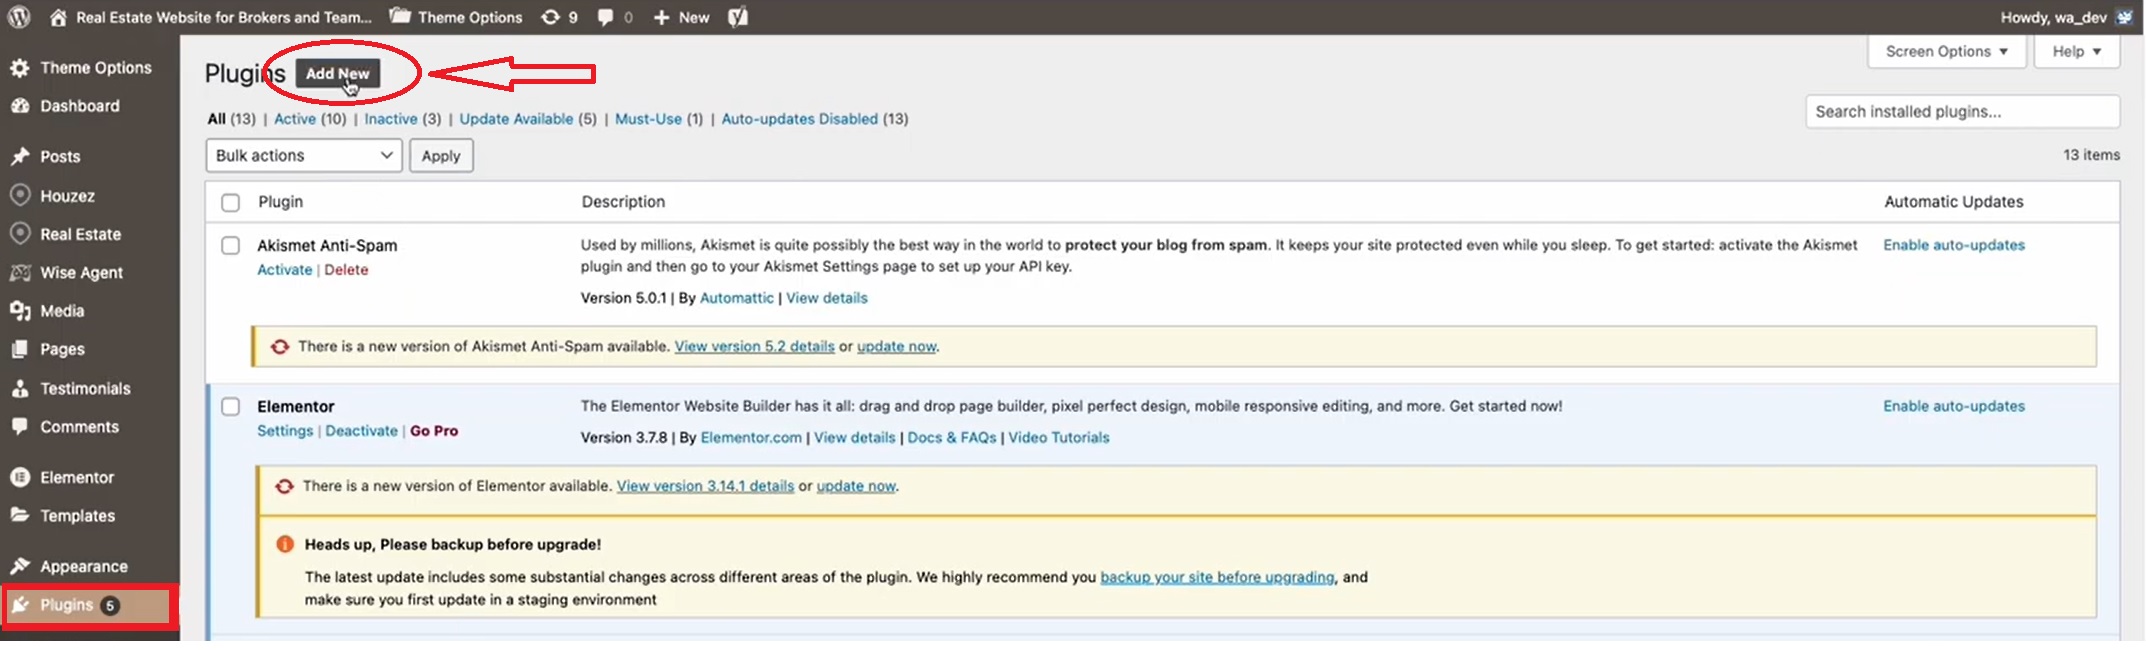
Click Add New and then select Upload Plugin.
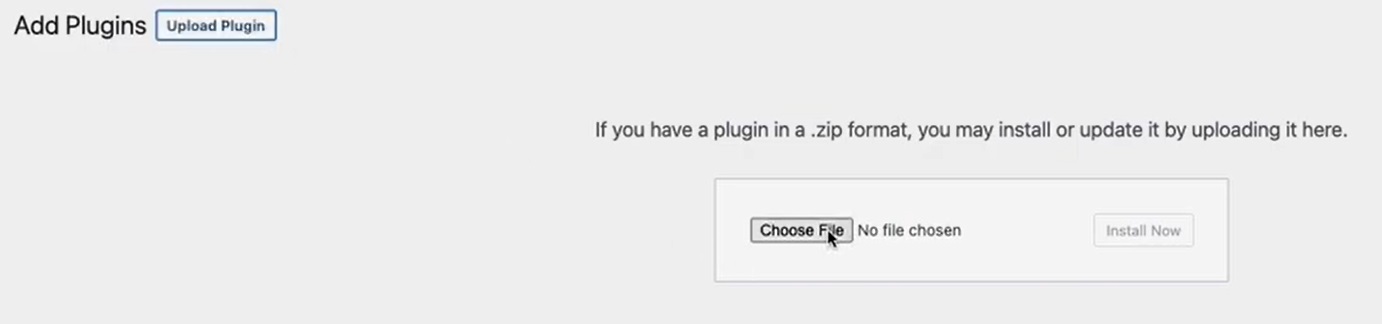
Choose the downloaded Wise Agent plugin file and upload it.
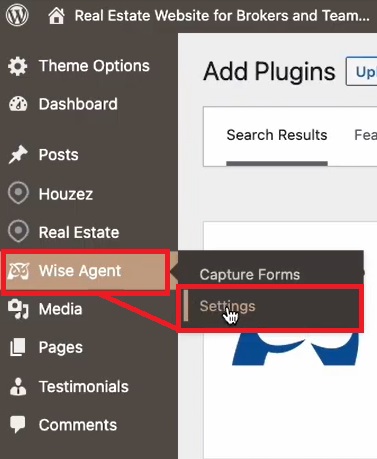
After installation, access the Wise Agent menu and go to Settings.
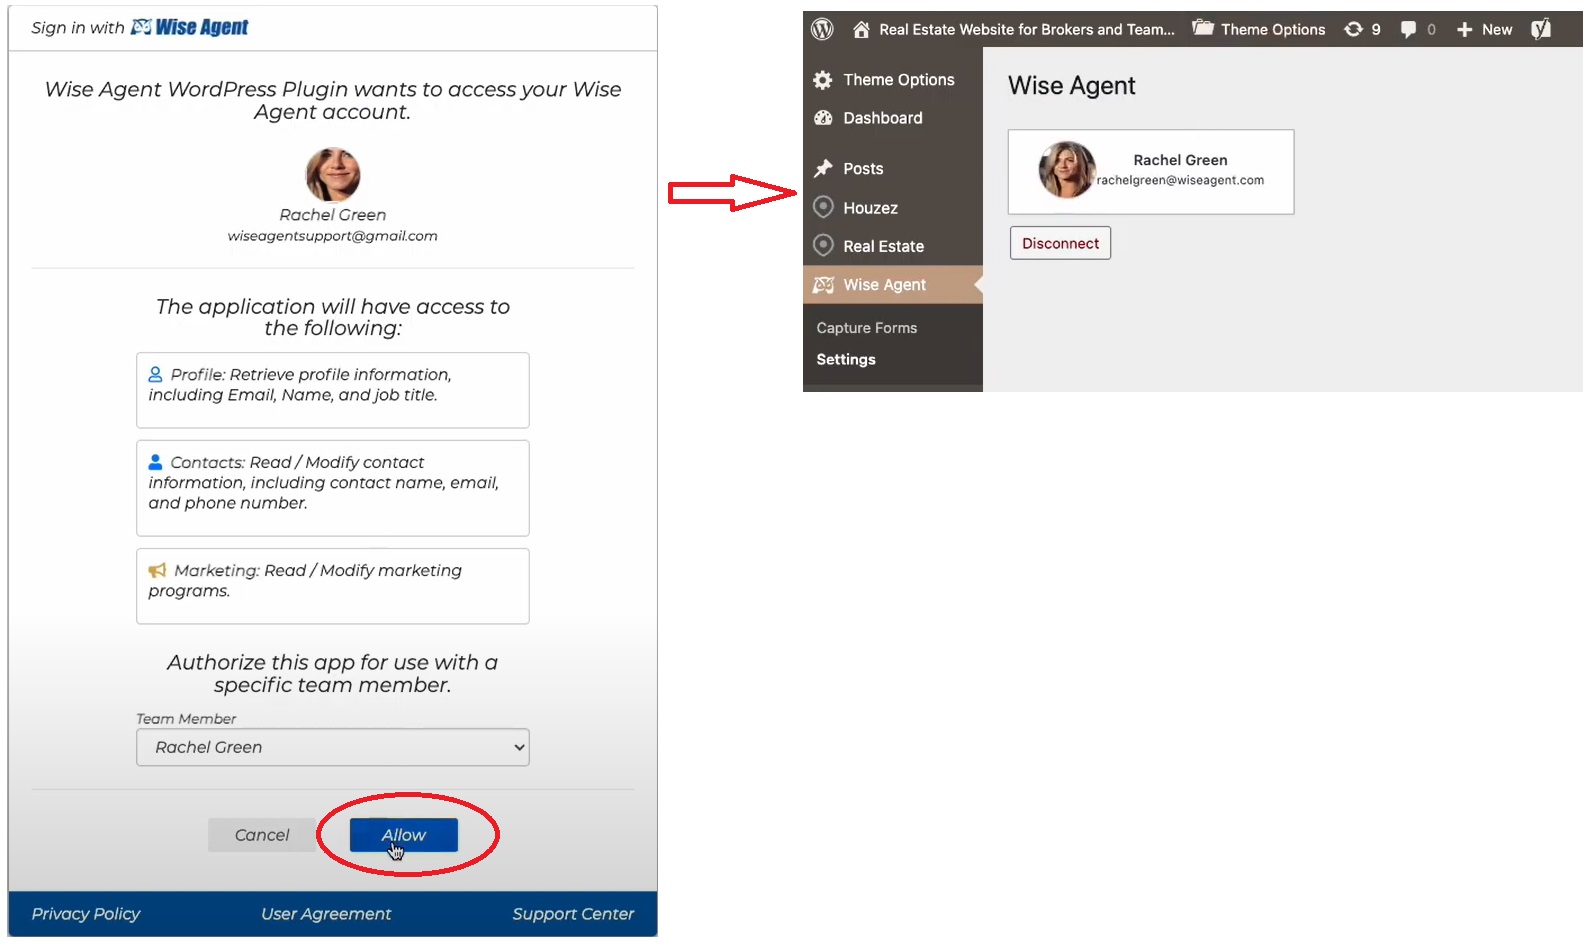
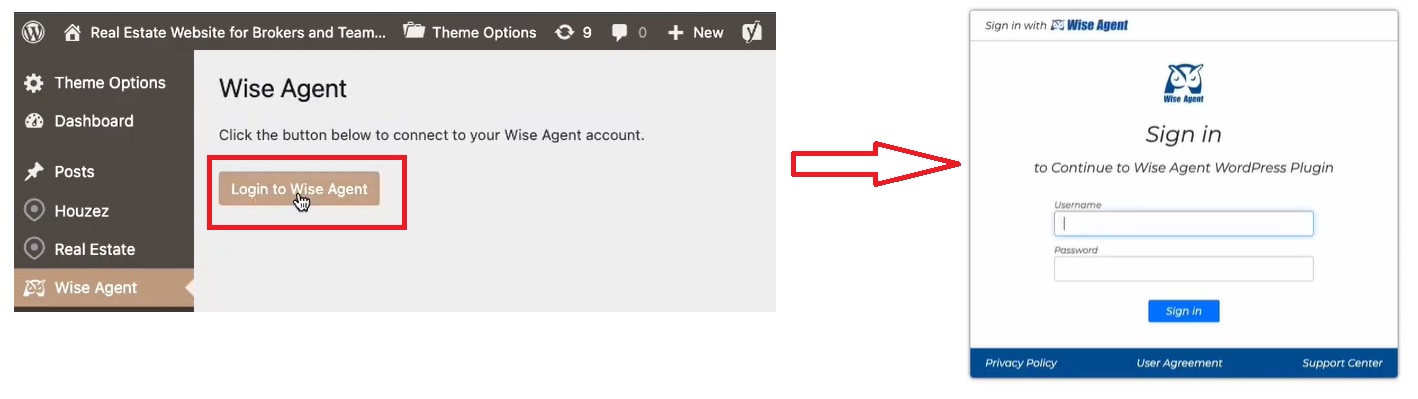
Follow the prompts to log in to your Wise Agent account through WordPress and authorize access.
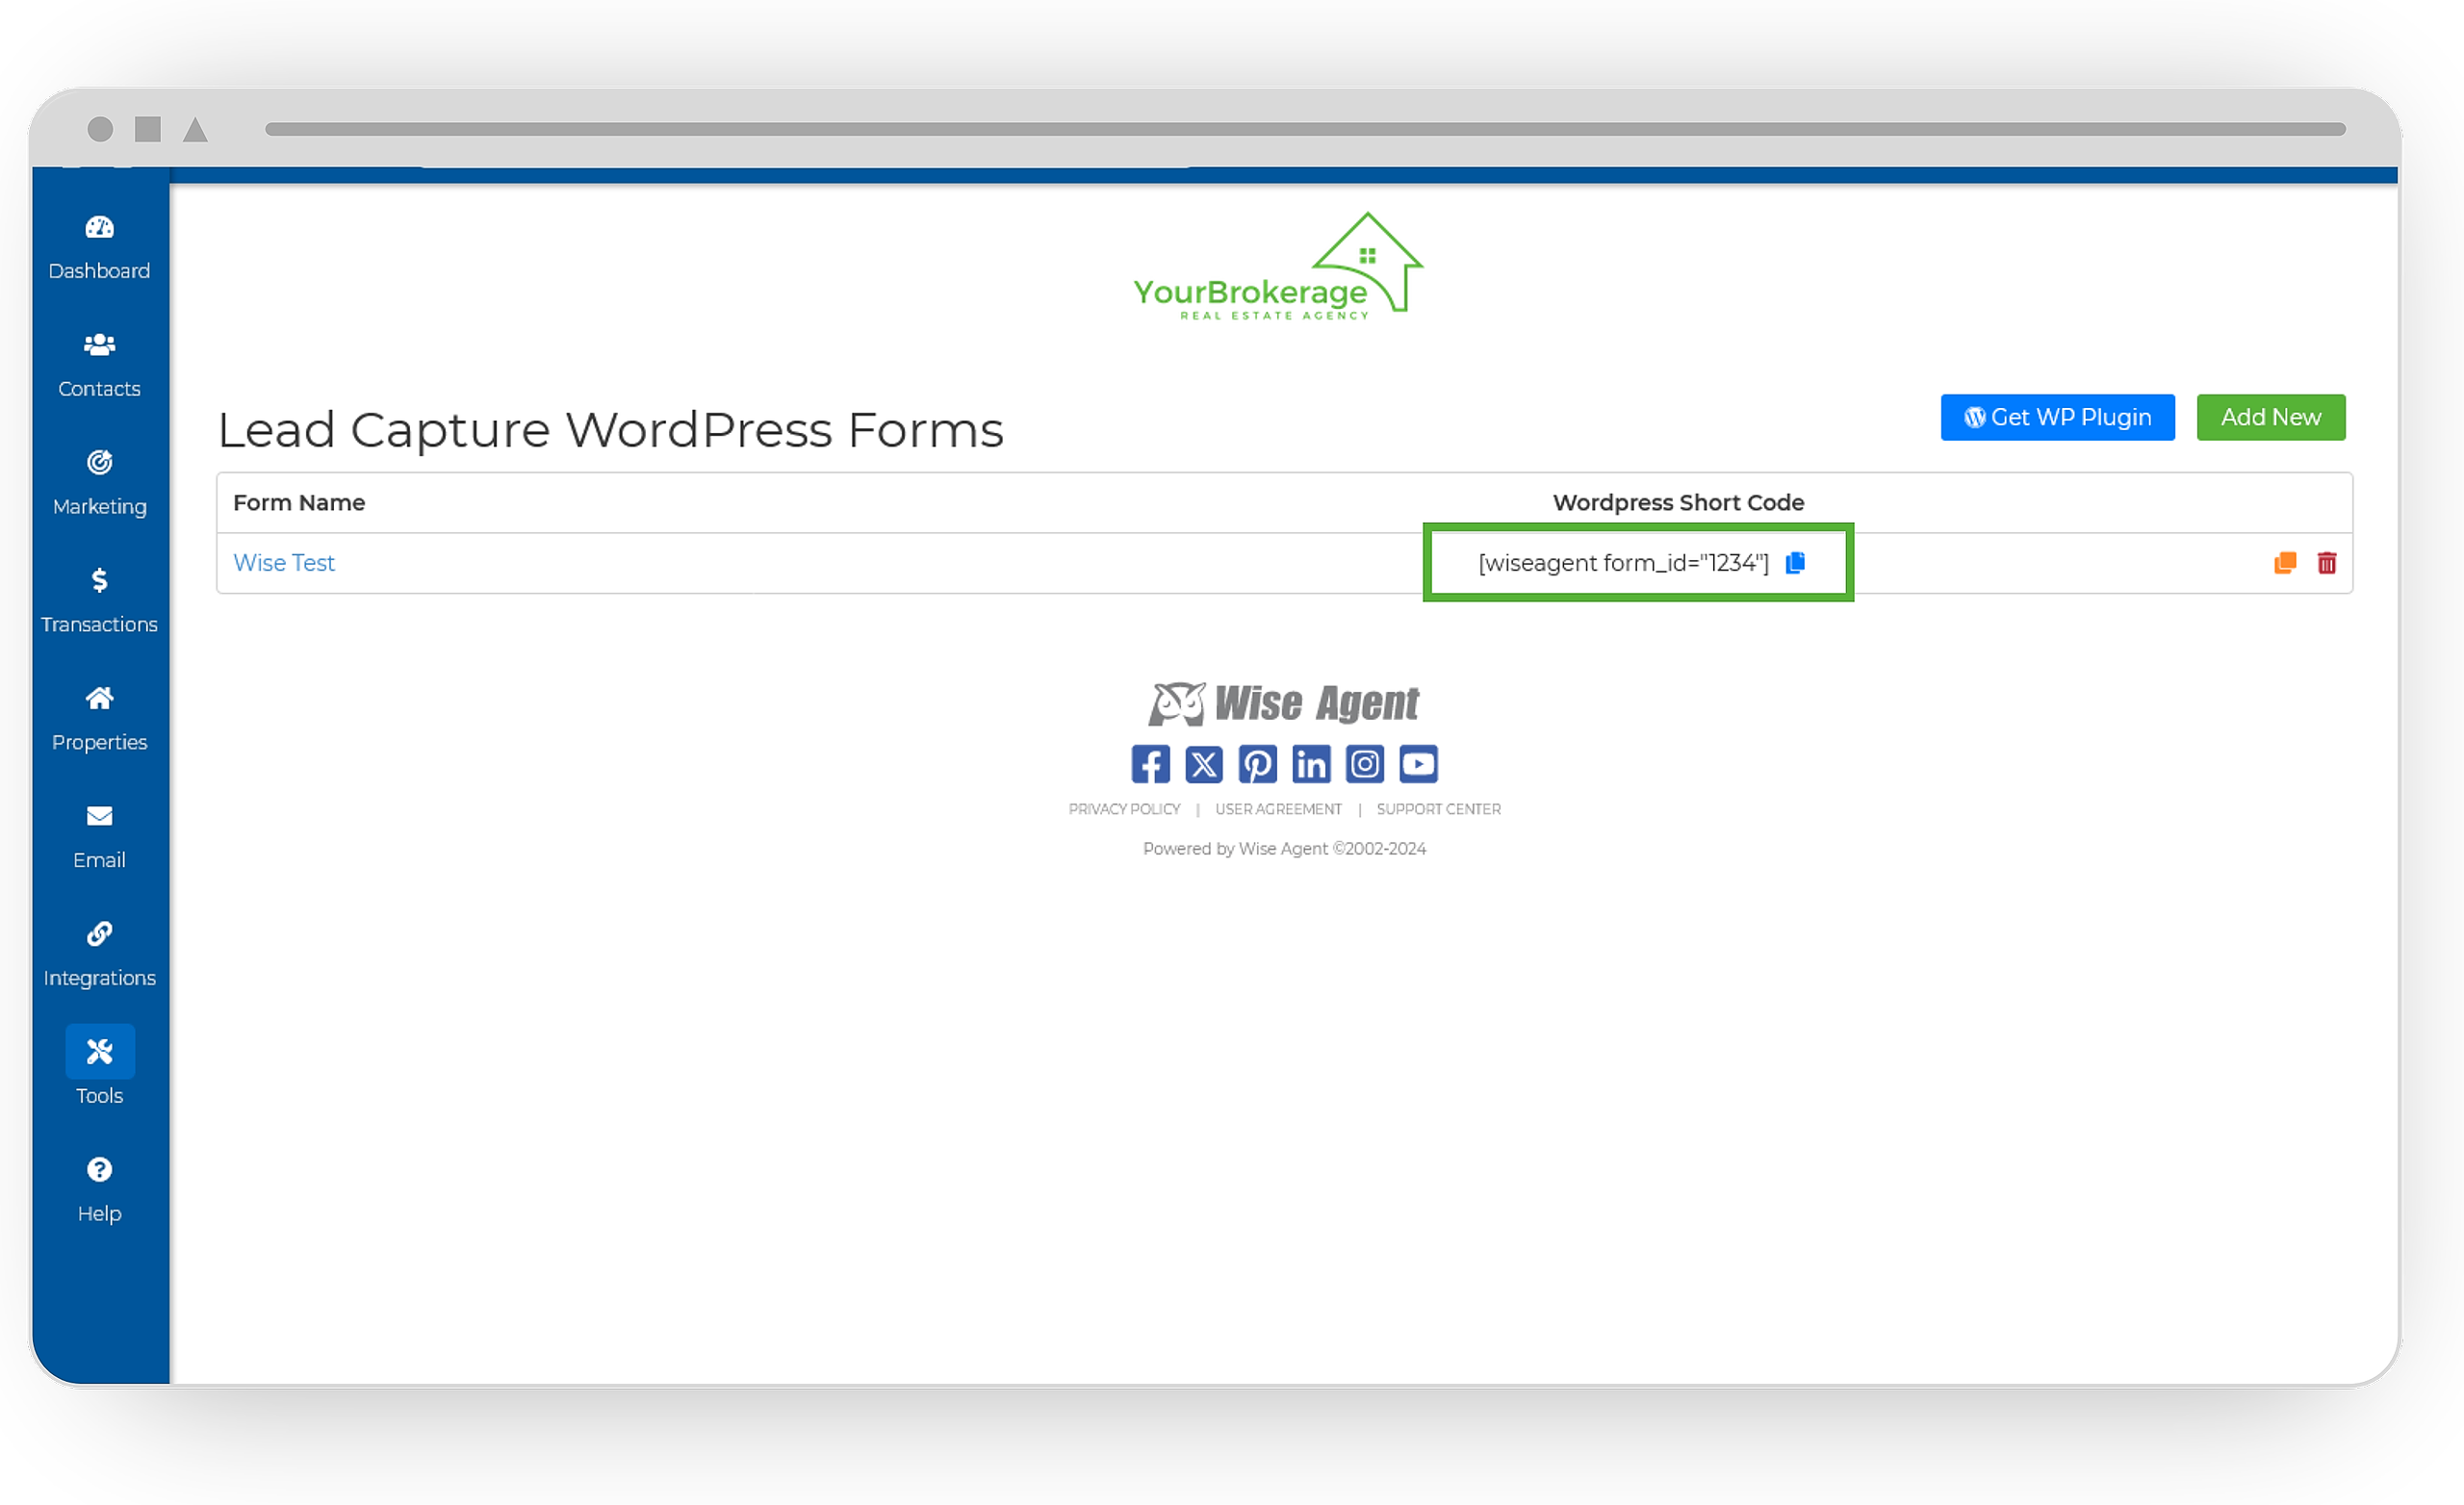
Creating Your Capture Forms
Login to your Wise Agent account.
From the sidebar, select Tools, then Capture Forms.
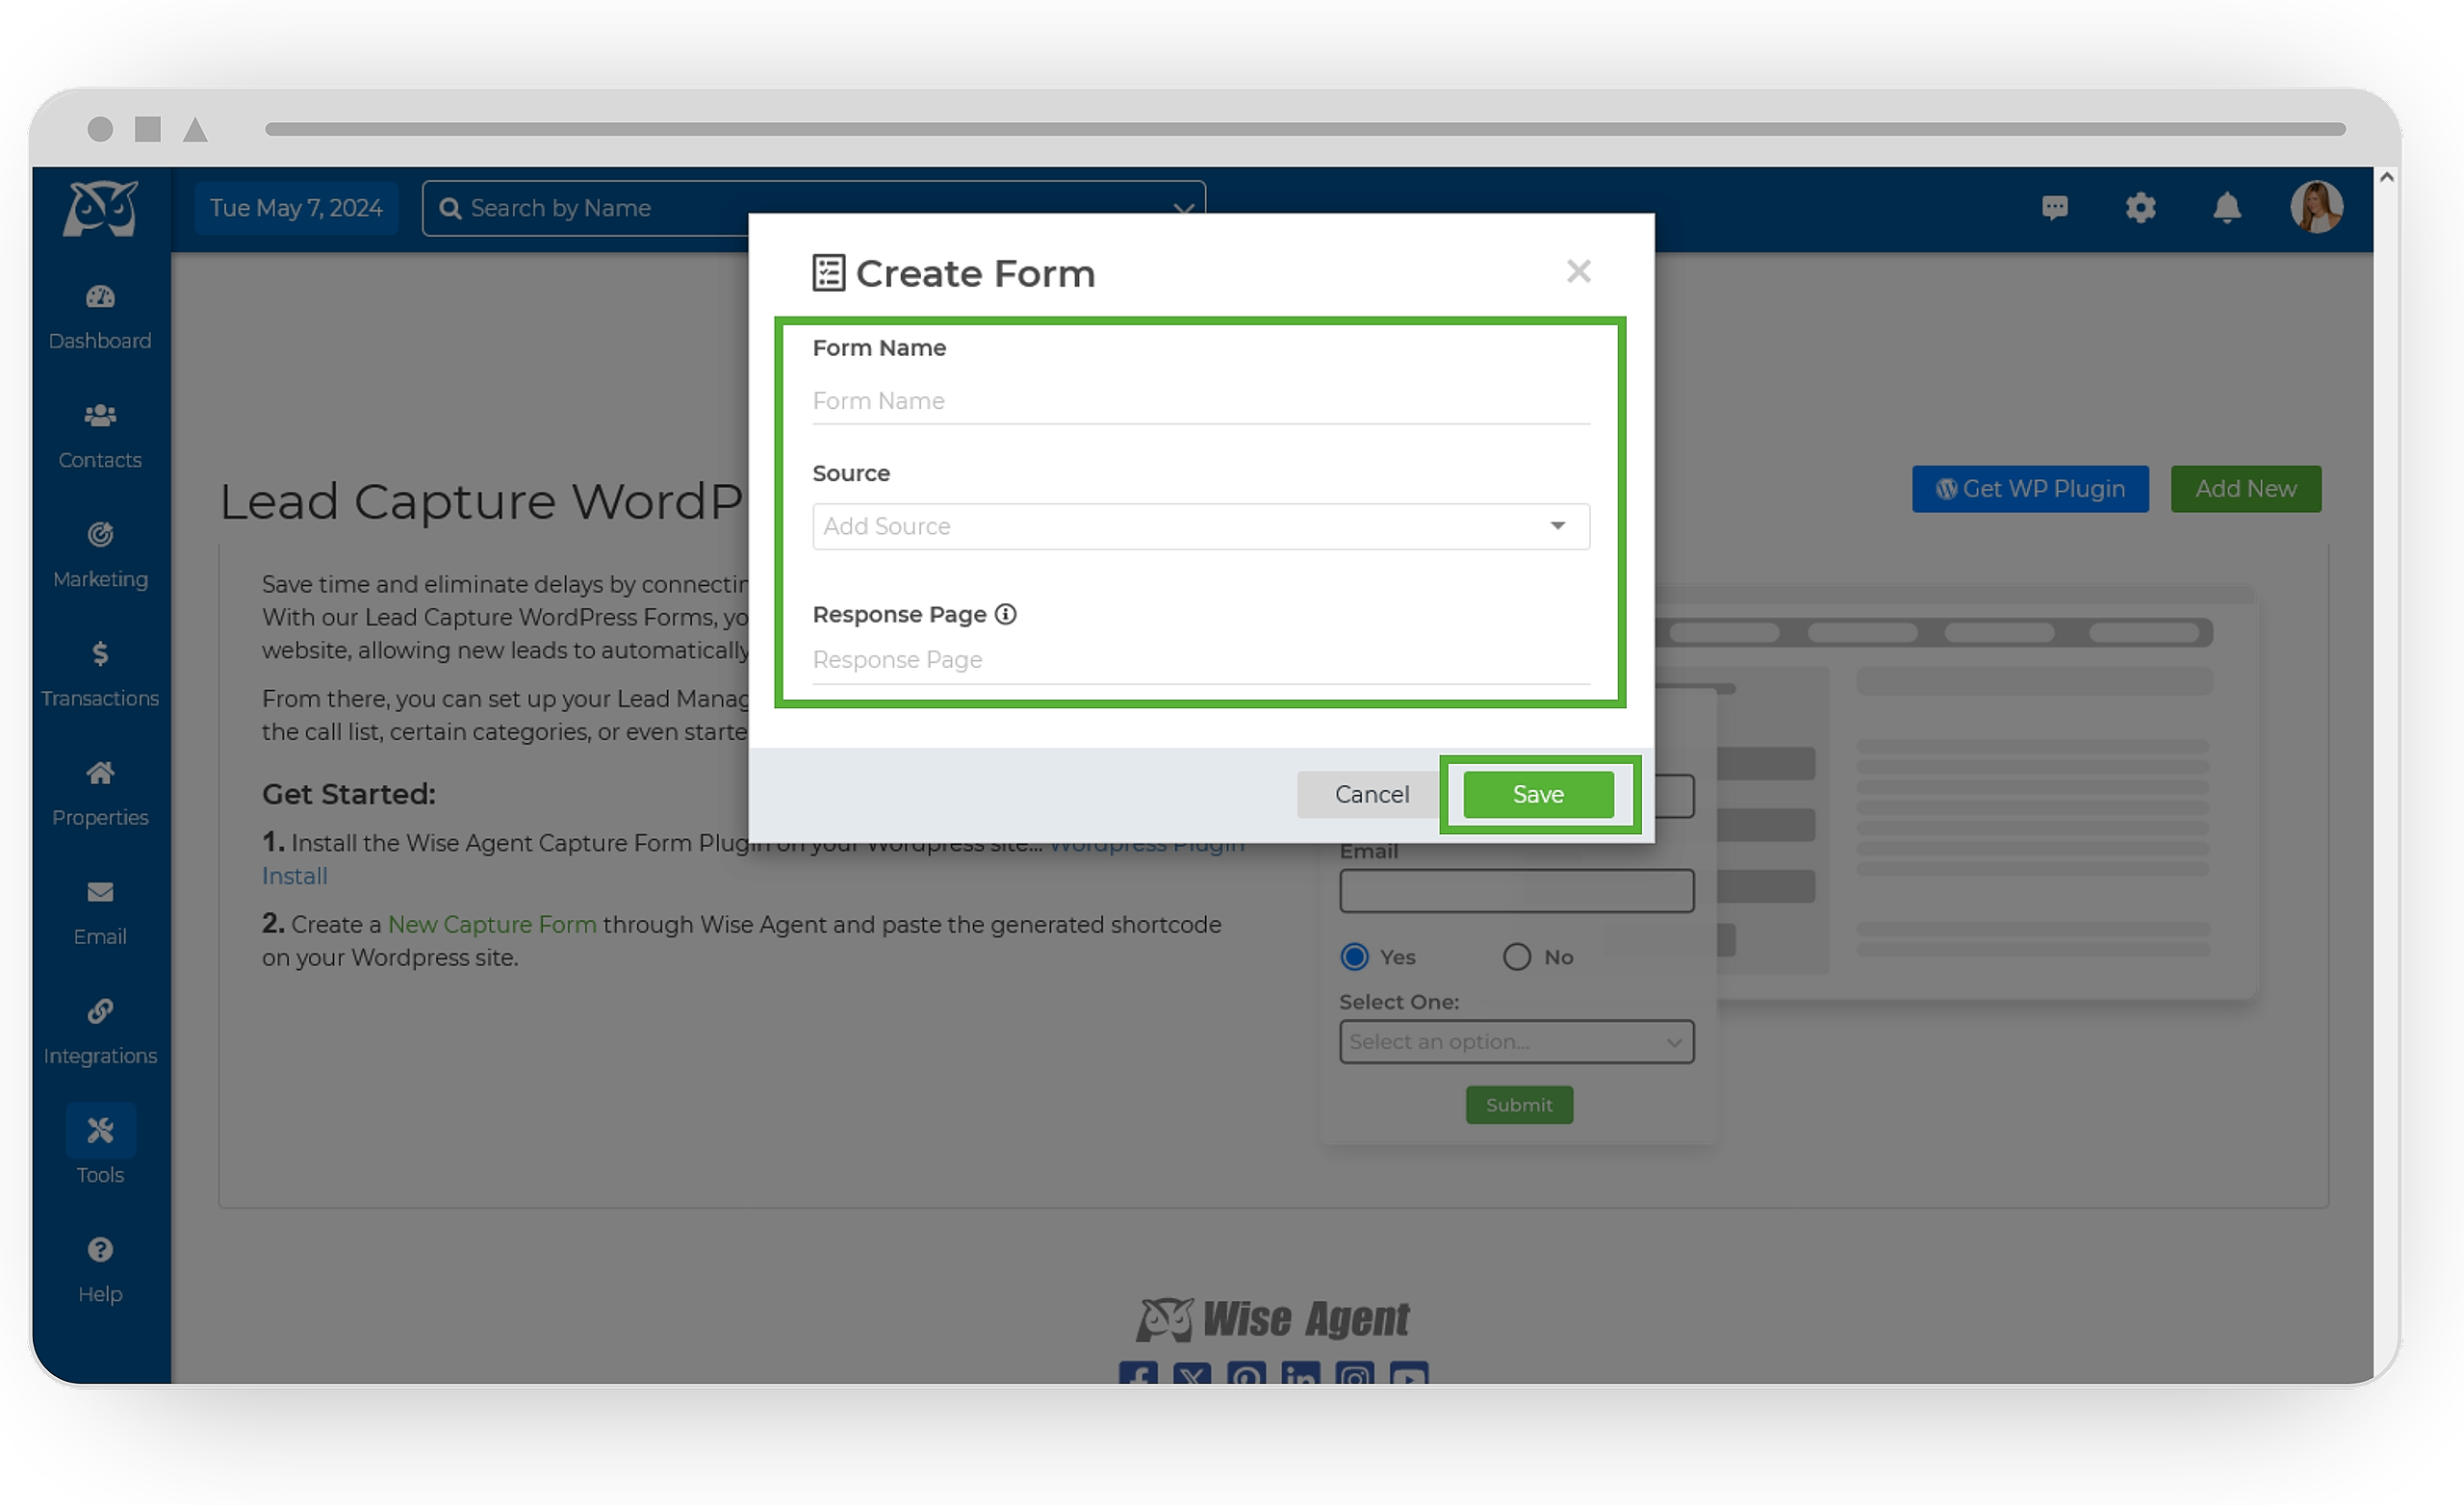
Create a new Capture Form by clicking Add New.
Input your Form Name, Source, and Response Page, then save your settings.
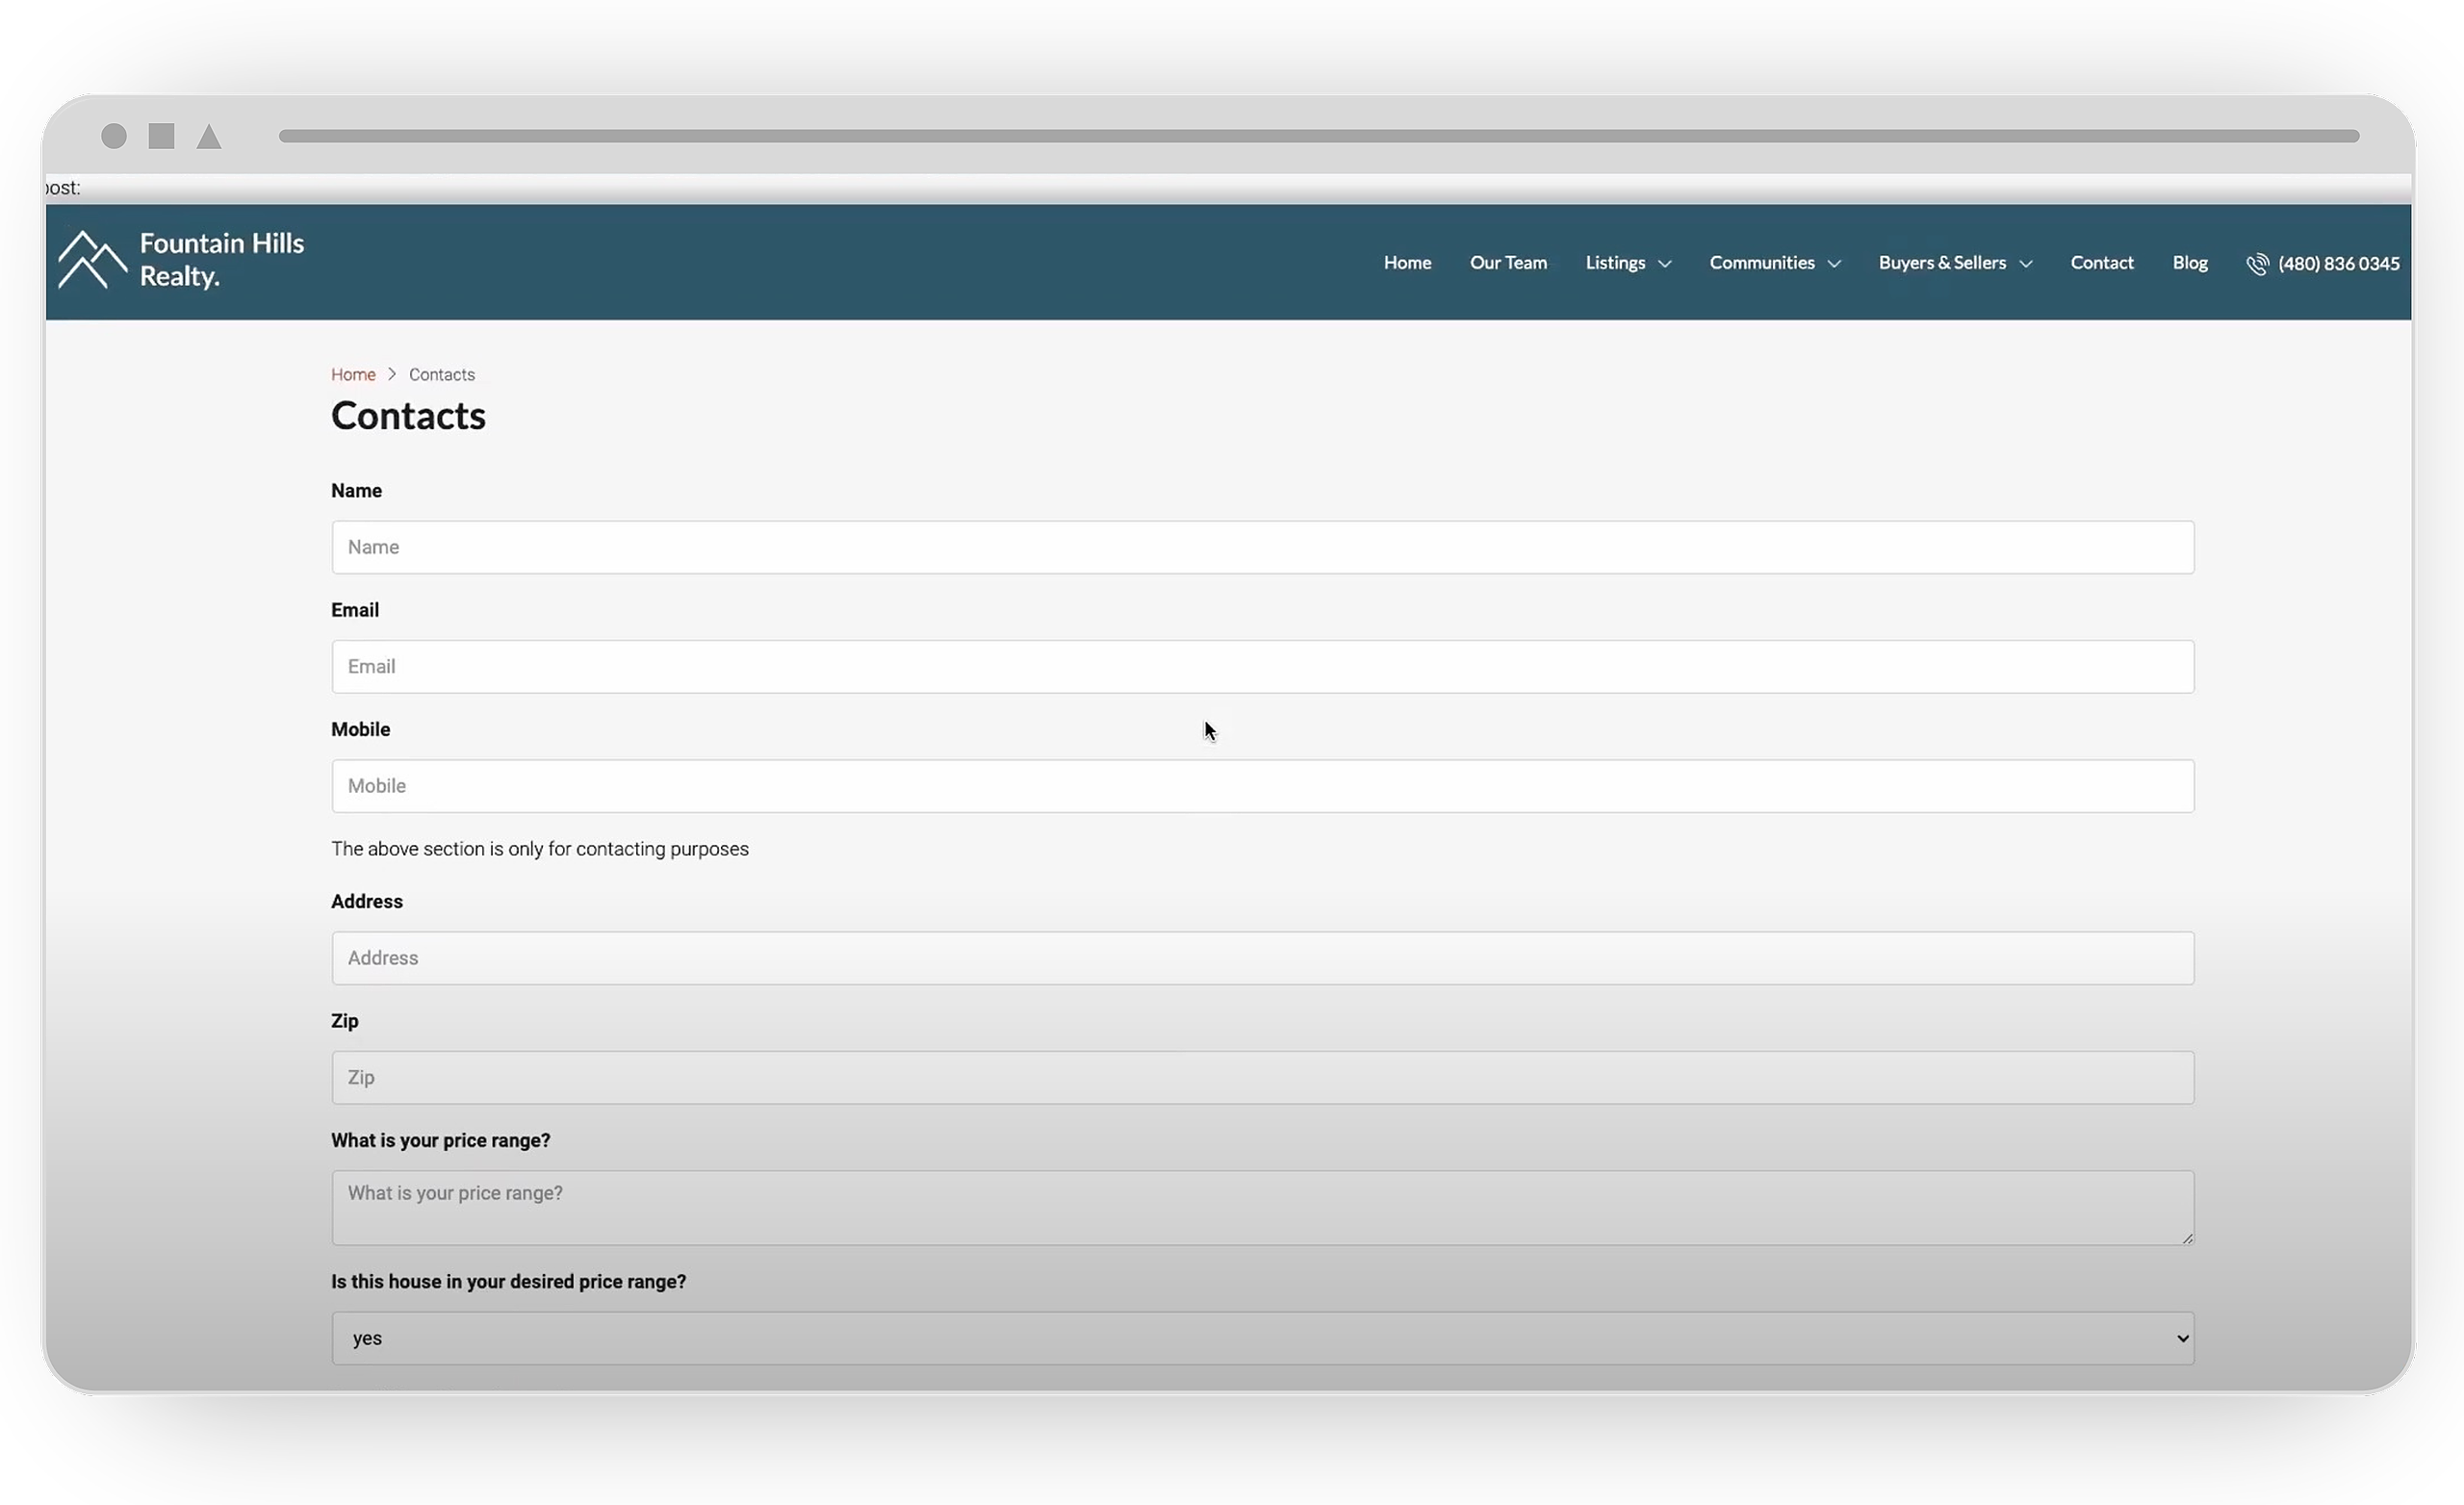
Once saved, customize your capture form by adding form fields, such as Email and Mobile Phone, as well as any additional fields needed. You can choose to make certain fields mandatory by selecting the star icon to the right of the field in the preview, turning the star icon red.
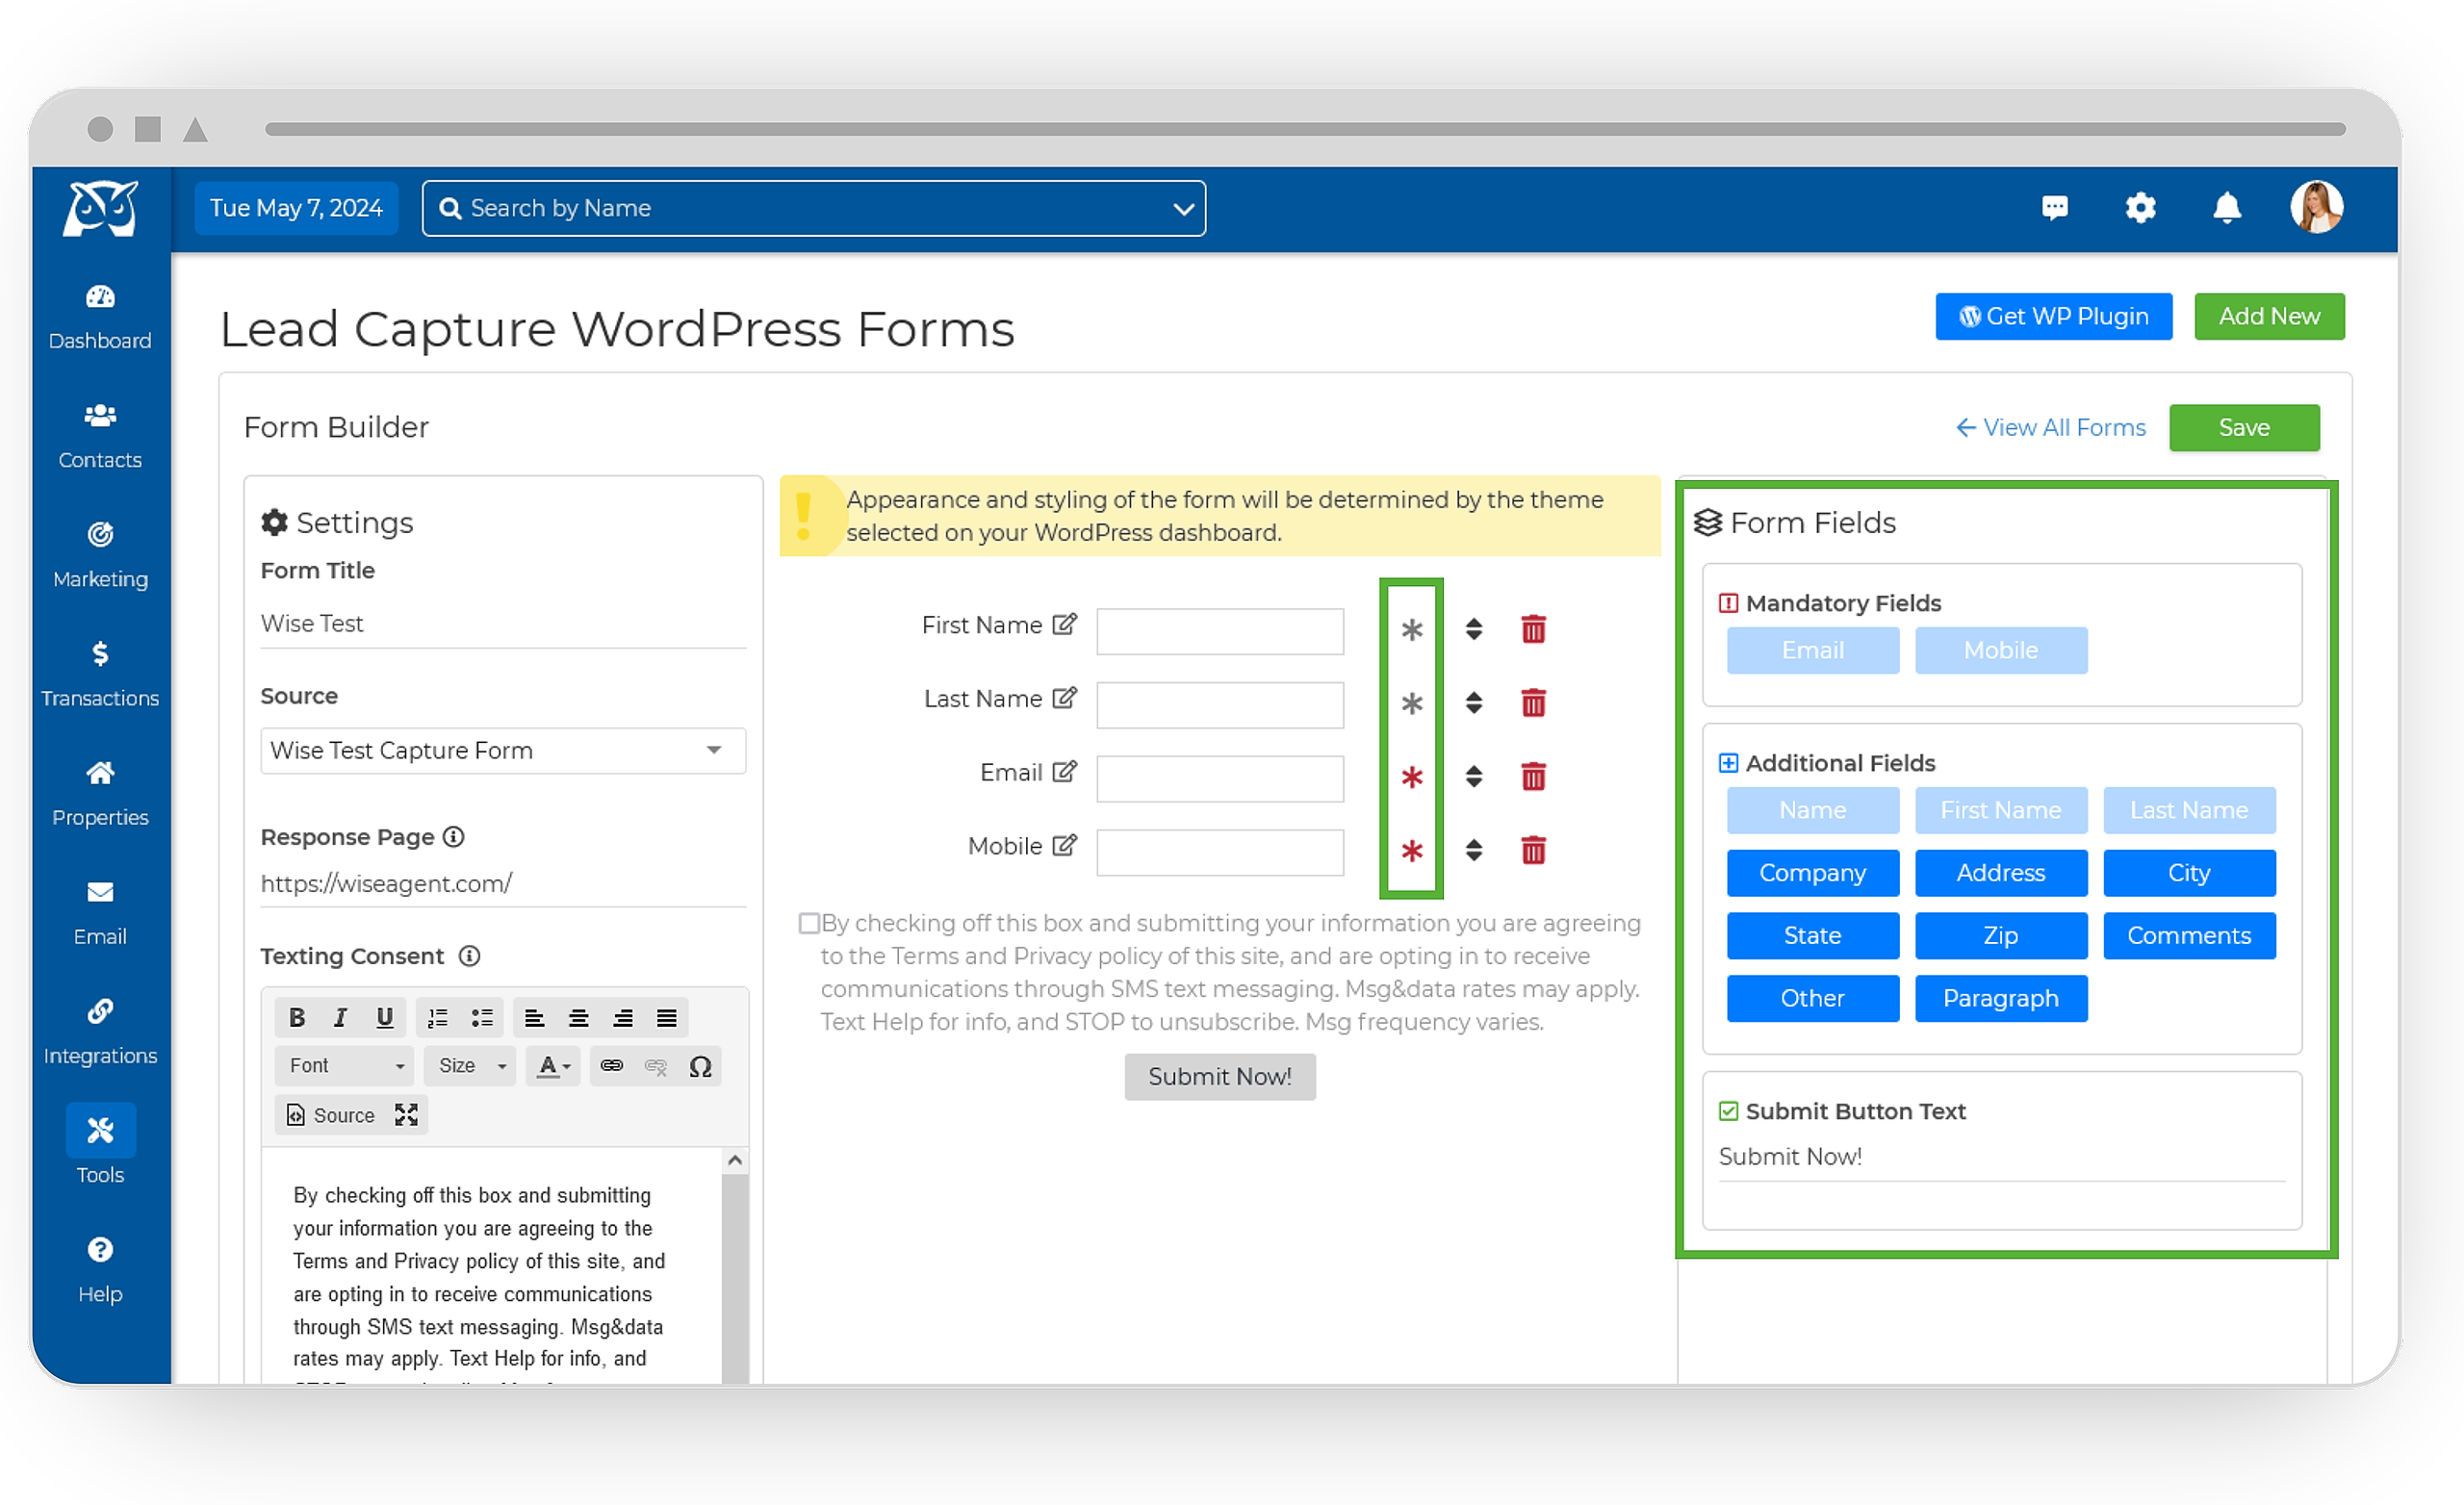
Rearrange fields, modify the texting consent, and customize the Submit button text as desired.
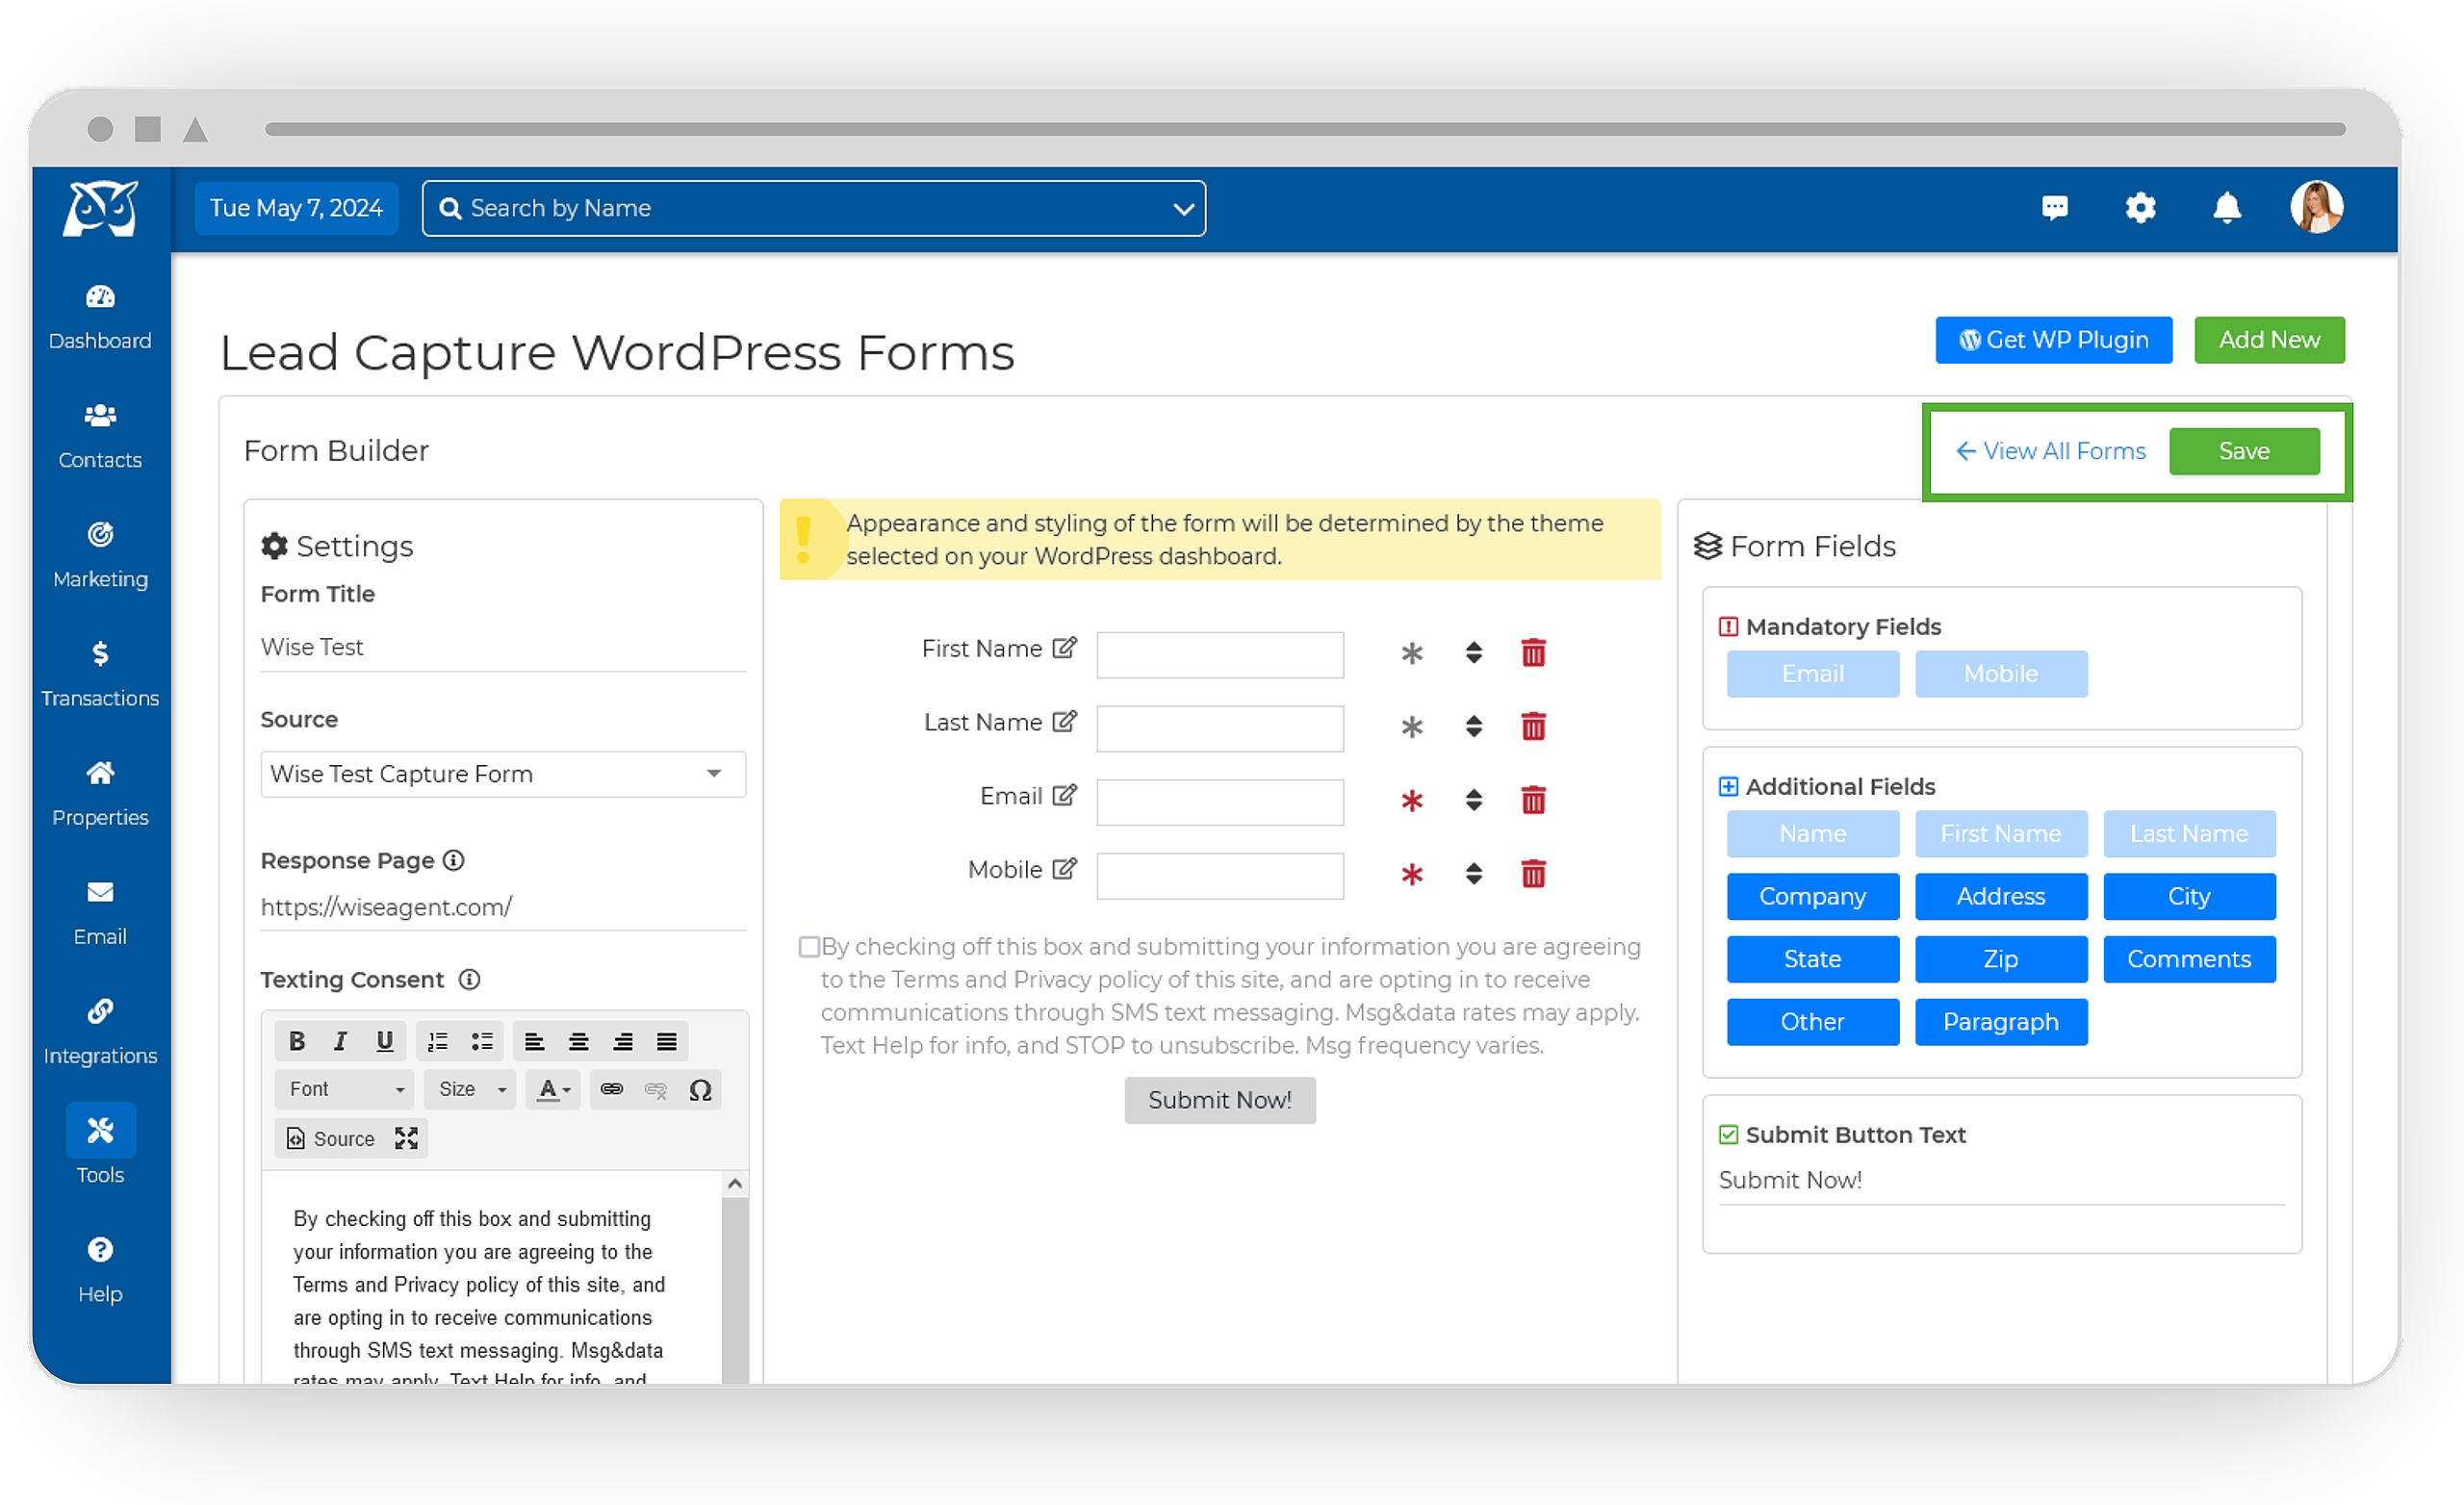
Hit the Save button, then click View All Forms to preview your form
Copy the WordPress shortcode for your form.
Integrating Your Capture Forms Into Your WordPress Page
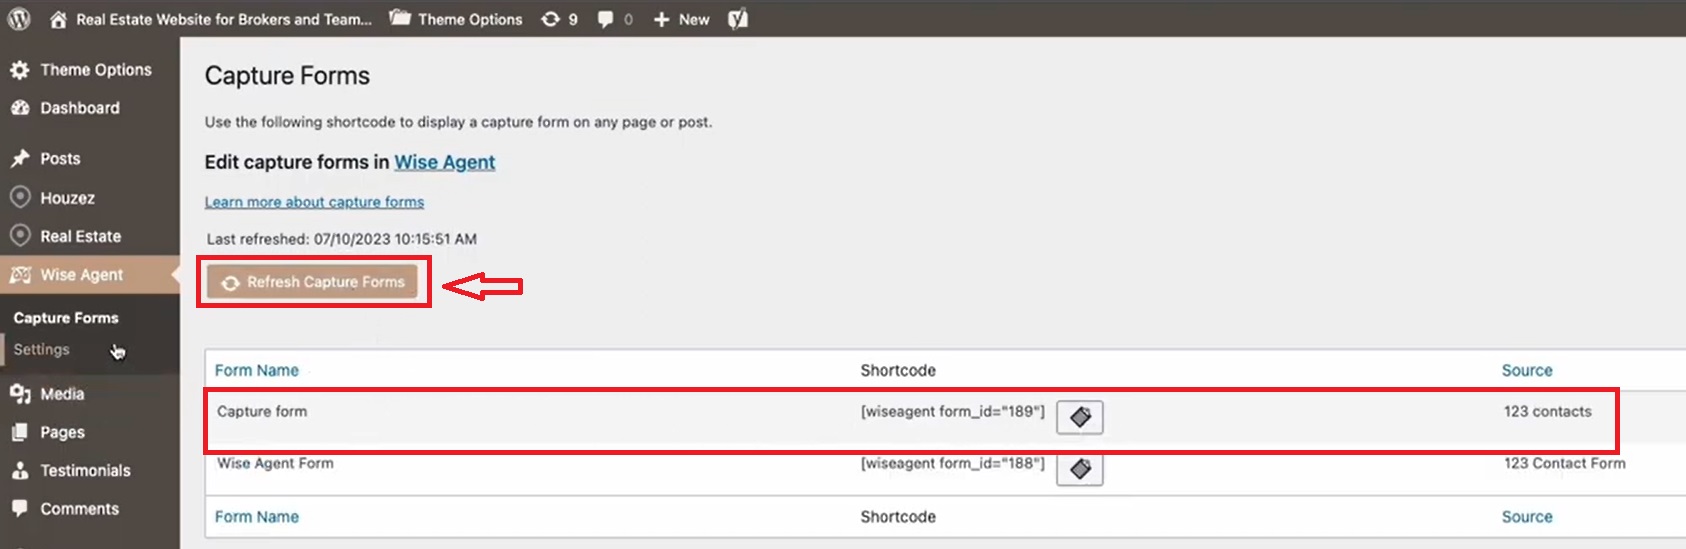
Return to your WordPress account.
Access Capture Forms from the Wise Agent menu, and click Refresh Capture Forms.
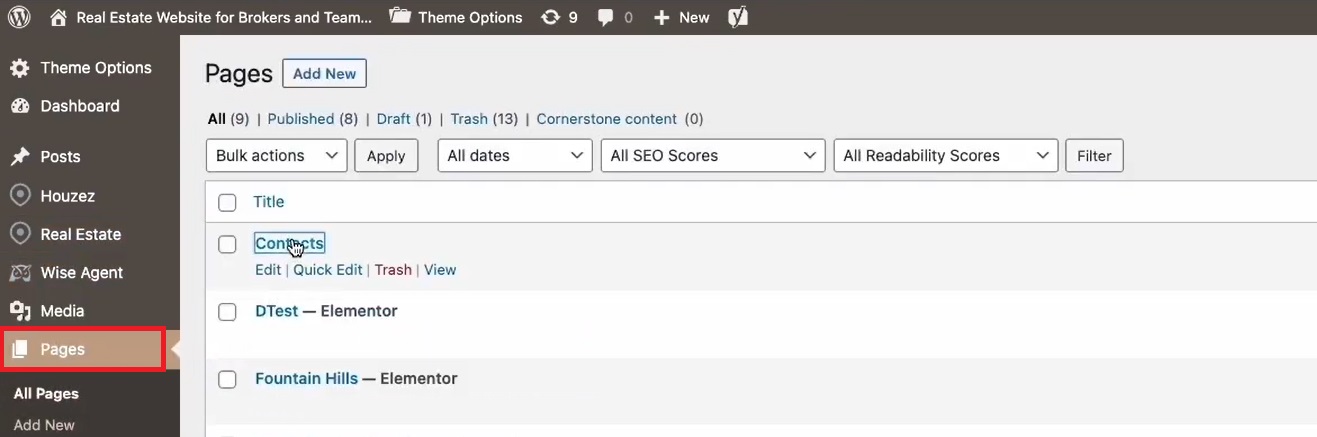
Select the page where you want to display the form.
Paste the shortcode into the code box and click Update.
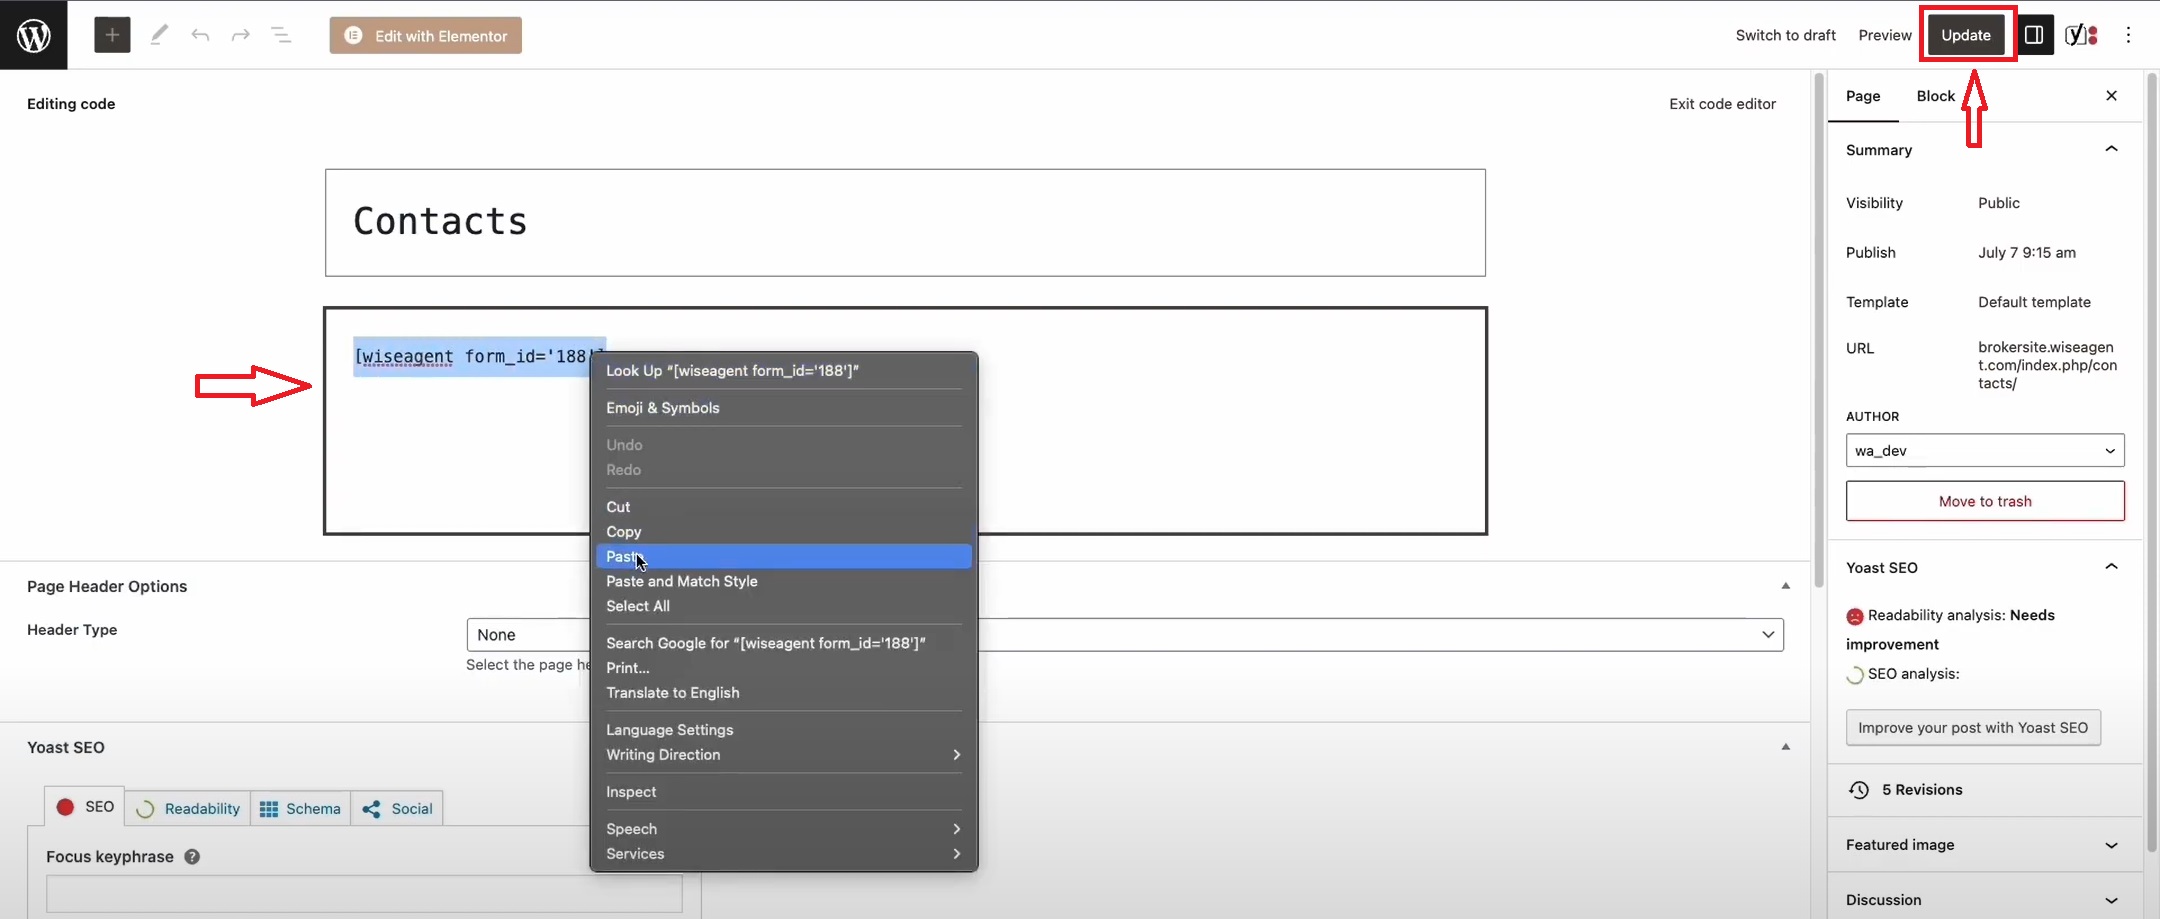
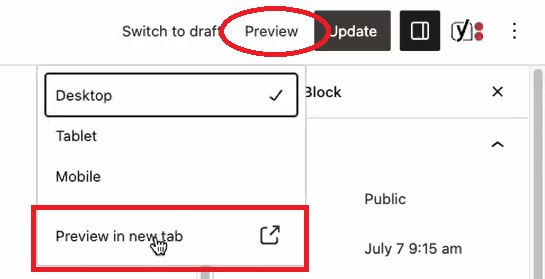
Preview the form on your website to ensure it appears correctly.
If you need to make any adjustments to your form, simply return to your Wise Agent account and locate the form you wish to edit. Follow the same steps as before to access and modify the form details. Make the necessary changes and save your updates, that's it!