

1. On the side navigation bar, click Send Email
2. You will want to choose which editor feature you would like. Drag & Drop Editor, Classic Editor, or Start from a template.
From which ever feature you choose, please complete editing the email. Once your email has completed the editing process click on:

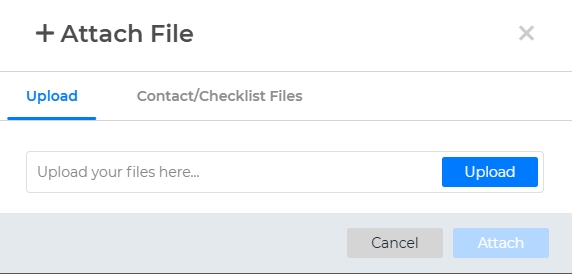
4. On the right hand side, you will see the Attach File icon:

Click the "Upload" button. Then select the file you would like to attach to the email.
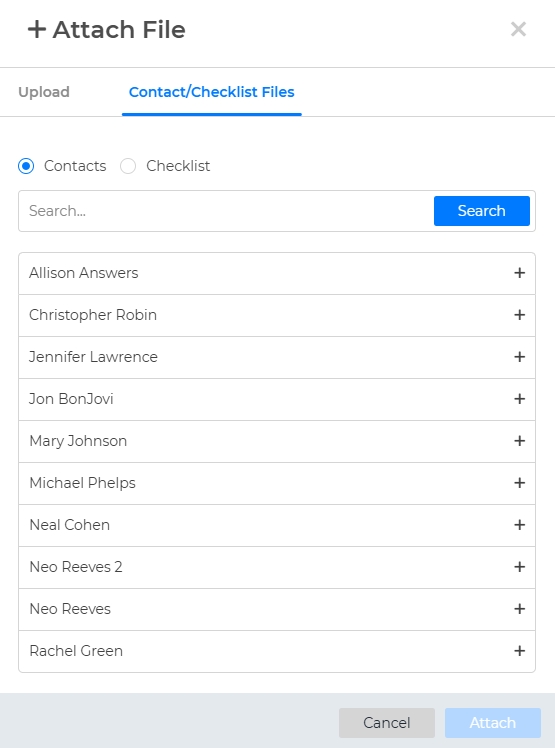
You can can also Attach Contacts or Checklist Files.
5. To send out your completed email, with your attachment. Click on Send/Schedule:

You will be directed to your Contacts/Vendors. You will be use Filters to search for specific contacts in the system, just like you would in your Contact List.

NOTE: Only clients with valid and complete email addresses will appear on this page
6. Once you have the list of all the contacts you want to send the email to, Click the "Schedule" or "Send" button.
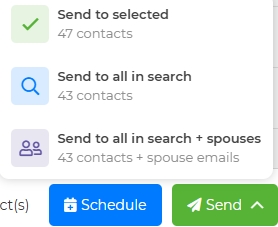
7. If selecting "Send" to send now, you will be able to send to selected, send to all in search, or send to all in search + spouses.
Note: If your have multiple pages of contacts that you want to send to, please make sure to "Send to all in search"
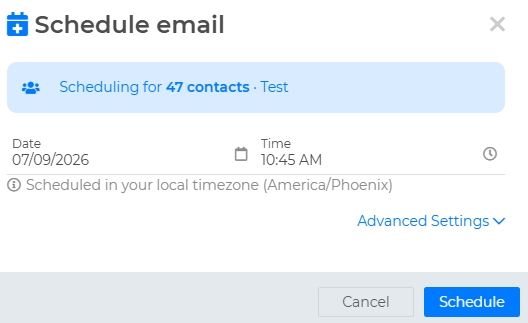
If selecting "Schedule" a window will pop up for you to select a Date and Time for your email to send out. There is also an option for Advanced Settings to send to all contacts in search & Include spouses. If you are wanting to send to "All Contacts in Search". Please make sure you select this.
And that's it!
Please don't hesitate to reach out to our customer service if you are need of additional help!