

Exporting Your Contacts From Outlook
💡 Important: Steps may be different between new and classic Outlook for Windows. Below are the steps for the New Outlook version.
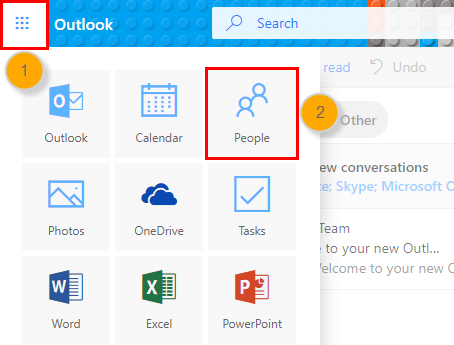
1. Open Outlook 365 and click the Applications icon, then select People. (Note: If you don't have People in the left navigation bar, select More apps, then People to add it. After adding People, right-click and select Pin to keep it in the left navigation bar.)
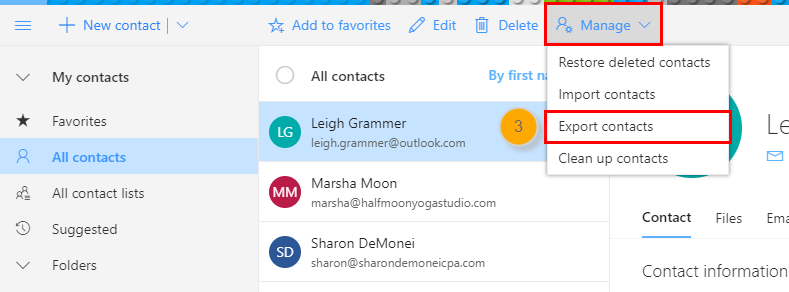
2. Select Manage, then Export Contacts.
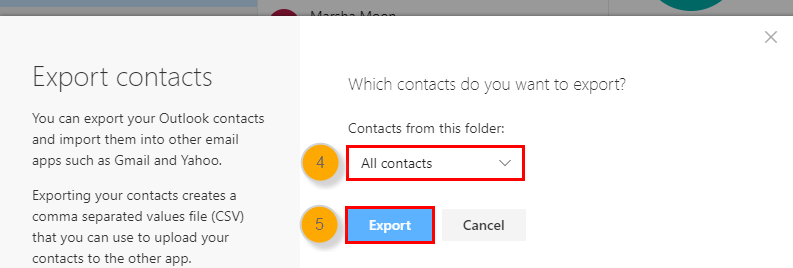
3. Under Contacts from this folder, select All contacts or select a folder of specific contacts, then select Export.
4. The exported .CSV file is saved to your Downloads folder.
Import Your Contacts Into Wise Agent
Once your CSV export has been saved, you can now import your contacts using one of the options on the Import/Export page (steps below), or email the file to help@wiseagent.com and we will format and import them for you! Wise Agent allows you to import more information than several other CRMs as we include categories, birthdays, anniversaries, spouse and child names, and notes. HERE is an example file to use for acceptable column header fields in your CSV file.
To Import Your Contacts:
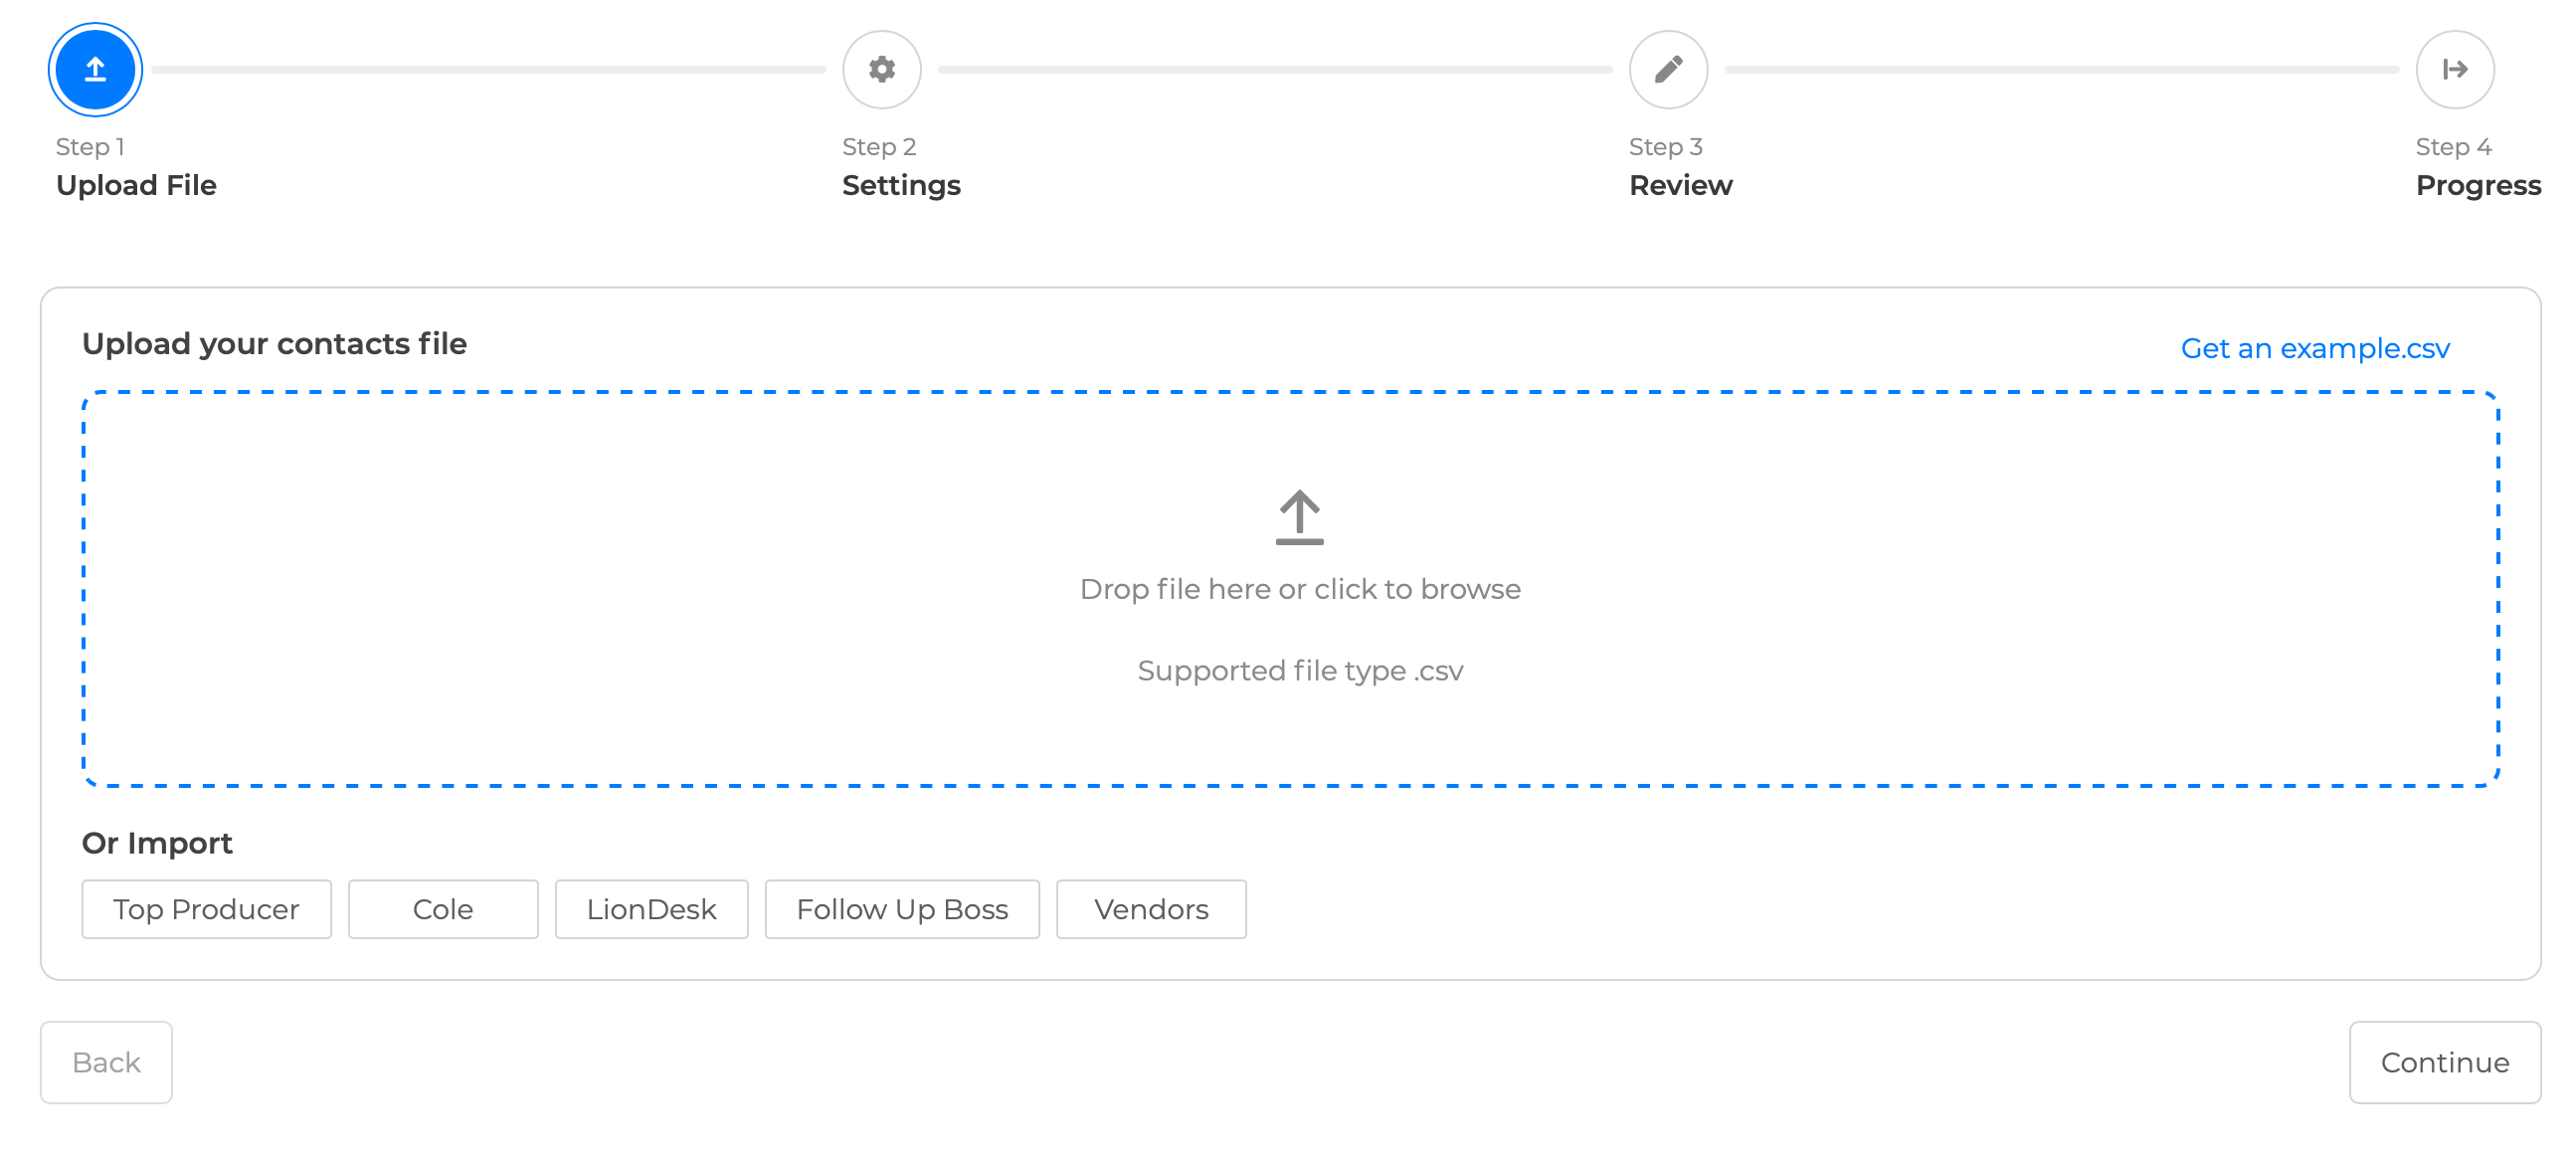
From the sidebar, select Contacts ➜ Import
Once selected drag and drop file or click to browse then click Continue
Next, select your Settings:
▸Only Insert New
This method adds only new contacts to the database. If a contact already exists in your Wise Agent contact list, it will not be updated or duplicated.
▸Insert New/ Update Existing
This method adds new contacts and updates information for existing ones already in your Wise Agent contact list. If a contact already exists, its details will be updated rather than creating a duplicate.
▸Allow Duplicates
This method adds all contacts from the import, even if they already exist in your Wise Agent contact list, which may result in duplicate entries.
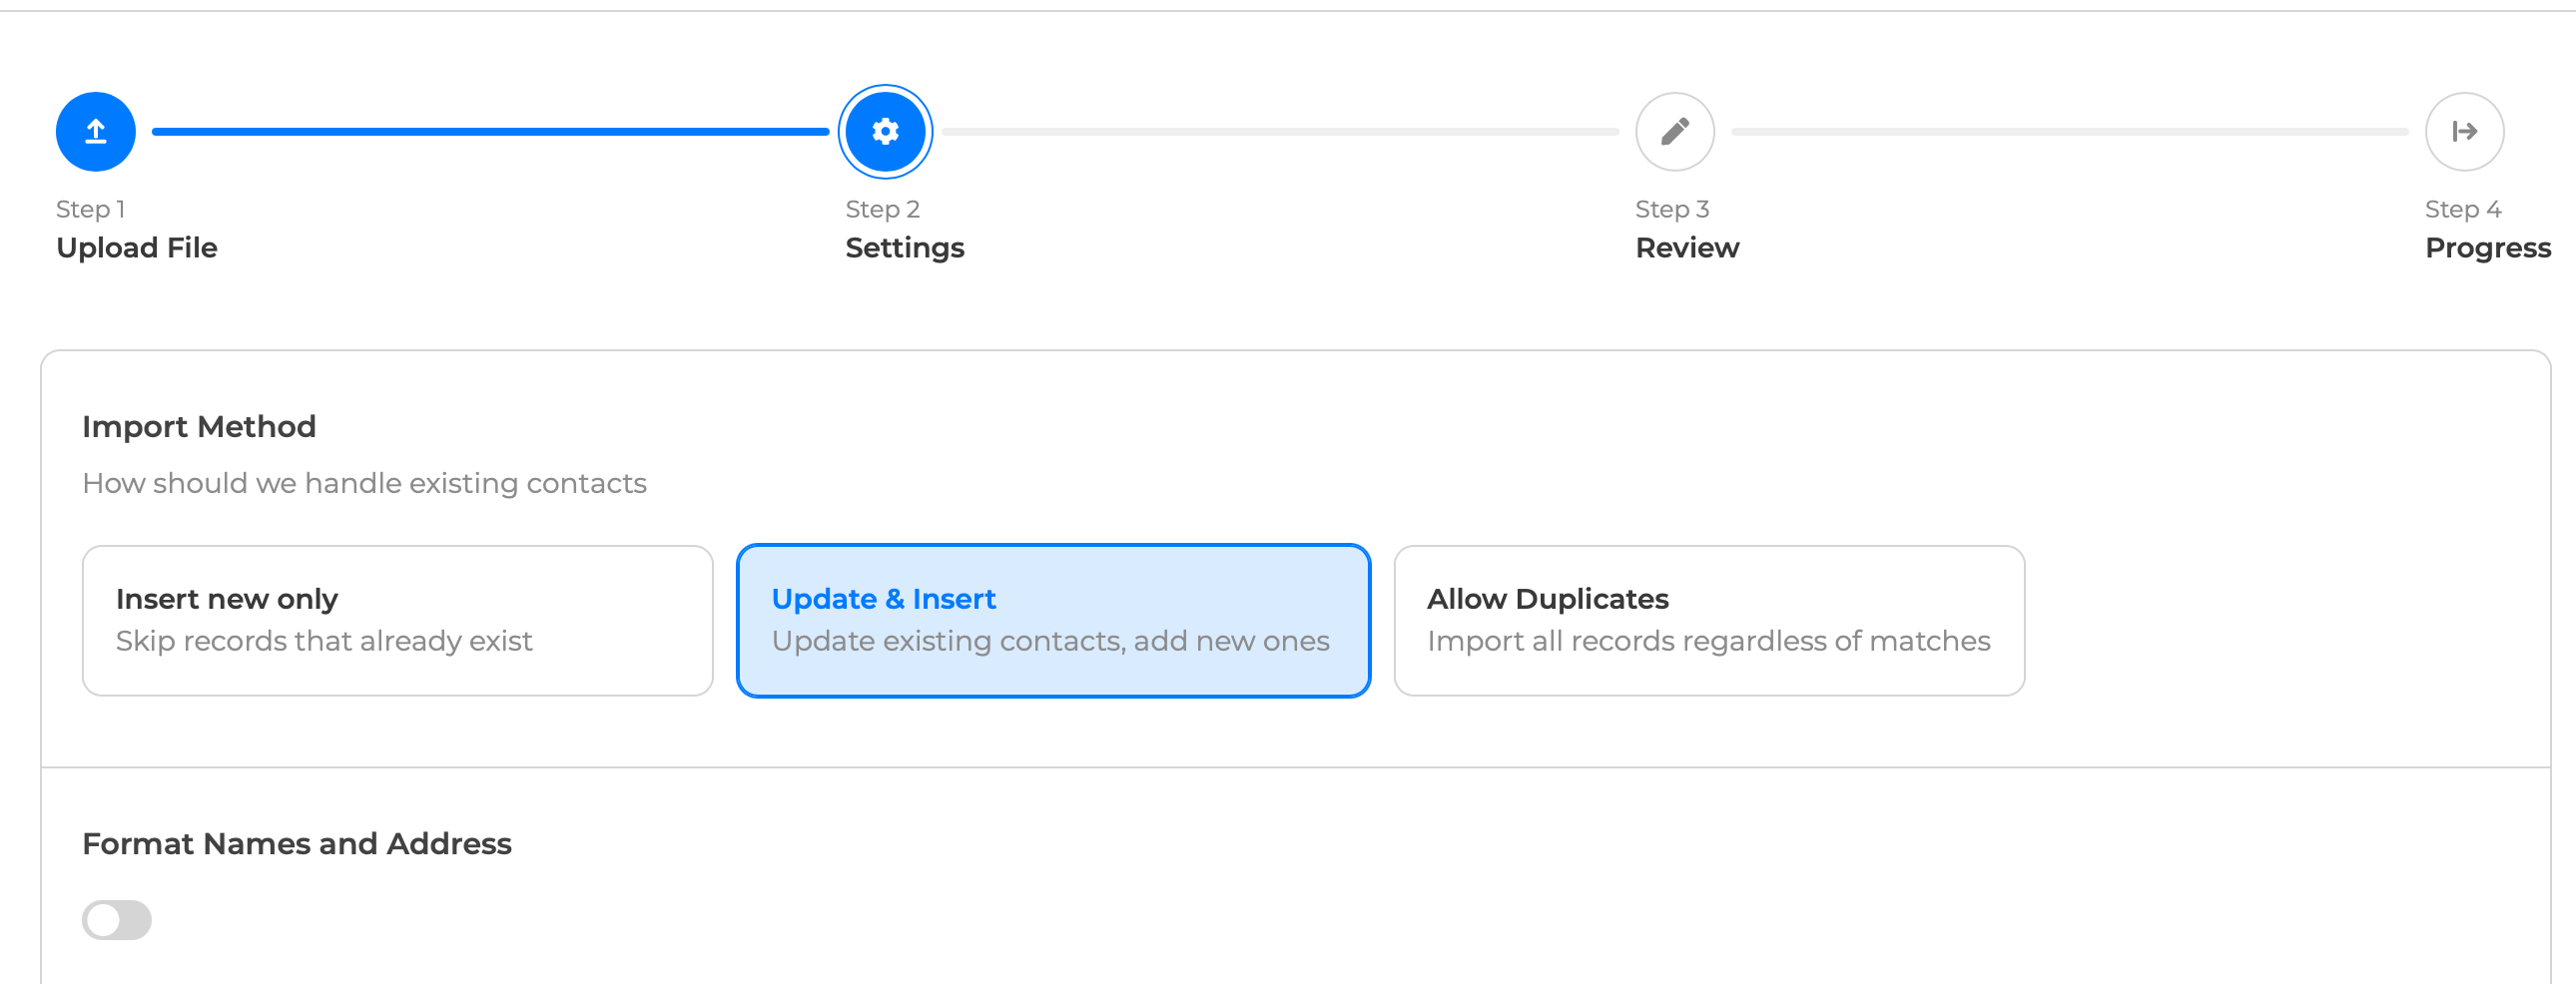
If you'd like to format your names and addresses added during the import process, check the Format Names and Addresses box. This option ensures consistency by correcting capitalization, punctuation, and common errors, making your contact information look uniform throughout your database.
Choose an Inside Team Member to assign the contacts.
Select a Category to add to all the contacts. This step is optional, however, adding a category will help you segment your audience for future marketing efforts!
Choose a Source to be added to all the contacts.
💡 Pro Tip: Label your contacts with a source name in alignment with where the contacts originated from (I.E. Zillow, an open house you hosted, etc.) . This helps you easily identify the origin of your contacts, keeping your database clean and organized!
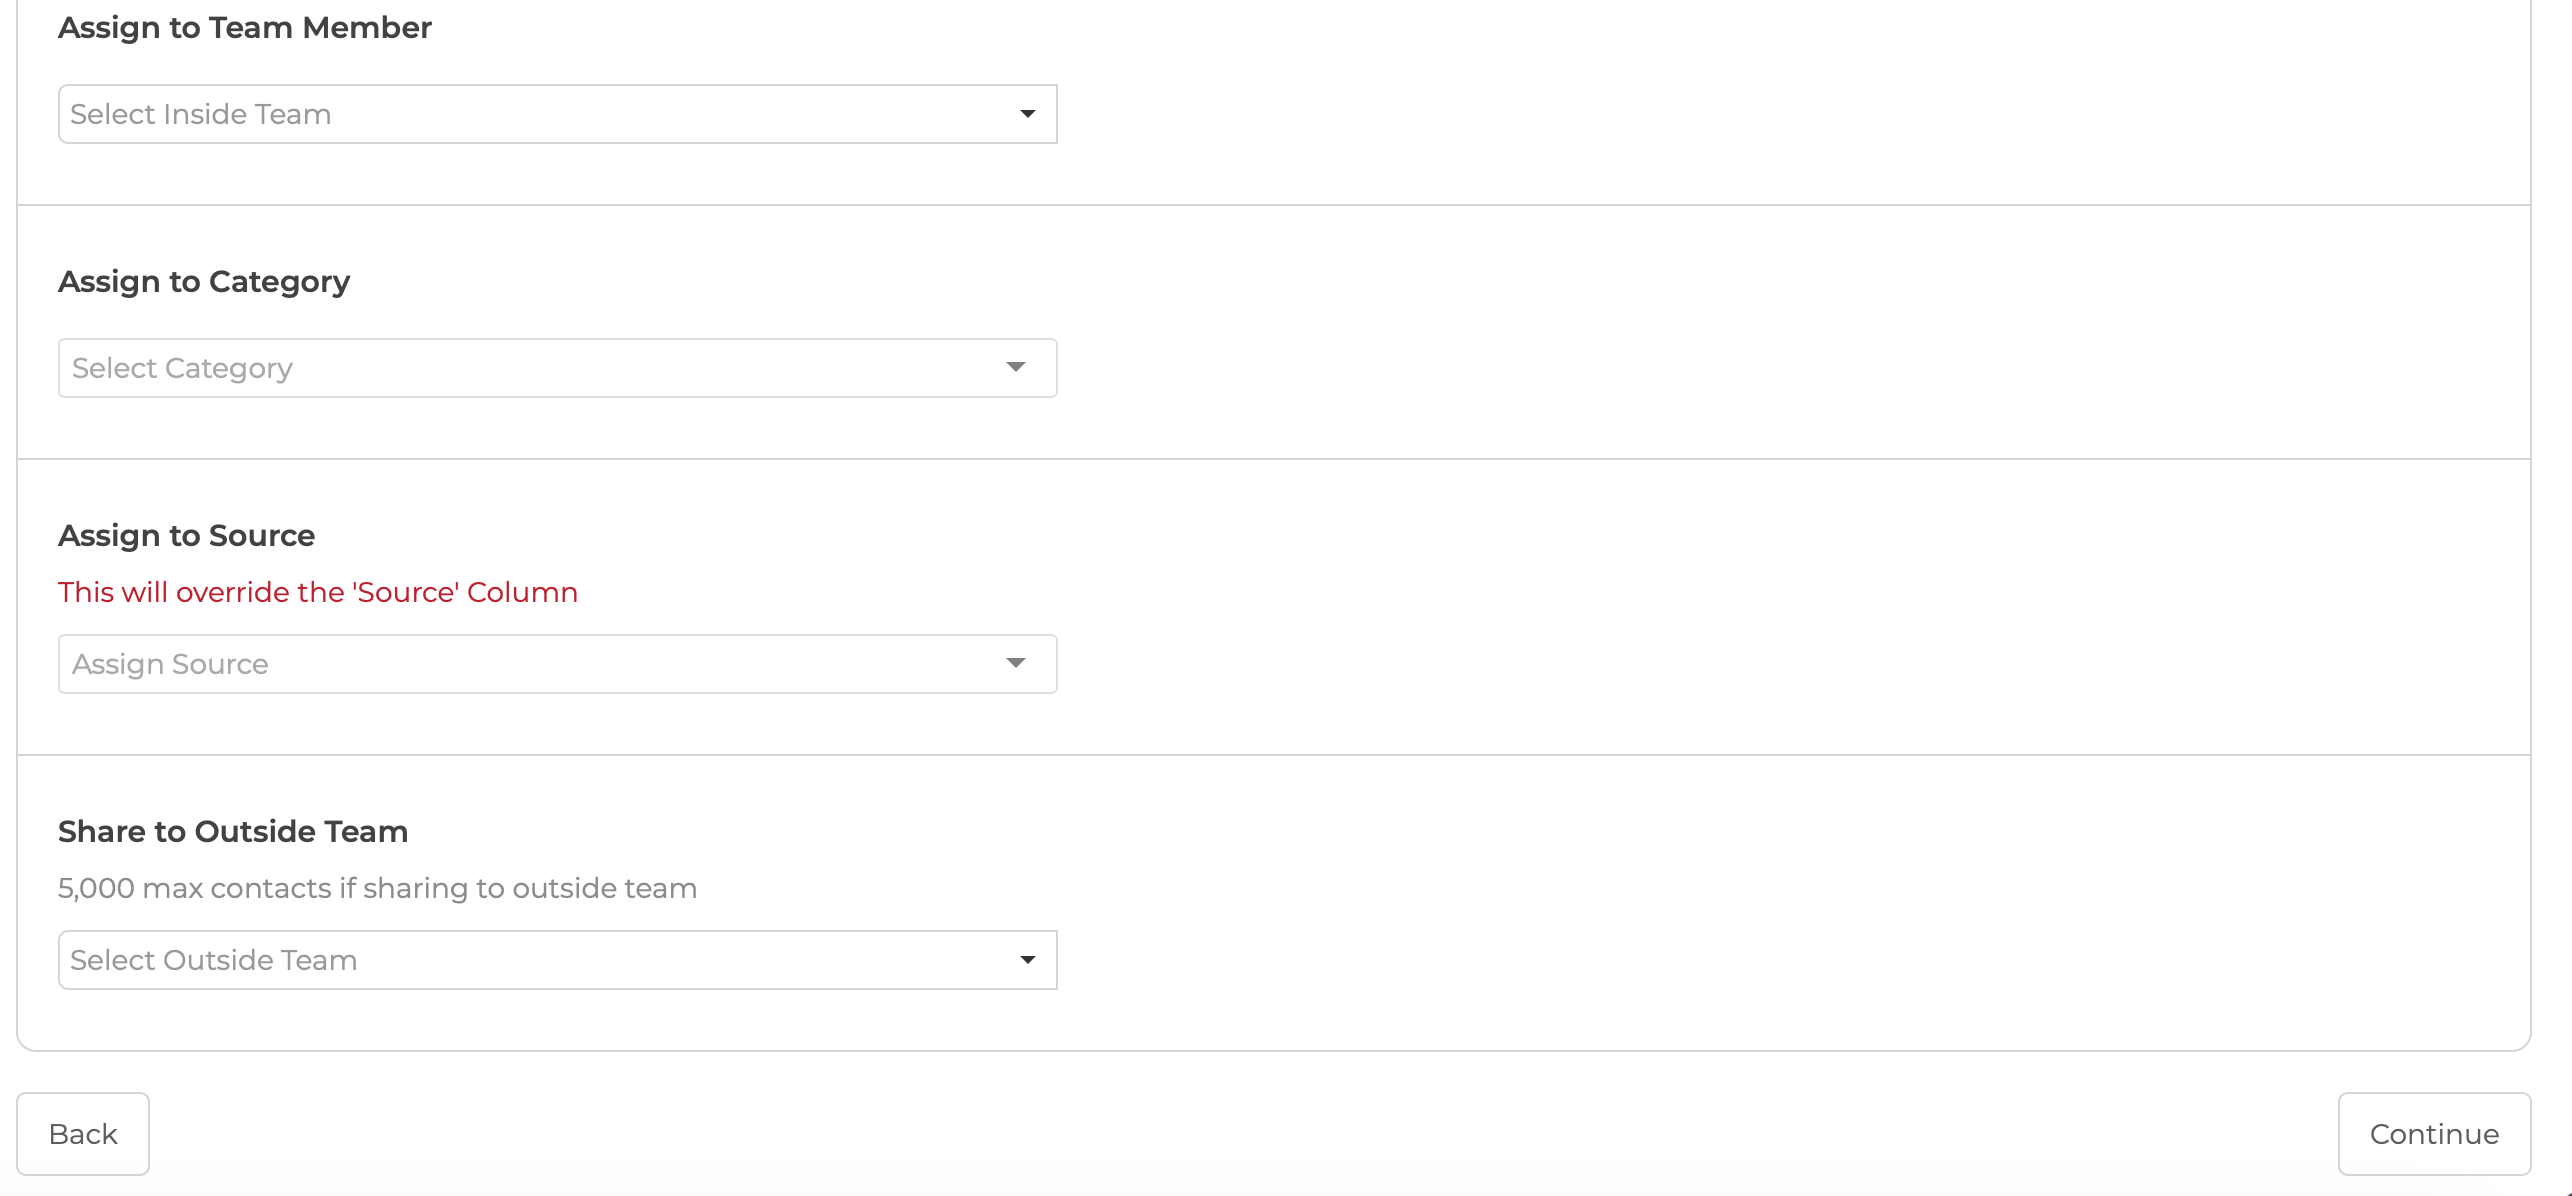
Click continue and review your Import
Lastly, the system will read the column headers in your file & those accepted will show a green checkmarkunder Status. If you have a red X under Status for any of your columns, make sure to select an accepted field to import into, using the dropdown menu beneath Accepted Columns.
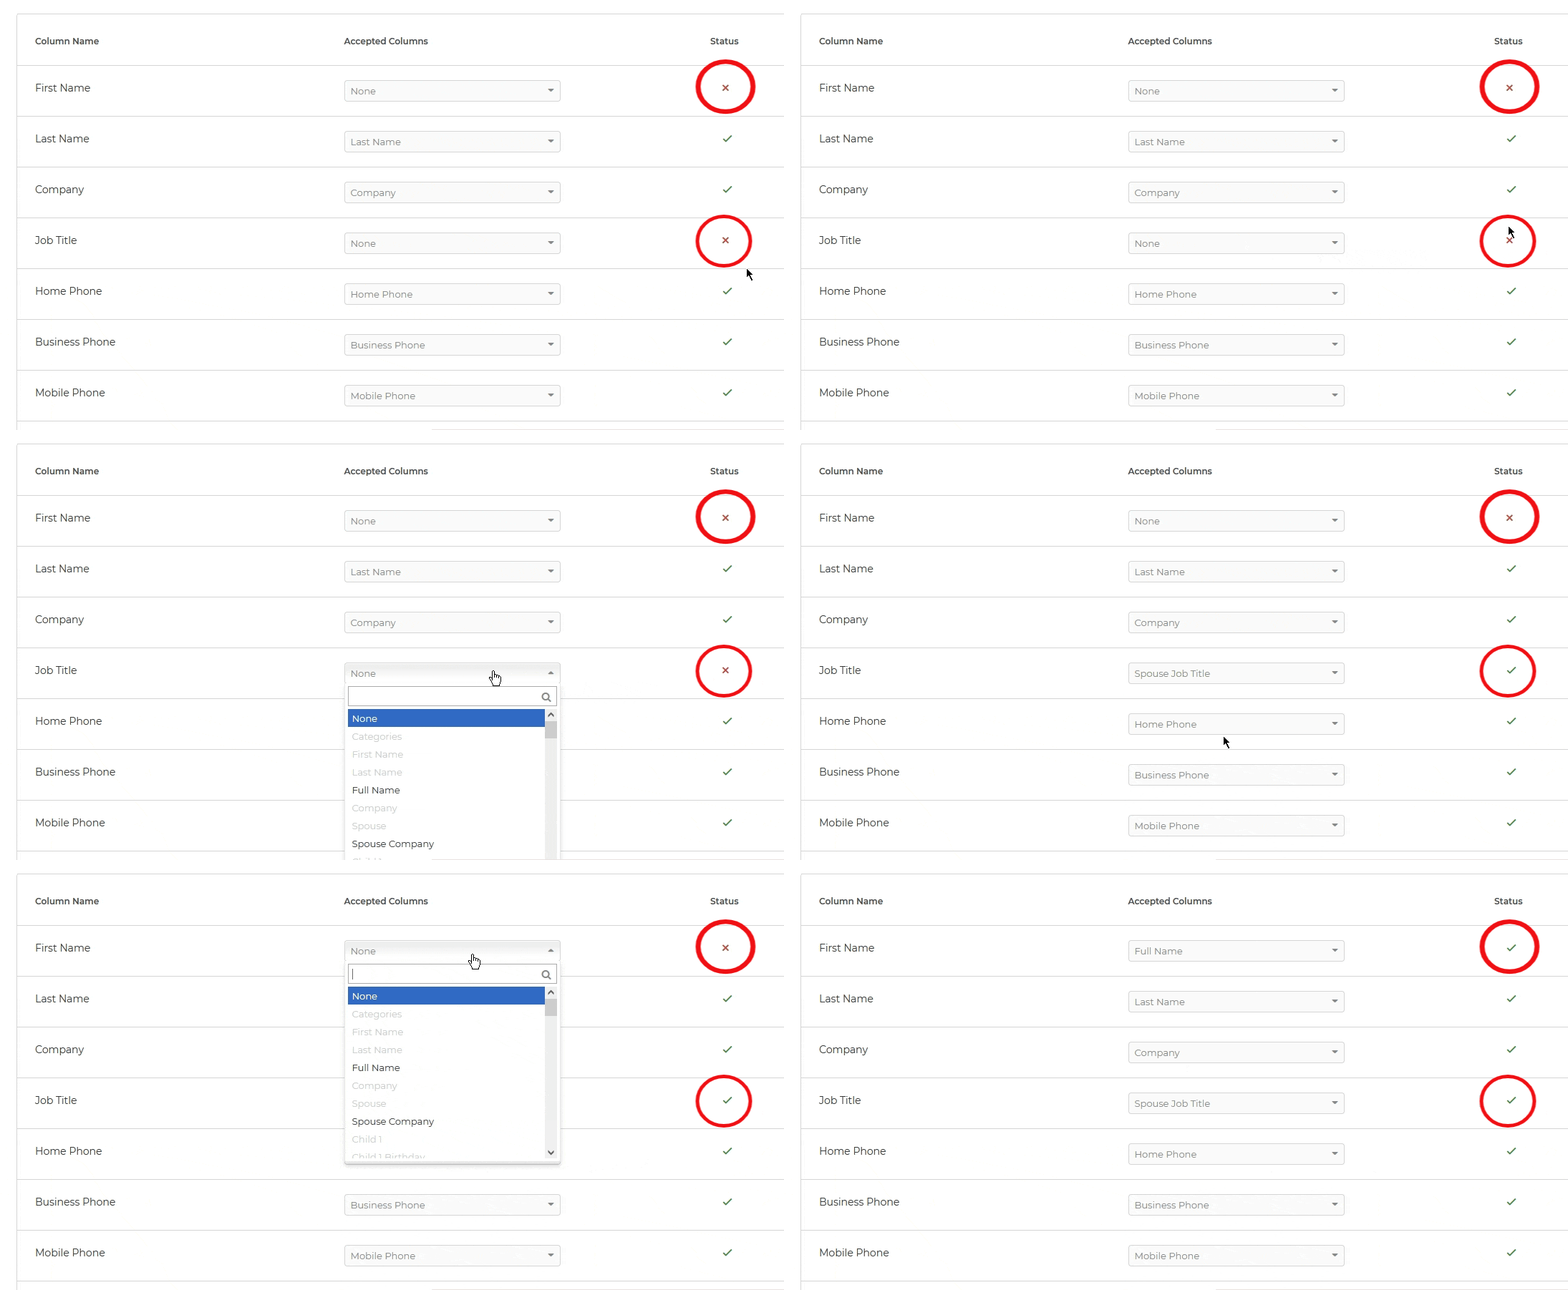
After completing all sections, click Import. Your contacts will soon be added to your Wise Agent contact list. That's it!
💡 Pro Tip: When adding multiple Important Dates, and/or Custom Fields, you will need to separate each date or field with a semicolon!
Example: Label: Date ; Label: Date ; Label: Date