Connecting Google Conversations
Login to your Wise Agent account.
Select Integrations in the sidebar, then click on Settings.
Scroll down to find Google Gmail Conversations & click to expand.
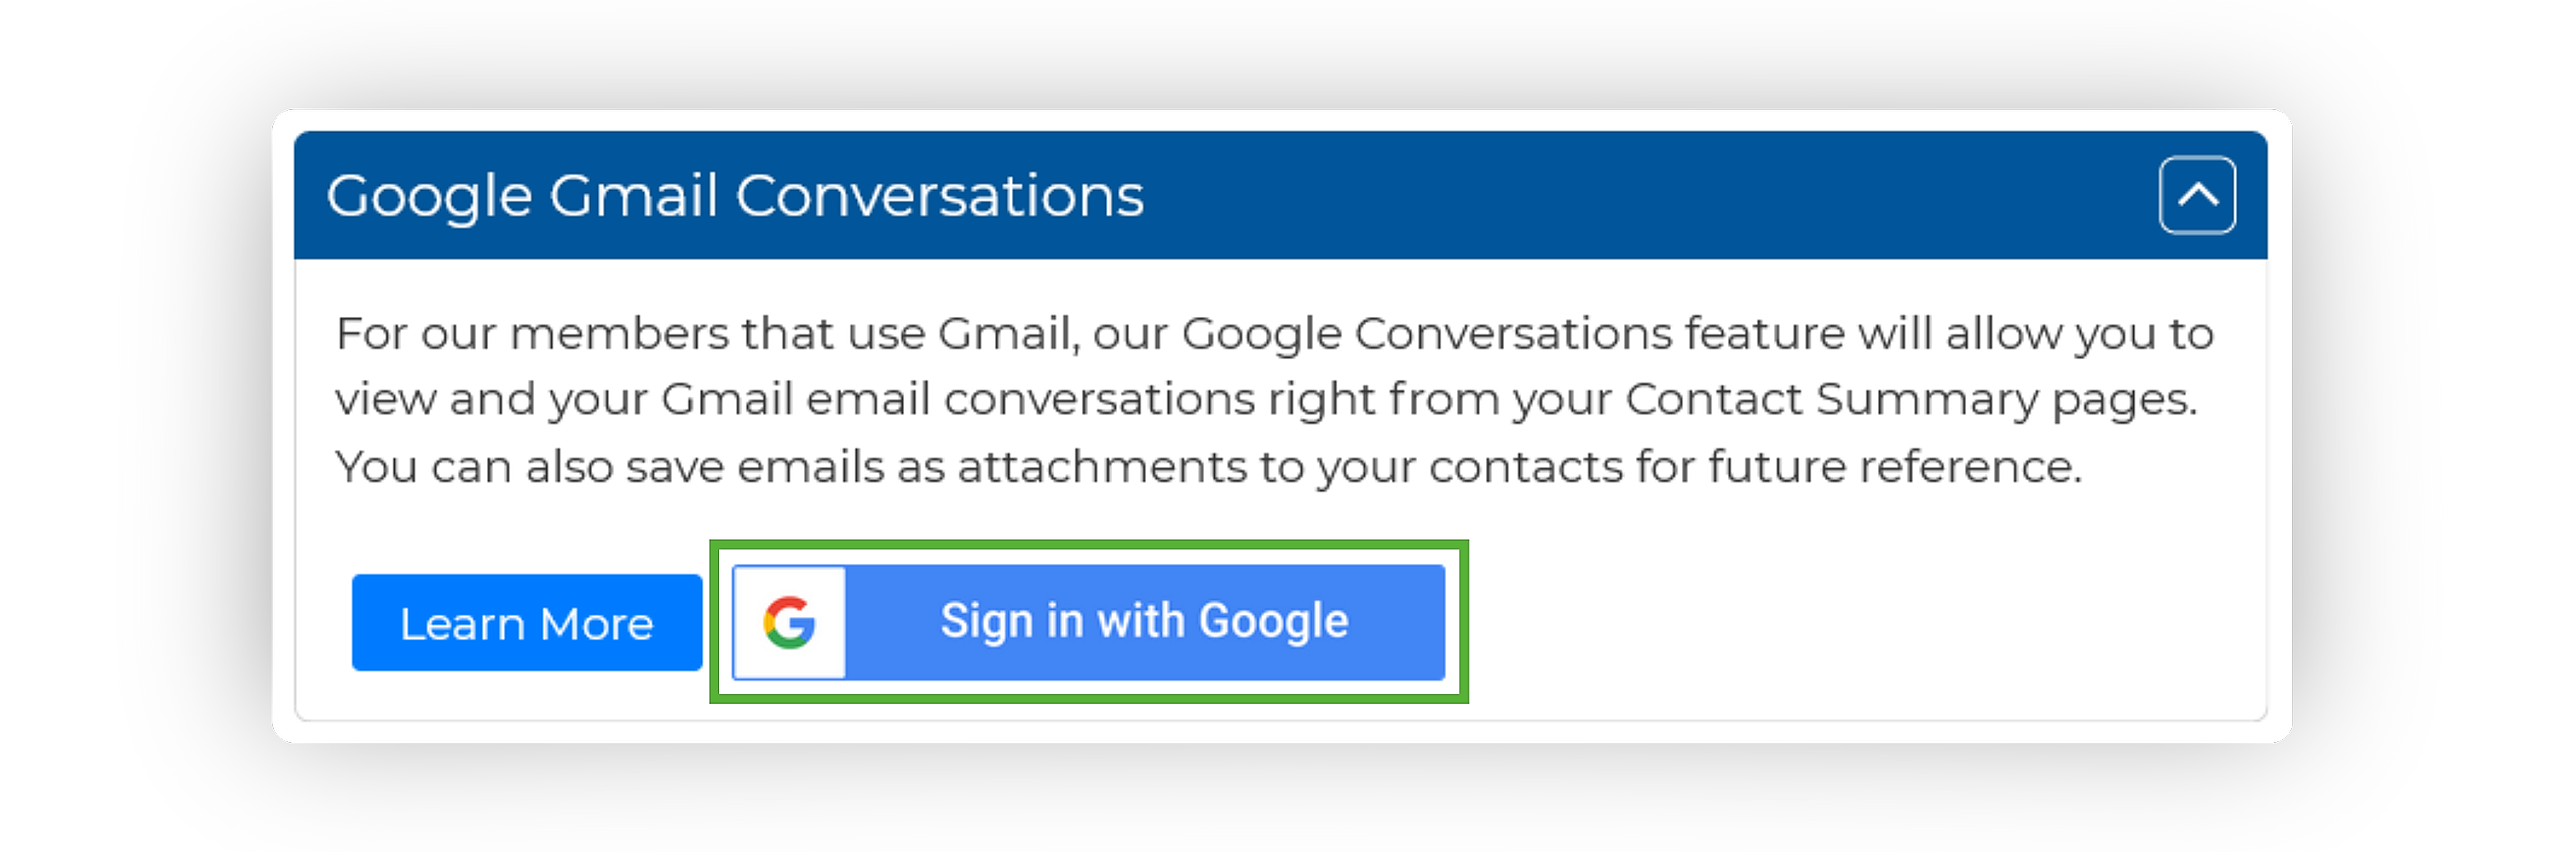
Click on Sign in with Google to proceed to the Google login page.
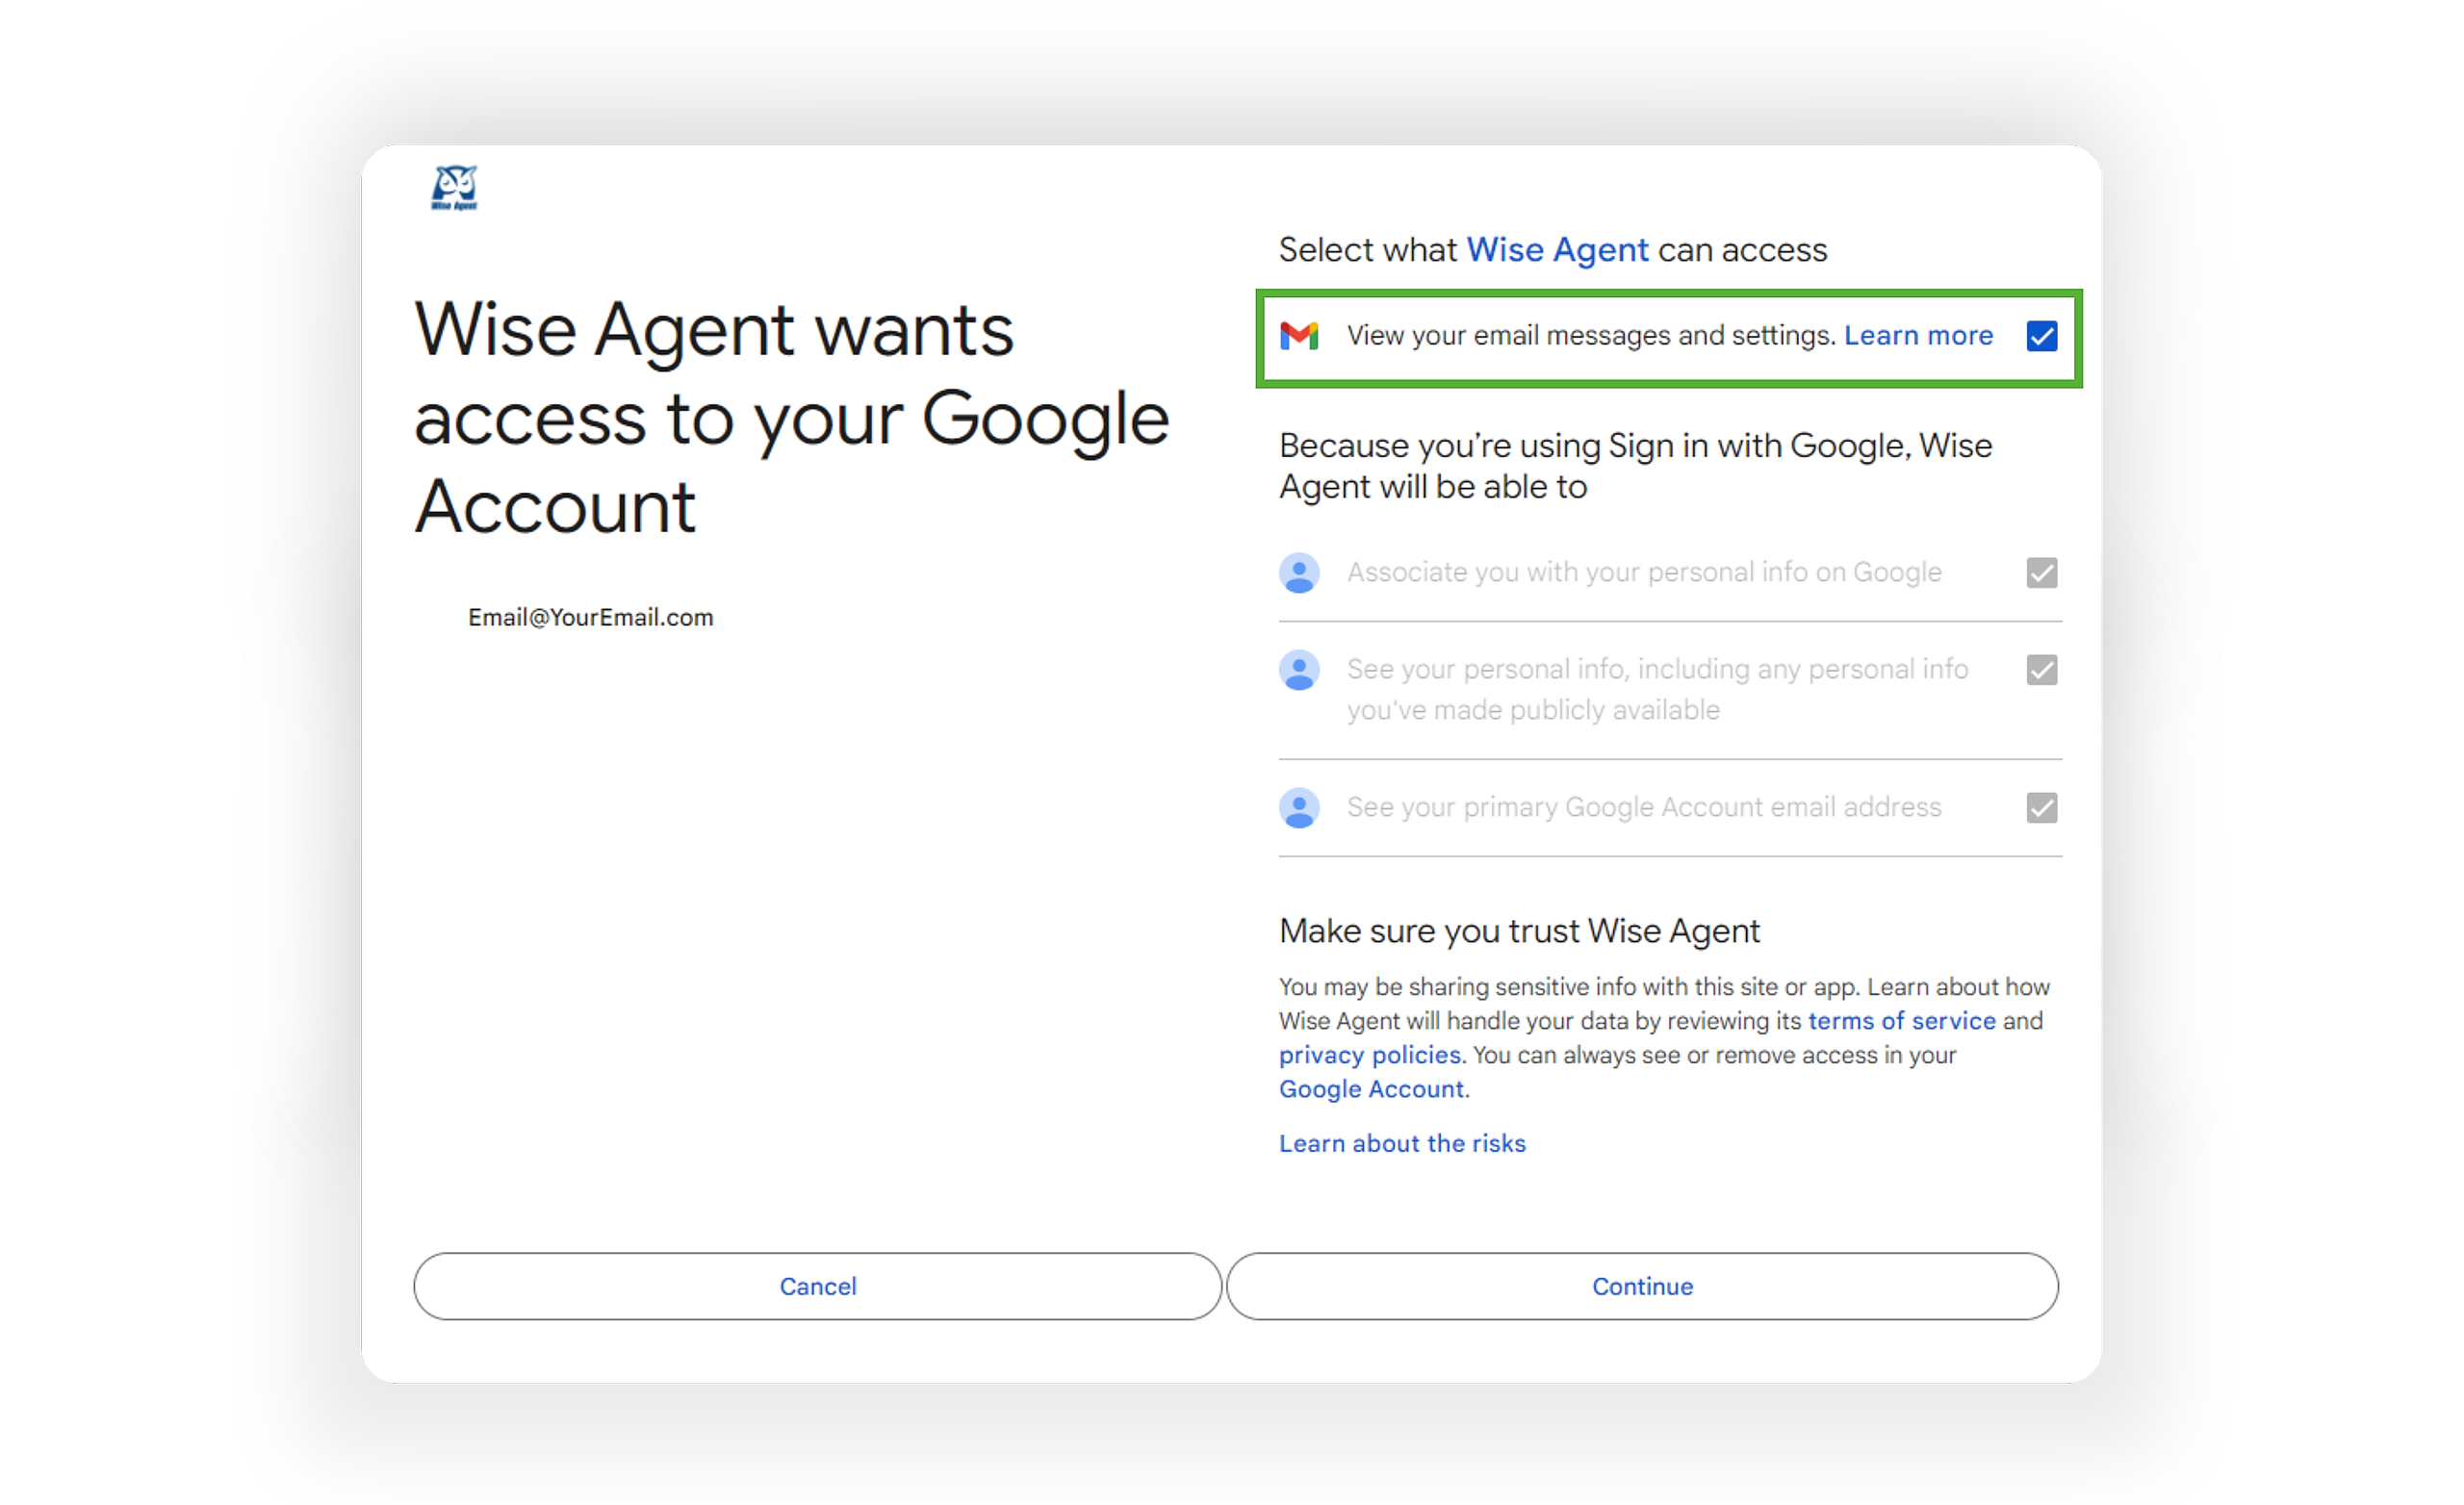
Login to the desired Gmail account with your Google credentials.
Upon signing in, you'll be directed to a permissions page. Make sure to select View your email messages and settings to enable viewing of email correspondence within your CRM. Once selected, click Continue.
Congratulations, you're now ready to utilize the integration! 🎉
View and Attach Your Gmail Communications
From the sidebar, select Contacts, then click Contact List.
Find and select your client from the contact list to open their Contact Summary Page.
On the Contact Summary Page, click on Gmail from the menu on the left-hand side.
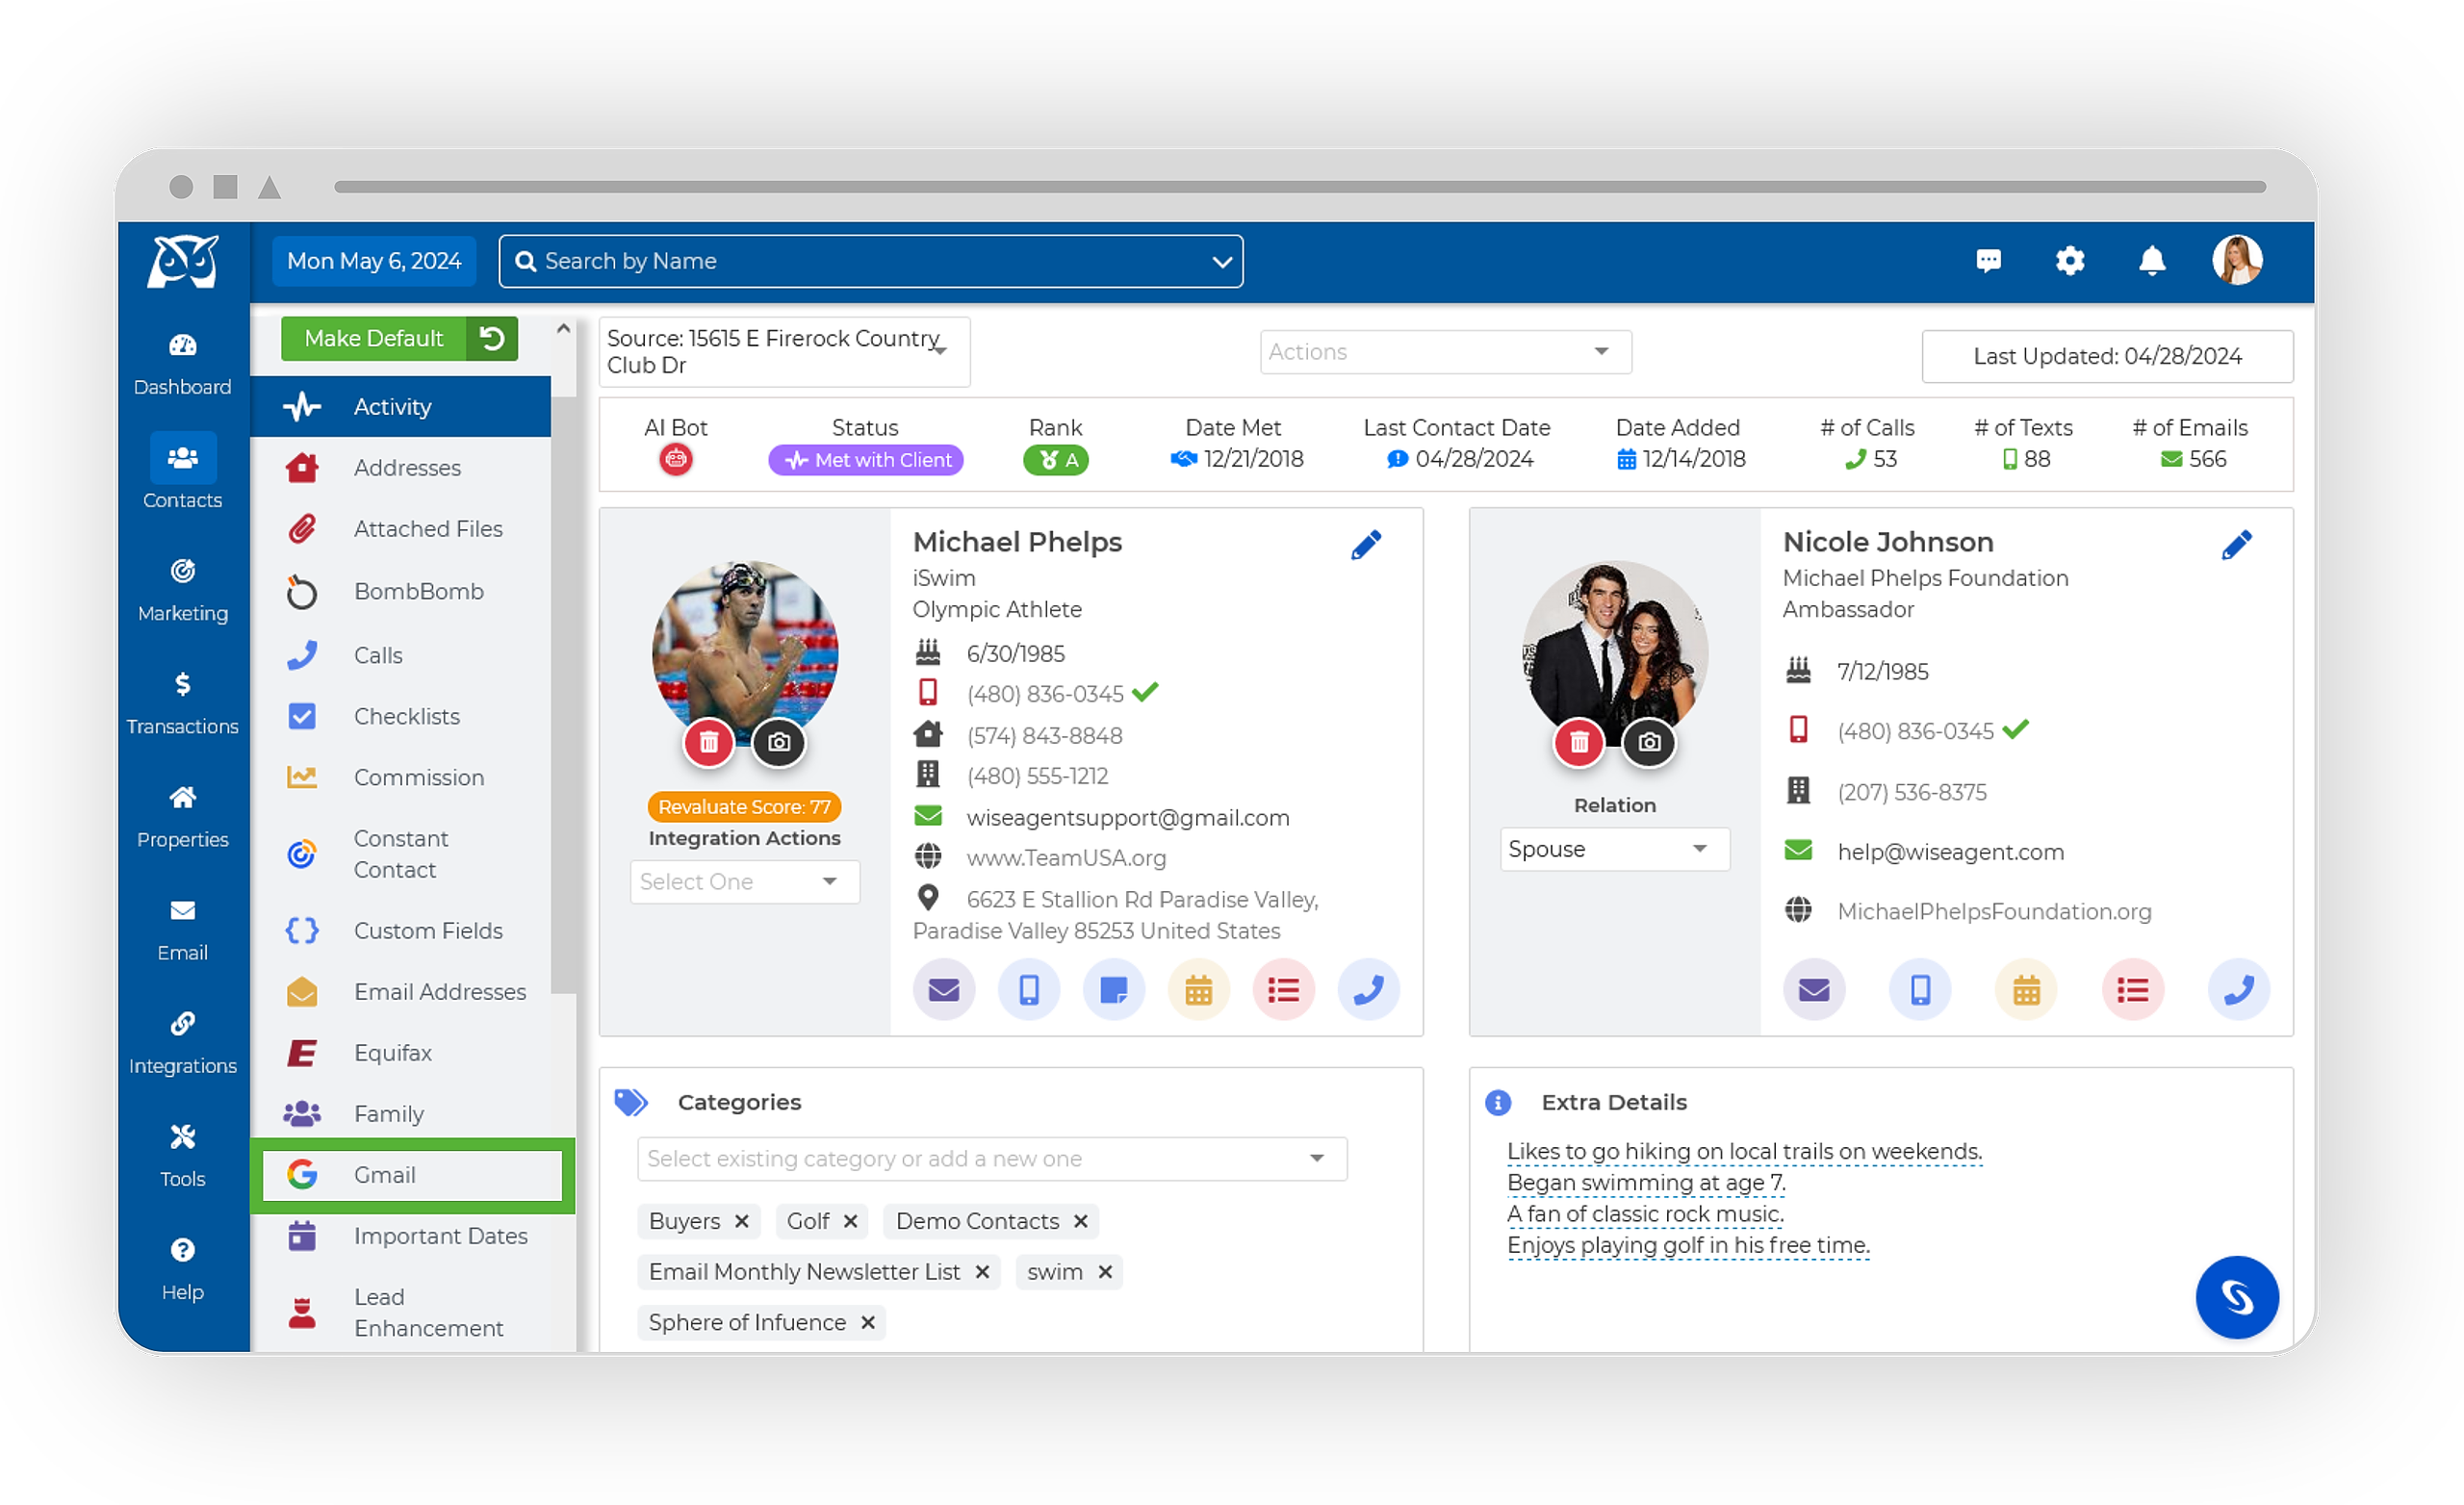
You'll now have access to all previous email correspondence with the client!

Attaching Gmail Communications as a Note
From the sidebar, select Contacts, then click Contact List.
Find and select your client from the contact list to open their Contact Summary Page.
On the Contact Summary Page, click on Gmail from the menu on the left-hand side.
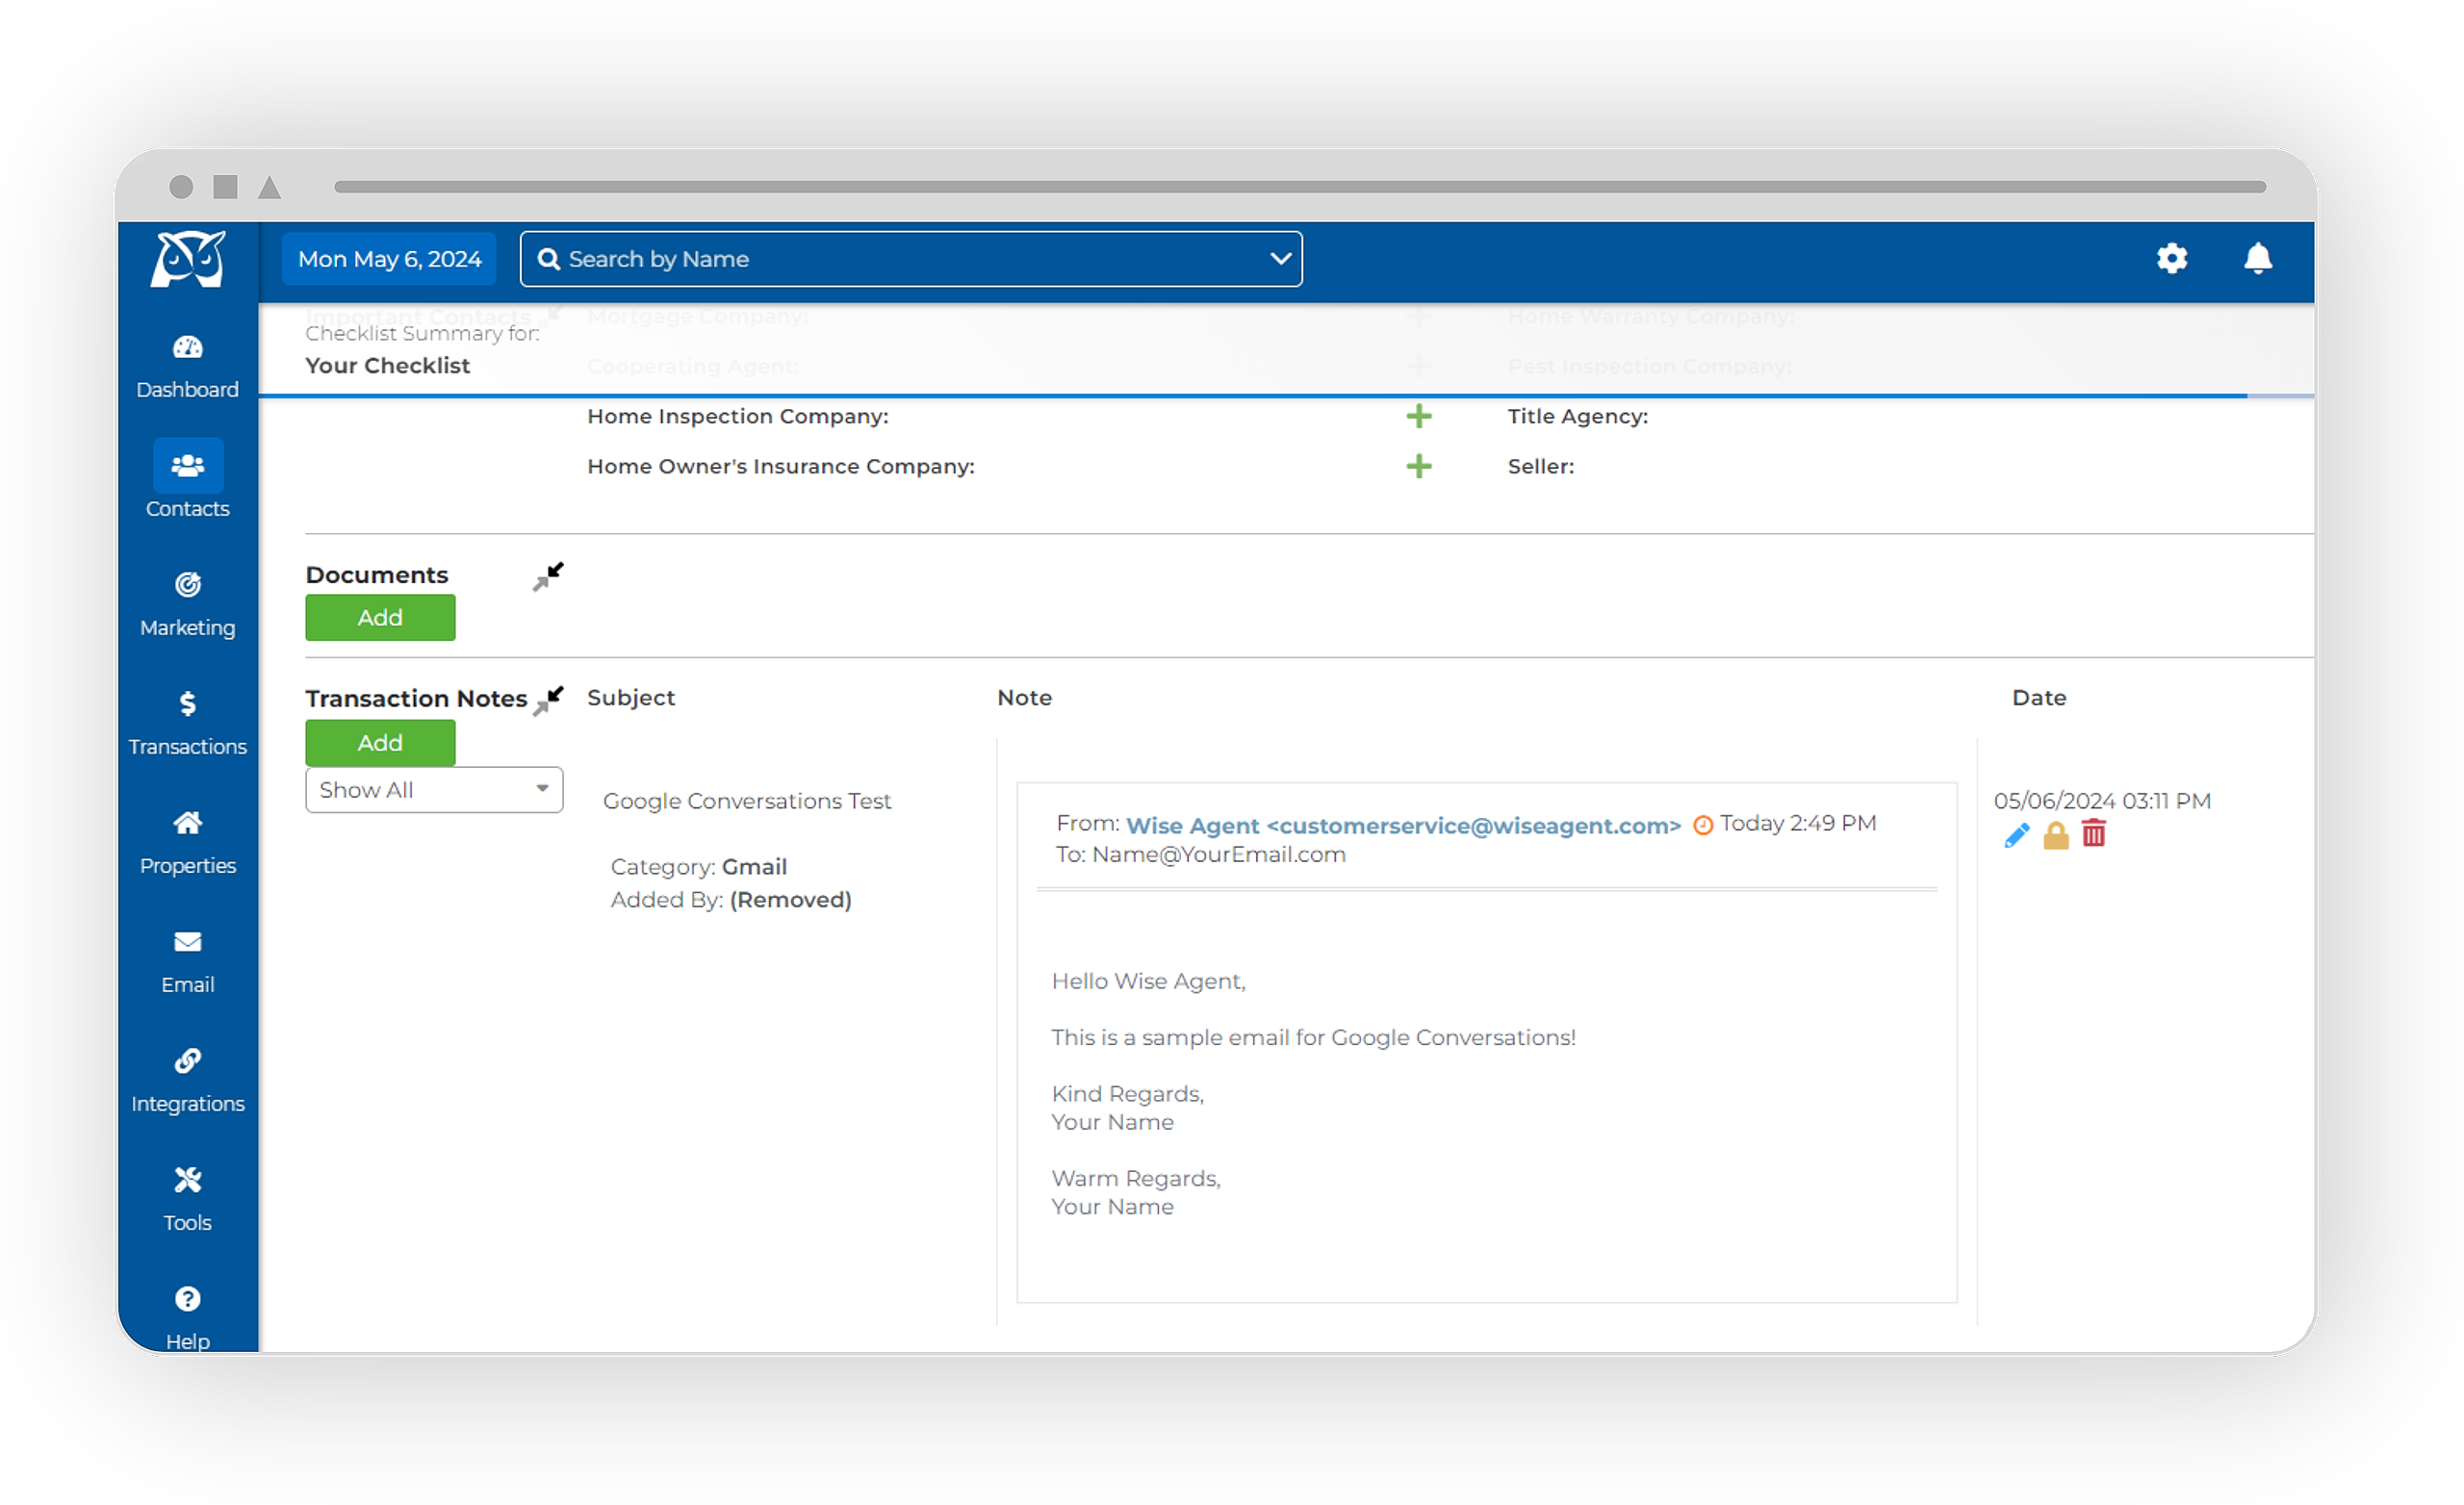
To the left of the email's subject, select the Note icon.

Once selected, the email will be saved in your Activity Tracker as a Note!
Attaching Gmail Communications to a Transaction Checklist
From the sidebar, select Contacts, then click Contact List.
Find and select your client from the contact list to open their Contact Summary Page.
On the Contact Summary Page, click on Gmail from the menu on the left-hand side.
To the left of the email's subject, select the Checkbox icon. This will prompt the Add To Checklist modal to appear.
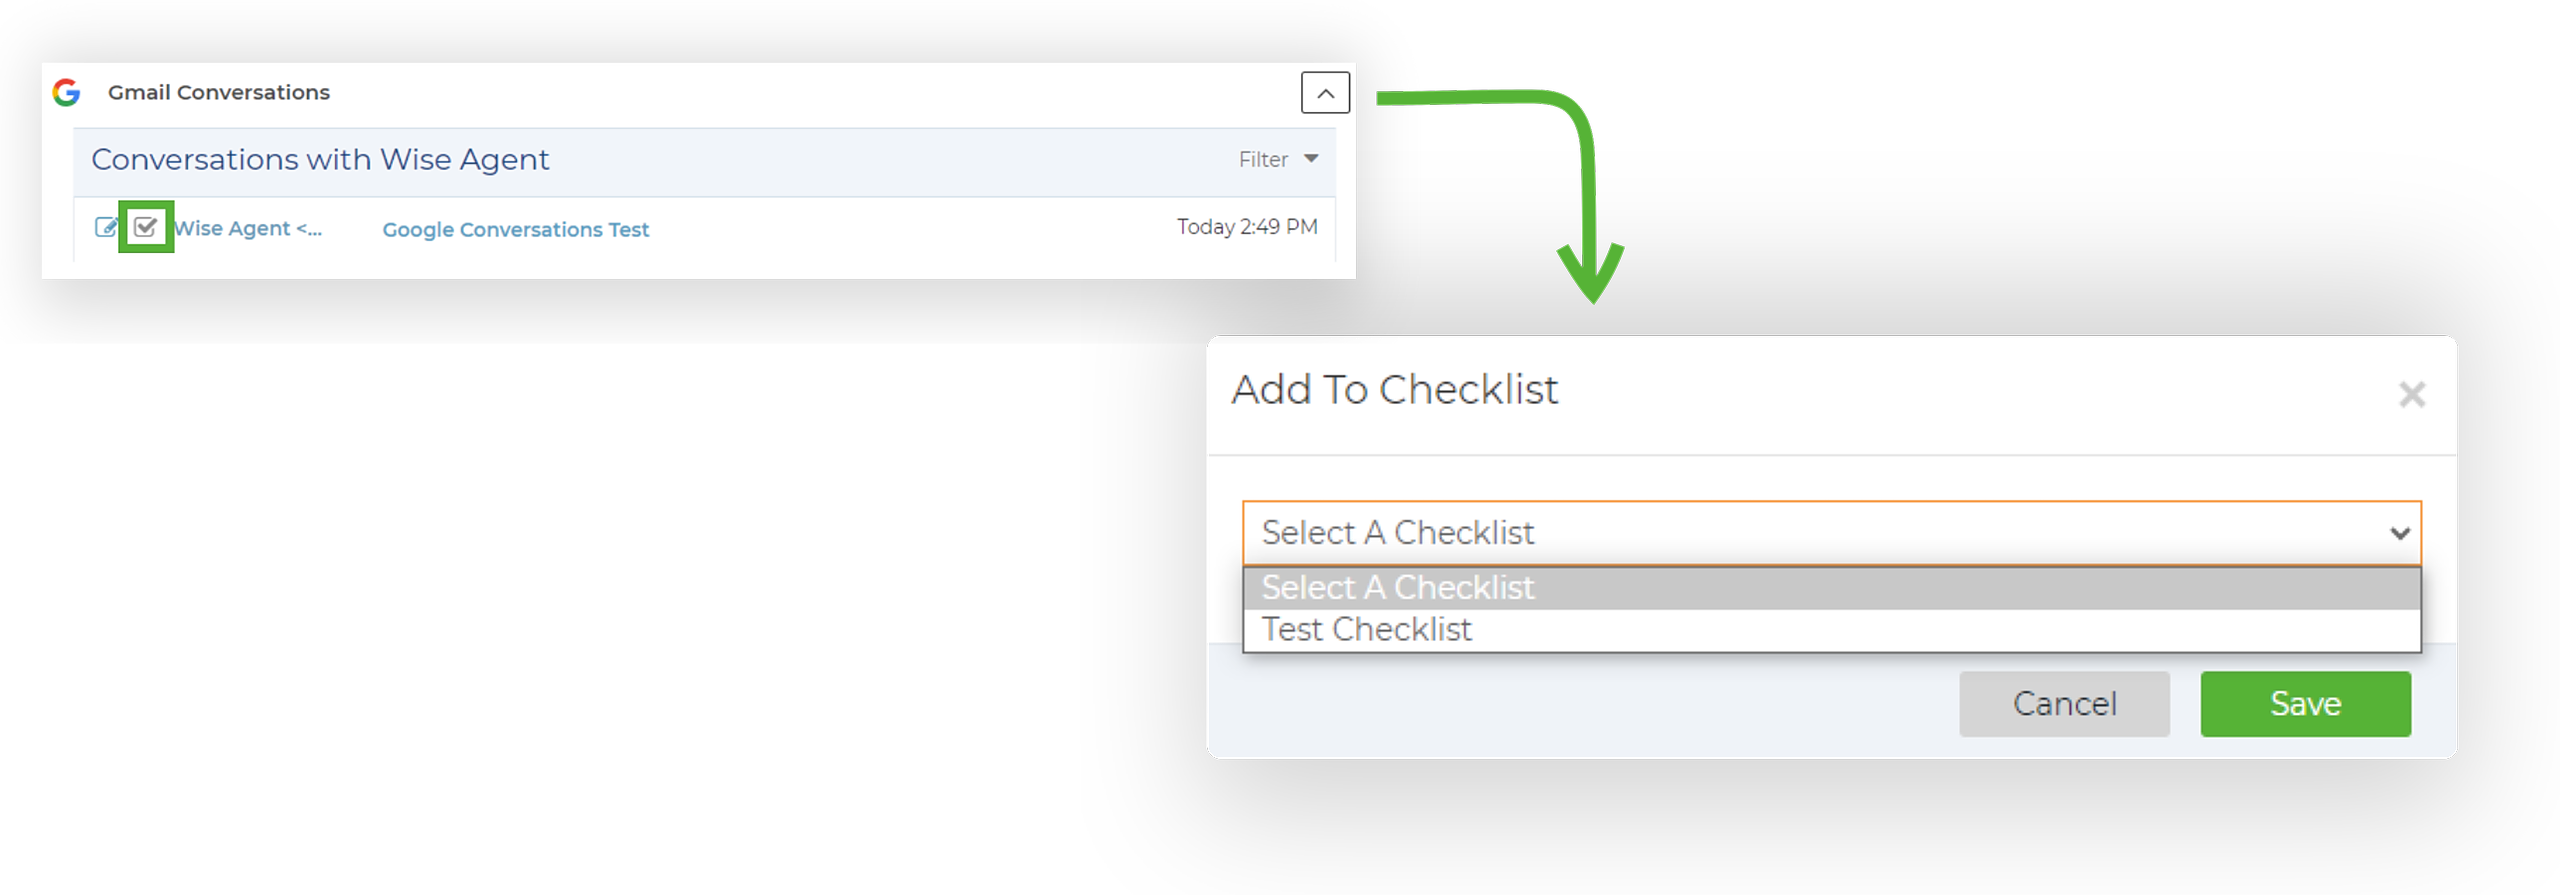
Choose the desired checklist from the Select A Checklist drop-down menu, then click Save.
Your email will now be accessible under the Transaction Notes on your checklist!