Adding MFA For The Main Account Holder
In the upper right-hand corner, click the Gear Icon and select Profile.
To the right of account details, locate Account Login, then click the blue pencil icon.
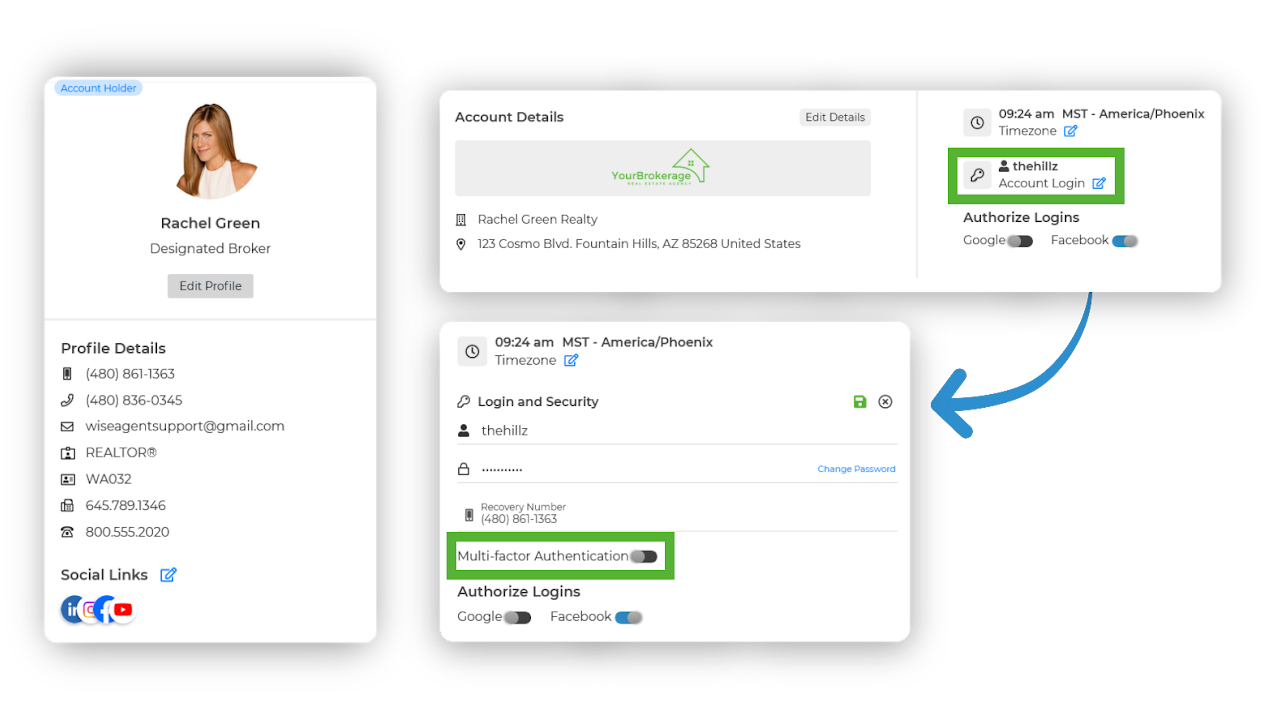
Toggle on Multi-Factor Authentication.
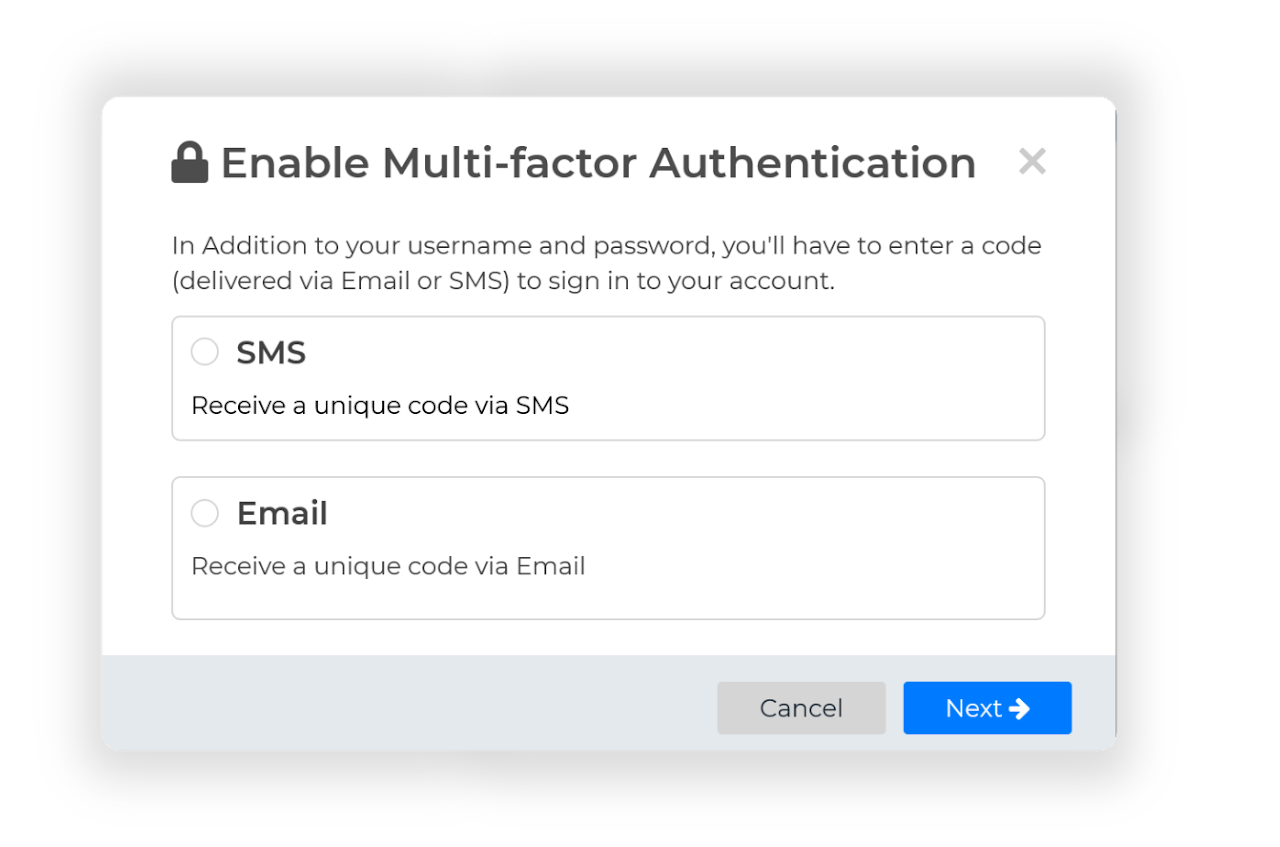
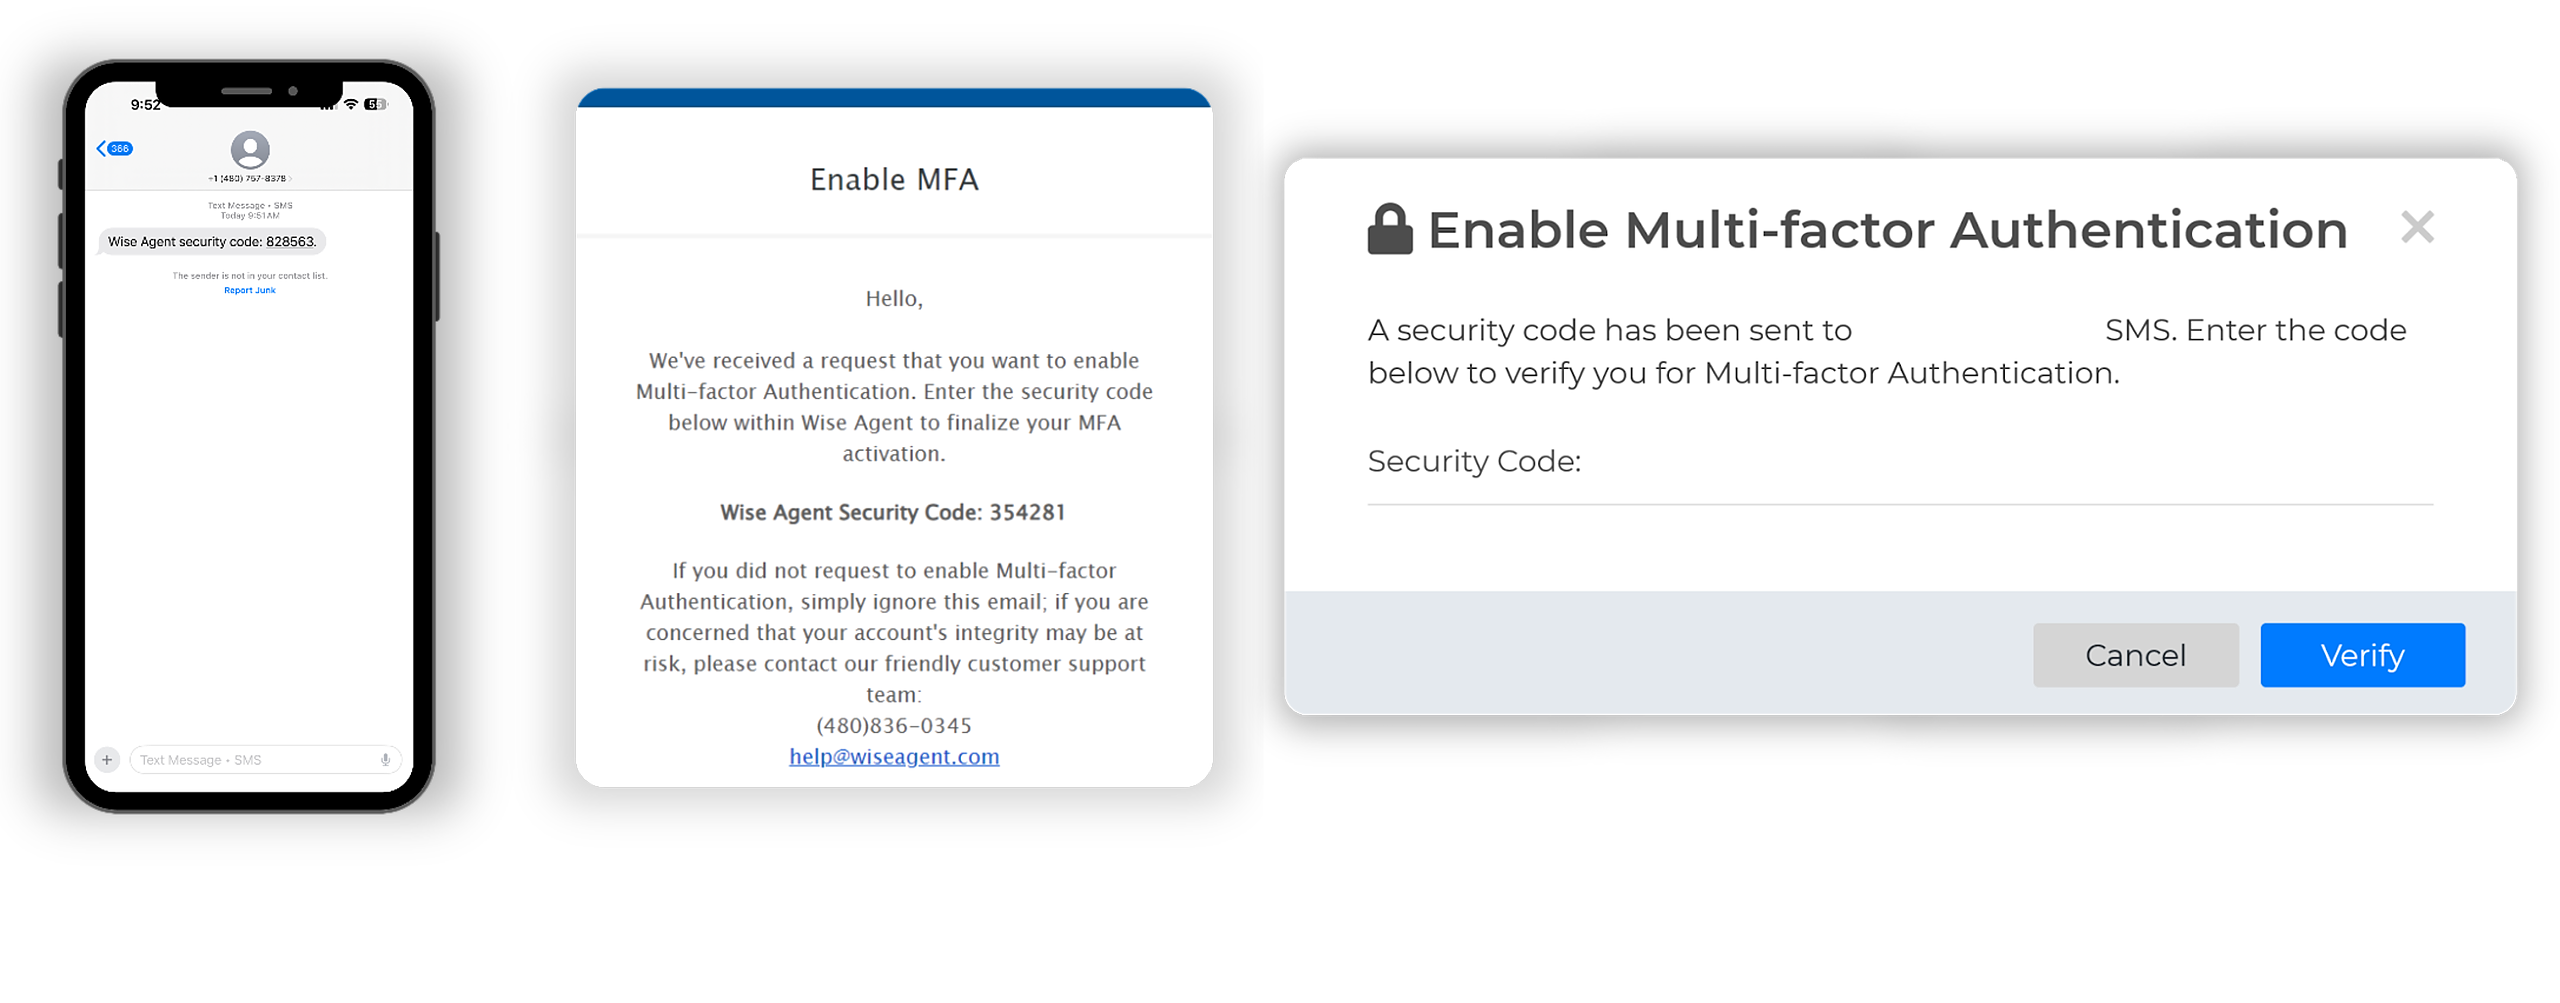
A pop-up will appear prompting you to enable MFA; Select your preferred MFA method and click Next.
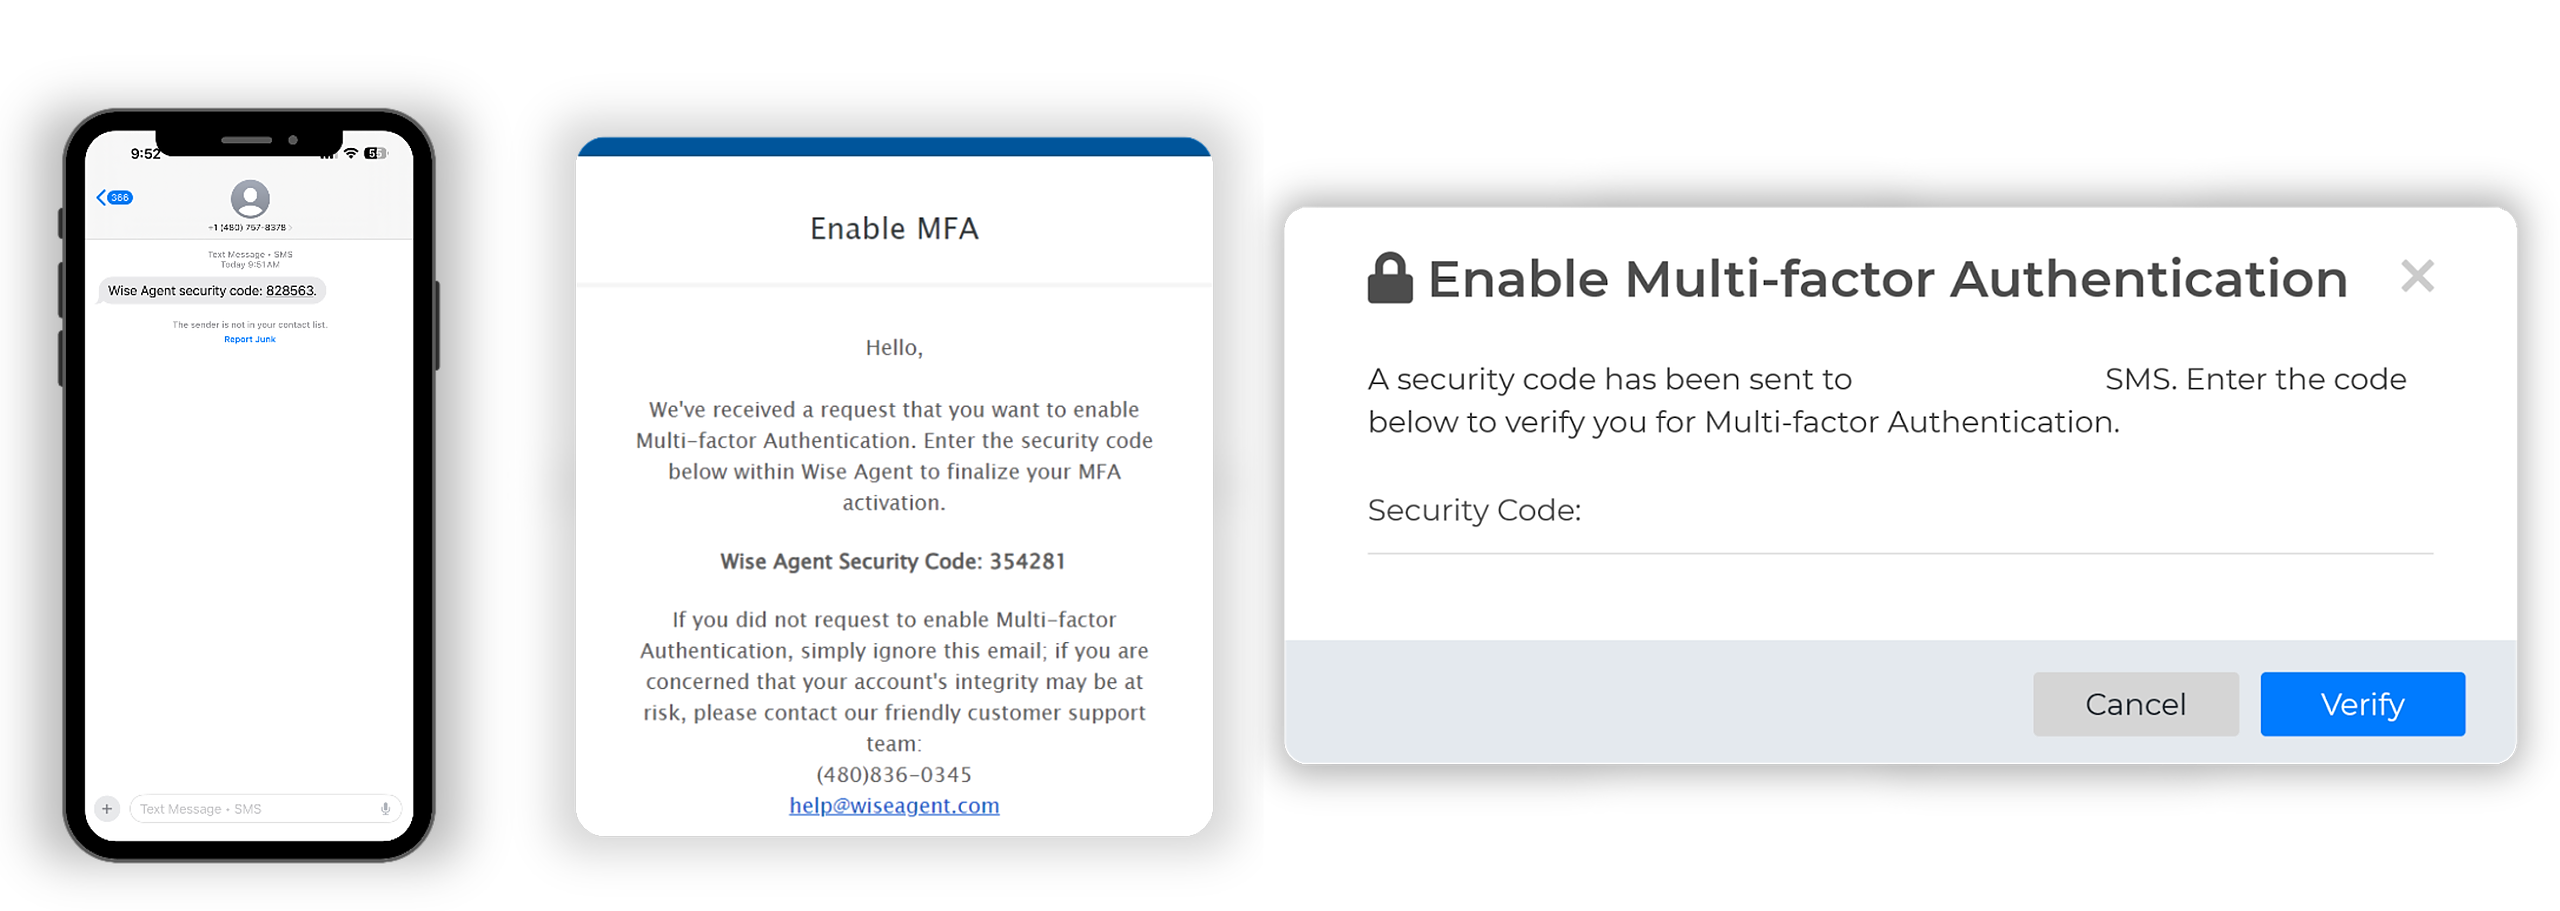
A verification code will be sent via text or email depending on your selection. Enter the verification code you received and click Verify to complete the process.
Adding MFA For Inside Team Members
In the upper right-hand corner, click the Gear Icon and select Profile.
In the Inside Team section, found below the Account Details, click View Profile under the appropriate team member's card.
Scroll down to the Profile Login section beneath the social links, then click the blue pencil icon.
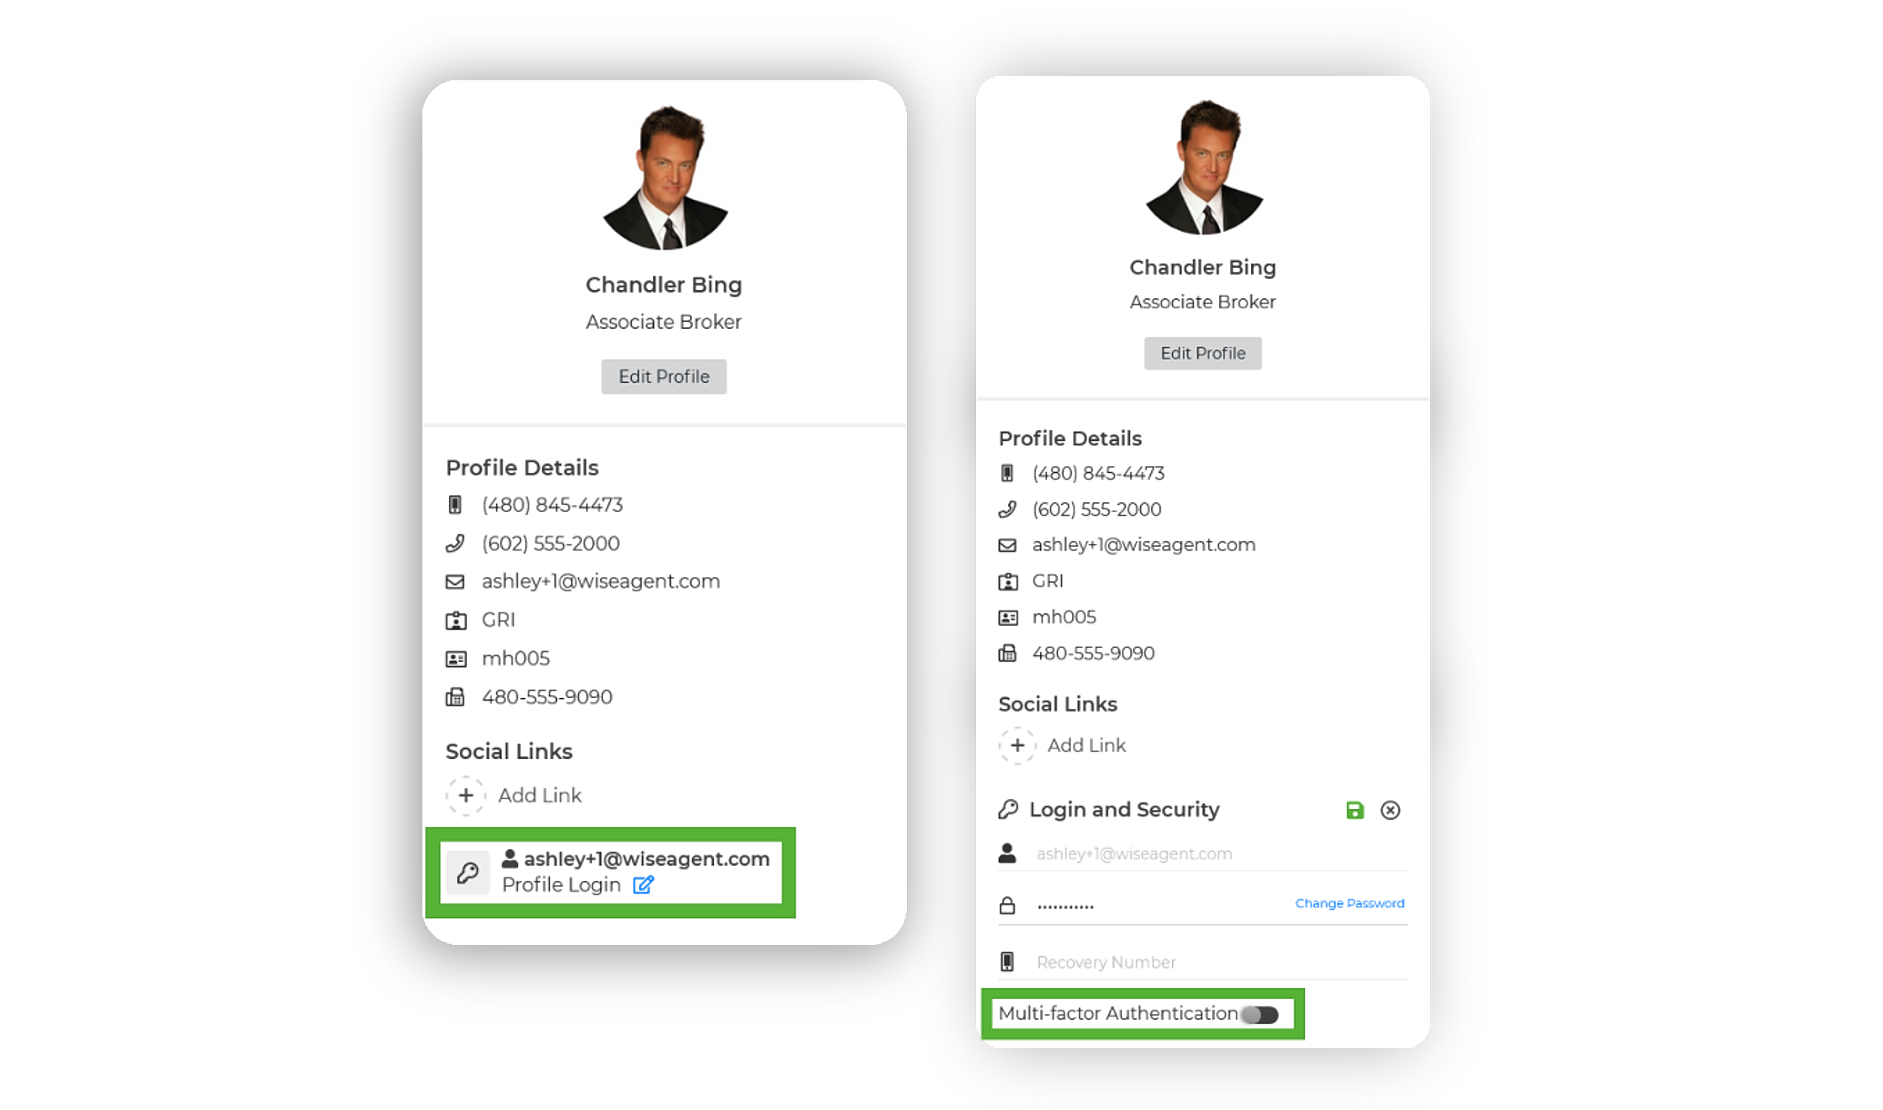
Toggle on Multi-Factor Authentication.
When the Enable Multi-Factor Authentication pop-up appears, choose your preferred MFA method and click Next.

A verification code will be sent via text or email to the inside team member, depending on your selection.
Enter the verification code you received and click Verify to complete the process.
Adding MFA When Logging Into Outside Team Member Accounts
In the upper right-hand corner, click on the Gear Icon and navigate to Permissions.
Choose the Outside Team Member whose permissions you'd like to adjust.
From the available permission categories on the left-hand side, click on Other.

Enable the option to Require Multi-Factor Authentication, then click Save to apply the changes.
Once these settings are saved, your outside team member will be required to complete Multi-Factor Authentication (MFA) upon logging into your account.
Setting Permissions To Require MFA For Inside Team Members With Logins
In the upper right-hand corner, click on the Gear Icon and navigate to Permissions.
Choose the Inside Team Member whose permissions you'd like to adjust.
From the available permission categories on the left-hand side, click on Other.
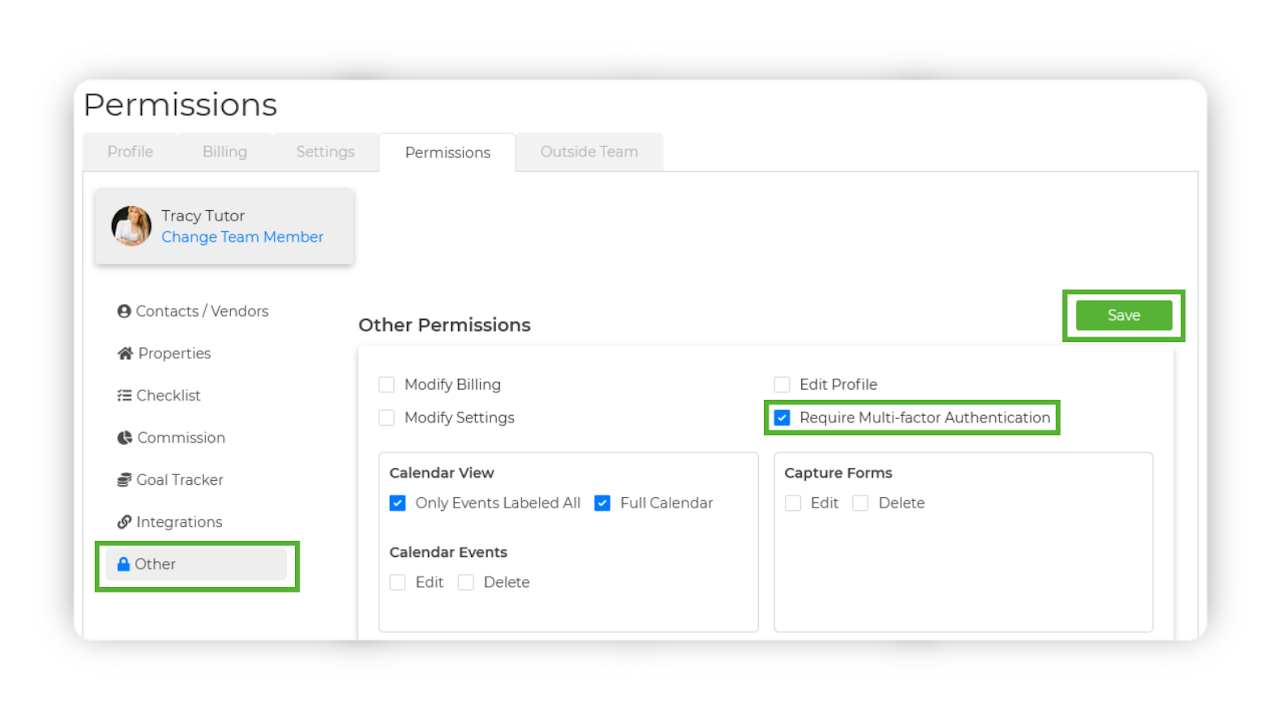
Enable the option to Require Multi-Factor Authentication, then click Save to apply the changes.
Once these settings are saved, your inside team member will be required to complete Multi-Factor Authentication (MFA) upon logging into their profile, regardless of whether they set up MFA on their profile.
‣ If an Inside Team Member has not added a recovery phone number, the verification code will be sent via email.
‣ If a recovery phone number is on file, the code will be sent via text message.
‣ Alternatively, if MFA is already enabled for the team member and a delivery method (text or email) has been specified, the verification will be sent accordingly.