Once you have activated WiseSocial, the next step is setting up your account. This includes connecting your social media profiles and configuring your brand, content, and listing preferences.
Complete all four settings sections: Profile, Brand, Content, and Listings before you begin posting or enabling automations. This ensures your content is accurate and branded from the start.
Step 1: Connect Your Social Media Accounts
After you log into WiseSocial via SSO, the dashboard will prompt you to connect your social media accounts and MLS ID. However, if you exit that prompt, you can follow the steps below to set up your account.
To connect your Social Media accounts:
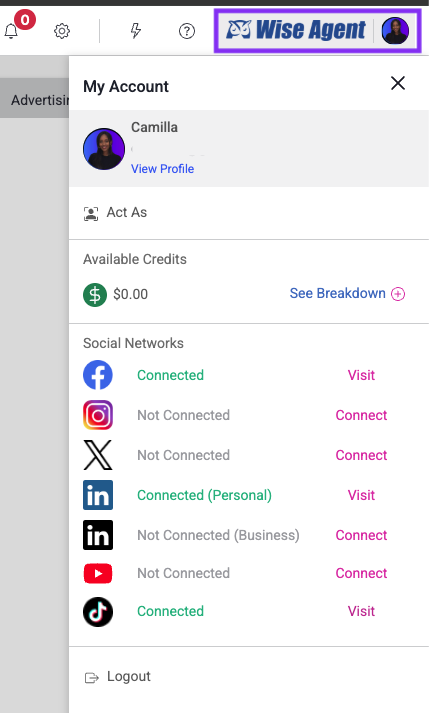
In the top-right corner of the dashboard, click your agent photo (the account icon) next to the Wise Agent logo.
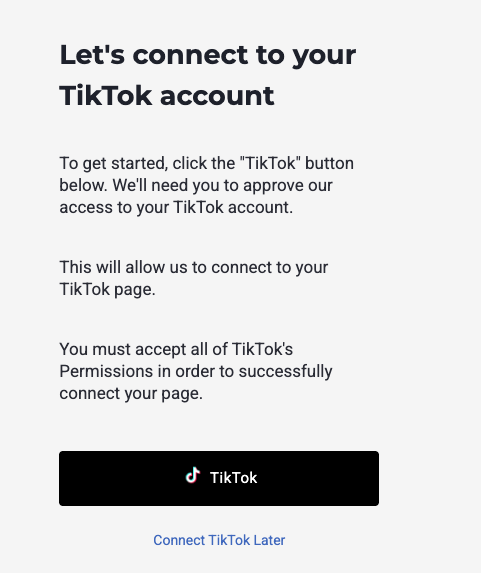
For each platform you want to connect, click the Connect link.
Confirm the integration prompt by clicking Yes.
You will be redirected to authorize each platform.
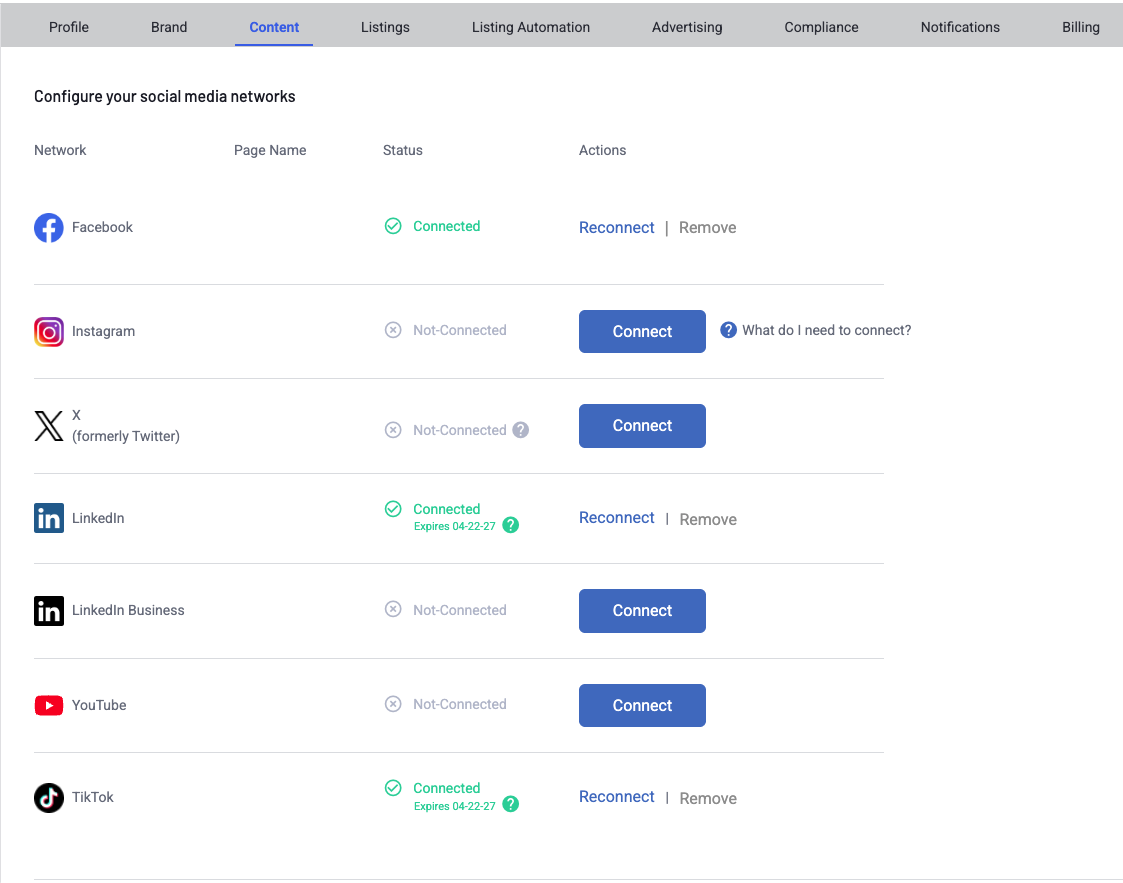
Available platforms to connect:
Facebook (must be a Business Page)
Instagram (must be a Business Account)
X / Twitter
LinkedIn (personal or business)
YouTube
TikTok
Note: Facebook and Instagram must be set up as Business accounts for the integration to work. Personal accounts are not supported for these platforms.
Step 2: Review Your Profile Settings
Before posting, review all of your account settings under the Gear icon, starting with your profile settings, to ensure all information is correct.
Click the gear icon on the right-hand side of the dashboard (hover to see "Settings").
Select My Profile.
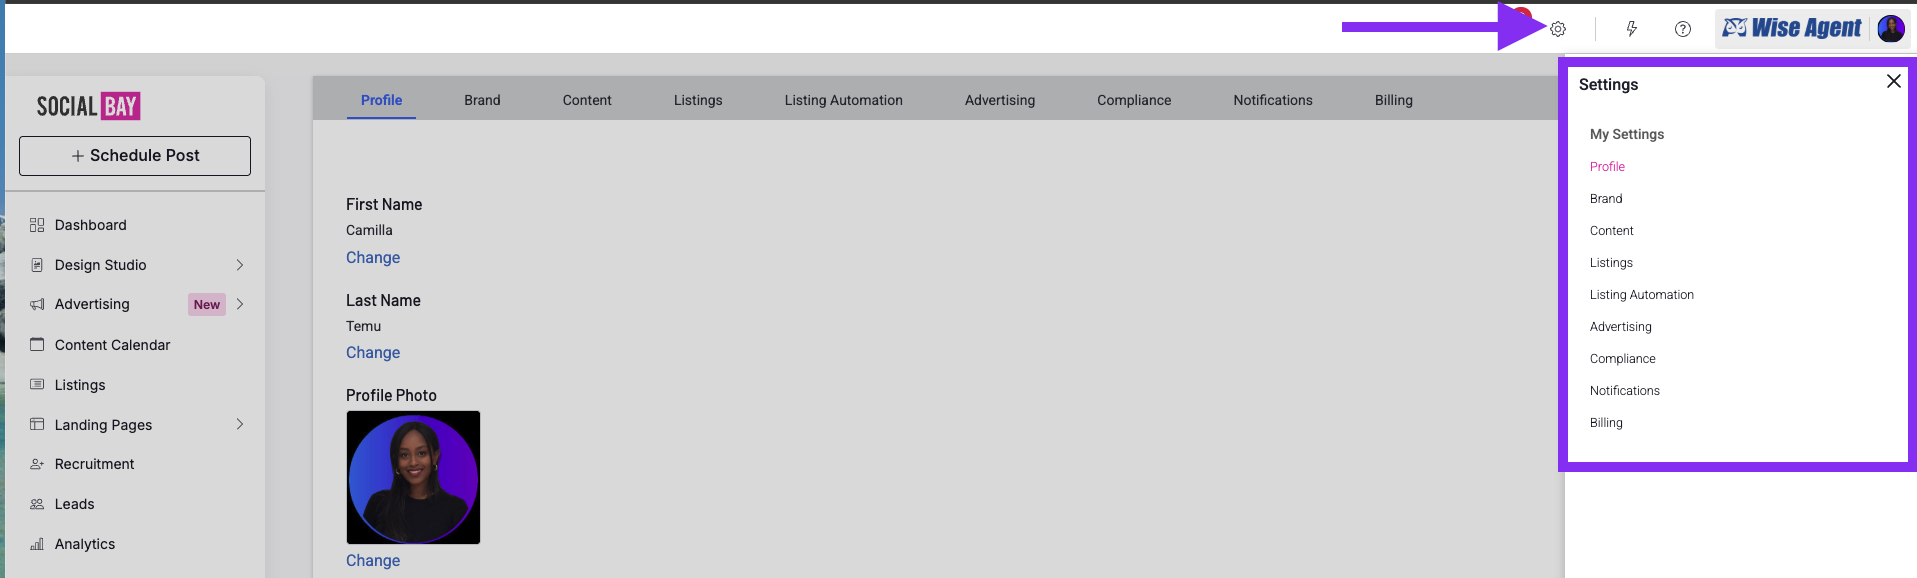
On the Profile page, review and complete the following:
First and last name
Agent photo (pulled in from Wise Agent; can be updated here)
Direct phone number and mobile number
Company name, company phone number, and license number
Scroll down to set your public-facing display preferences:
Display name: appears on all public-facing marketing materials
Display email and display phone number
Bio description: used on single property websites and listing advertisements
Personal website URL (optional)
Note: If you don't have a personal website, Wise Agent can create one for you. Reach out to the support team for assistance.
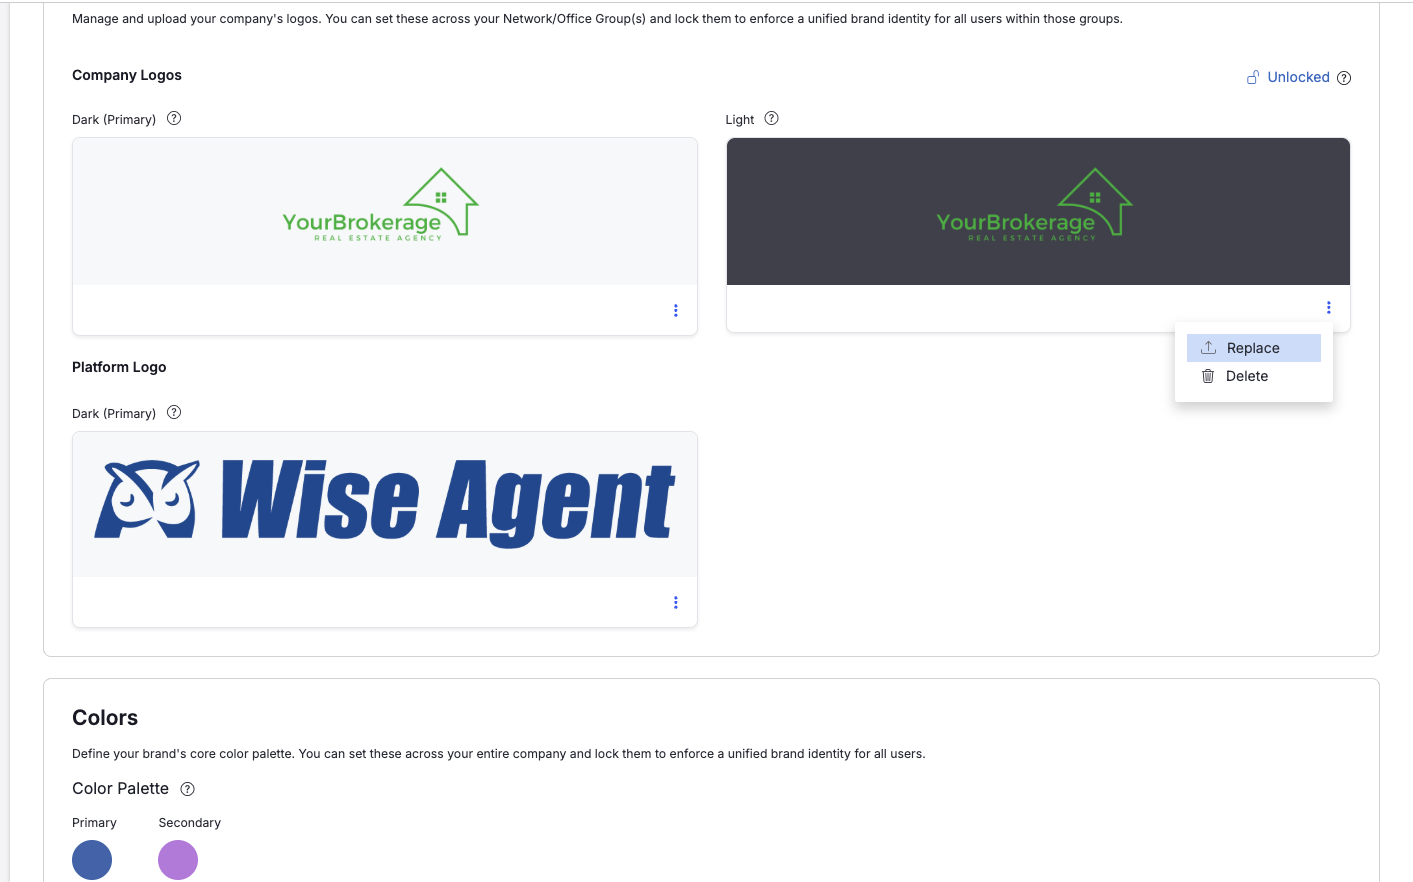
Step 3: Brand Settings
Your brand settings control how your marketing materials look across all platforms.
In Settings, click the Brand tab.
Upload or update your company logo.
Select your brand colors.
Save your changes.
These settings will automatically apply to listing post templates, videos, and any automated content created on your behalf.
Step 4: Content Settings
The Content tab is where you manage automated posting preferences and account-level settings.
Connect Social Networks (also accessible here)
The Content tab also shows your connected social accounts. You can connect or disconnect platforms from this view.
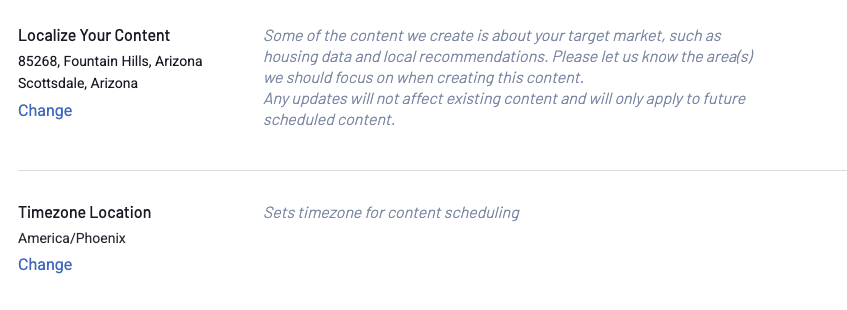
Localize Your Content
Scroll down to find the localization settings. Select your region and set your correct time zone. This ensures all scheduled posts go out at the right time.
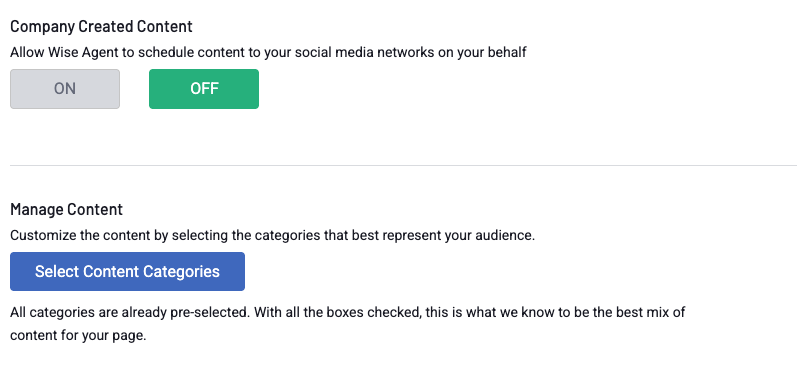
Automated Posting (Optional)
This section allows WiseSocial to schedule content to your social media networks on your behalf. By default, this is turned OFF.
To opt in, toggle Automated Posting to ON.
Click Manage Content > Select Content Categories to choose the types of posts you want scheduled.
Available categories include: branded videos, trending home news, lead generation content, market tips, and more.
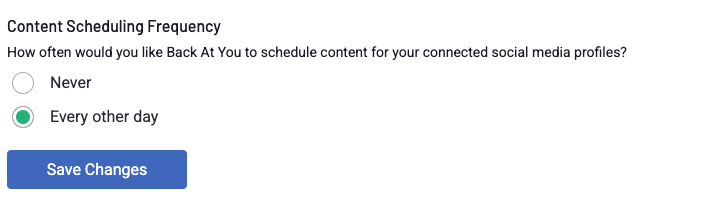
Content Schedule Frequency
Choose how often automated content is posted: every other day, or never (to pause automated posting while keeping your account connected)
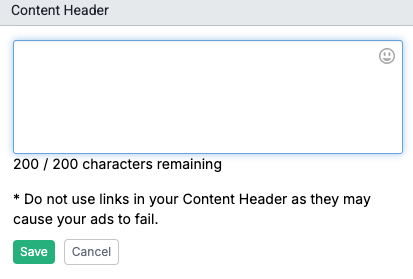
Content Header & Signature
Content Header: Text that automatically appears above every scheduled post caption. Ideal for required compliance disclosures or brokerage statements.
Content Signature: Text that automatically appears below every post caption. Great for your tagline, website link, or contact info.
Step 5: Listings Settings
The Listings tab is where you connect your MLS feed and configure how listings are displayed on social media.
Connect Your MLS
Go to Settings > Listings.
Enter your MLS ID in the provided field and click OK.
If you belong to multiple MLS associations, repeat this step for each one.
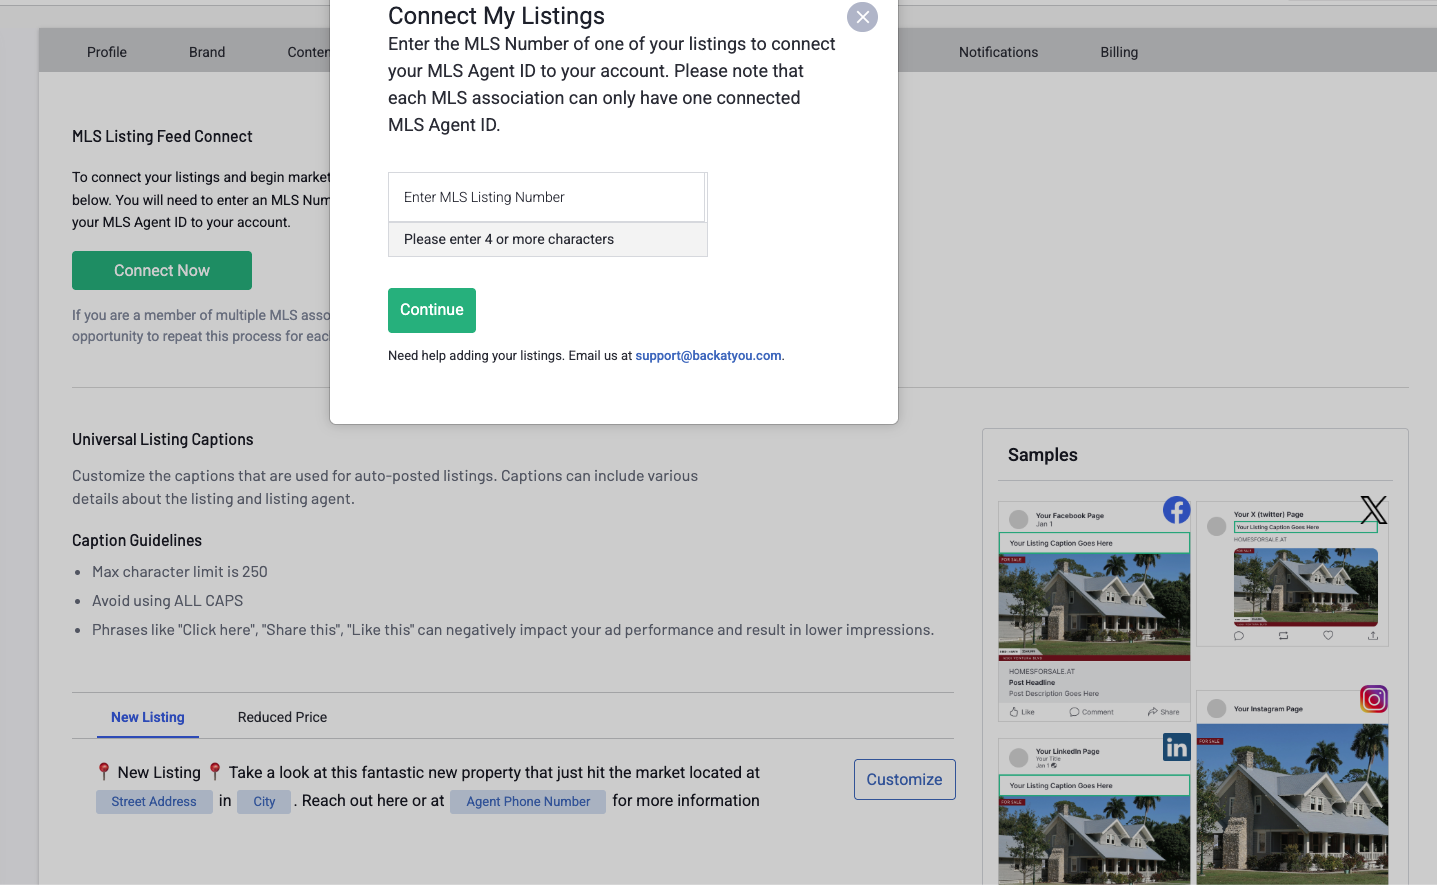
Customize Listing Captions
You can set default captions for two types of automated listing posts:
New Listing: Default message includes the address, city, and your agent phone number.
Reduced Price: Customize the caption that appears when a listing price drops.
Use the dynamic variables available in the caption editor: agent phone number, city, listing agent name, MLS number, price, state, street address, and ZIP code.
Note: Caption guidelines: Keep captions under 250 characters. Avoid ALL CAPS and clickbait phrases, as these can negatively impact your post impressions and ad performance.
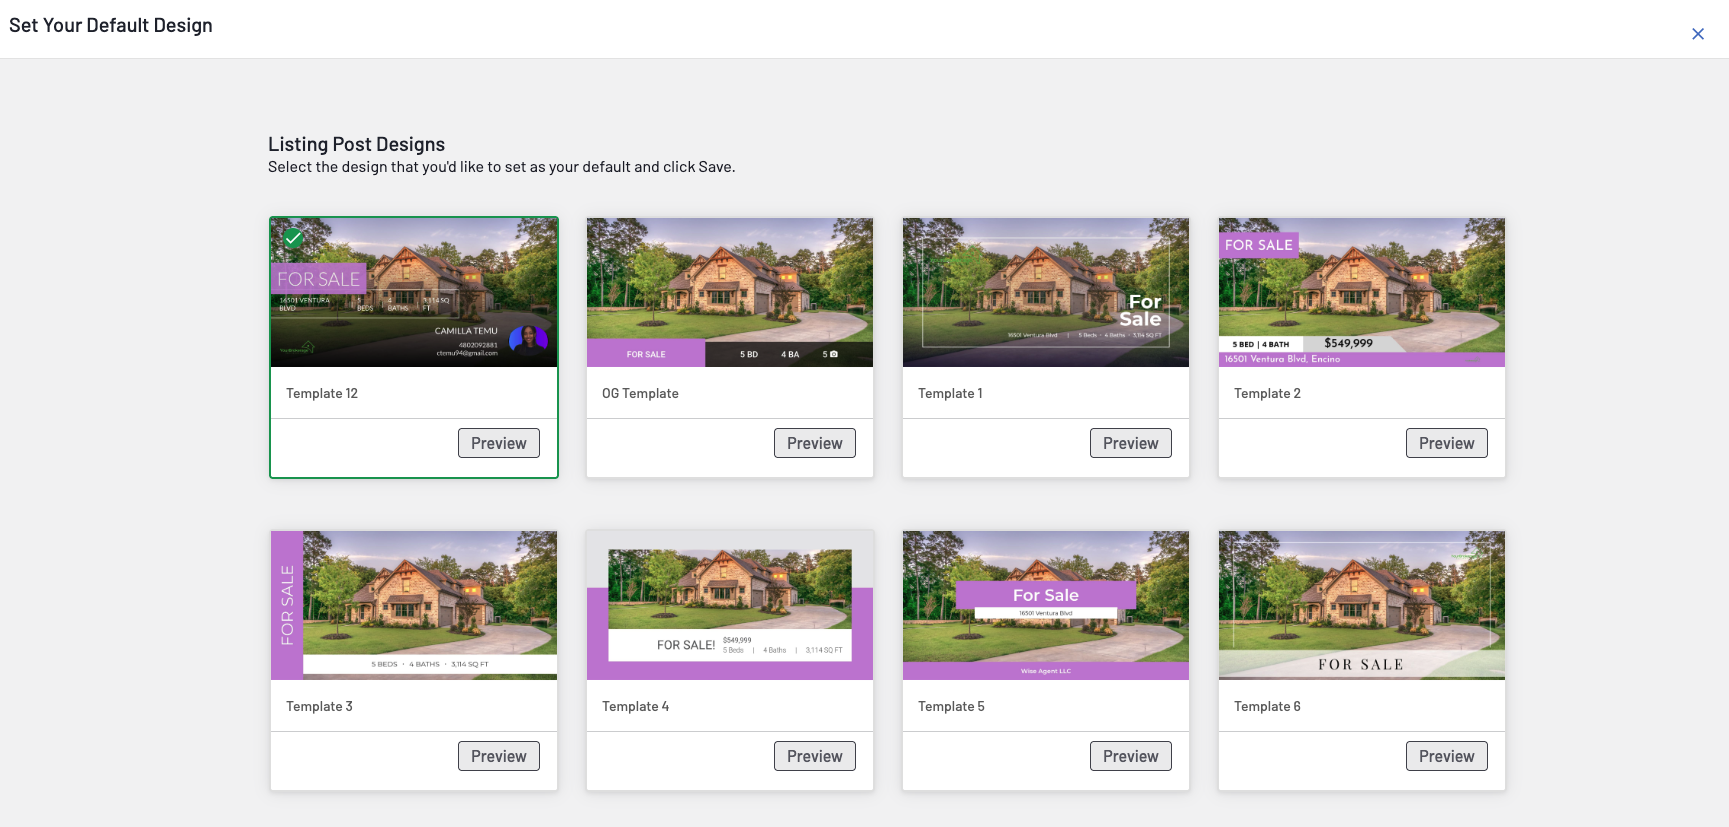
Listing Post Design
Select your preferred template for how listing posts will look on social media. You can preview templates and update them at any time by clicking the Change link next to the preview image.
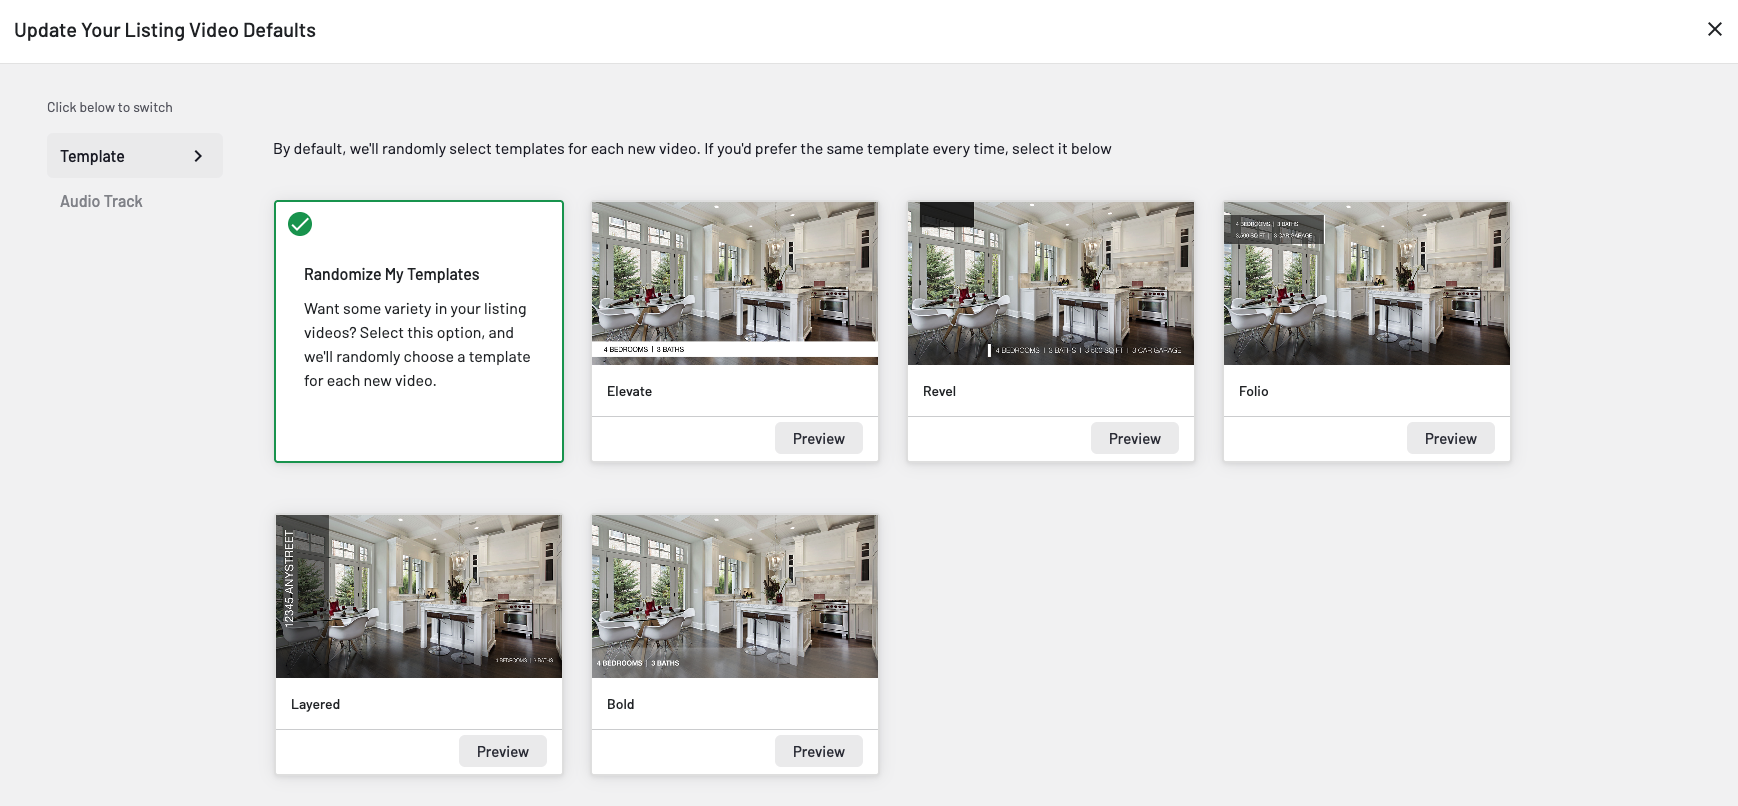
Listing Video Settings
WiseSocial can automatically generate listing videos for you. Choose your default:
Video template (options include Layered, Bold, Elevate, Reveal — or set to randomize)
Audio track (choose a specific track or set to randomize)
You can edit individual listing videos before they post, but these settings serve as your default for all auto-generated listing videos.
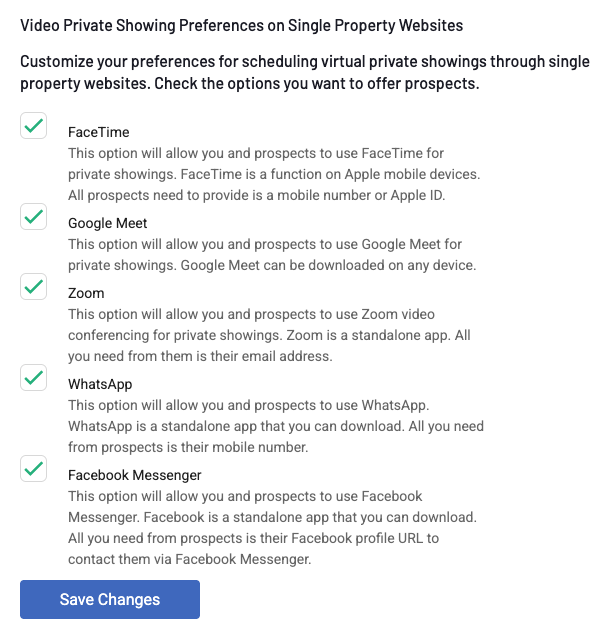
Virtual Showing Preferences
Customize which virtual showing options are available to prospects on your single property websites. Options include:
FaceTime
Google Meet
Zoom
WhatsApp
Facebook Messenger
All options are selected by default. Uncheck any you do not want to offer, then click Save Changes.